What are Dingers?
Dingers are email and SMS alerts that you can create to notify you and other users about new cases as they get reported into CasePortal.
Let’s say you run a search in CasePortal to determine if there are any cases involving Apple AND Samsung, where Mintz Levin was the plaintiff law firm.
As shown in the image above, there is just one matching case at the time the search was executed. But you may be interested to know about any future cases that match these same search parameters.
In this case, you will want to create a Dinger, as this will save your exact search parameters and use that information to regularly check our system for new cases that match.
How to Create a Dinger
[To watch a video instead click here]
Since a Dinger alerts you about future cases that match the parameters of a present day search, you can think of them as saved searches.
Accordingly, you must first execute a search before you can save it.
Step 1: Execute a Search
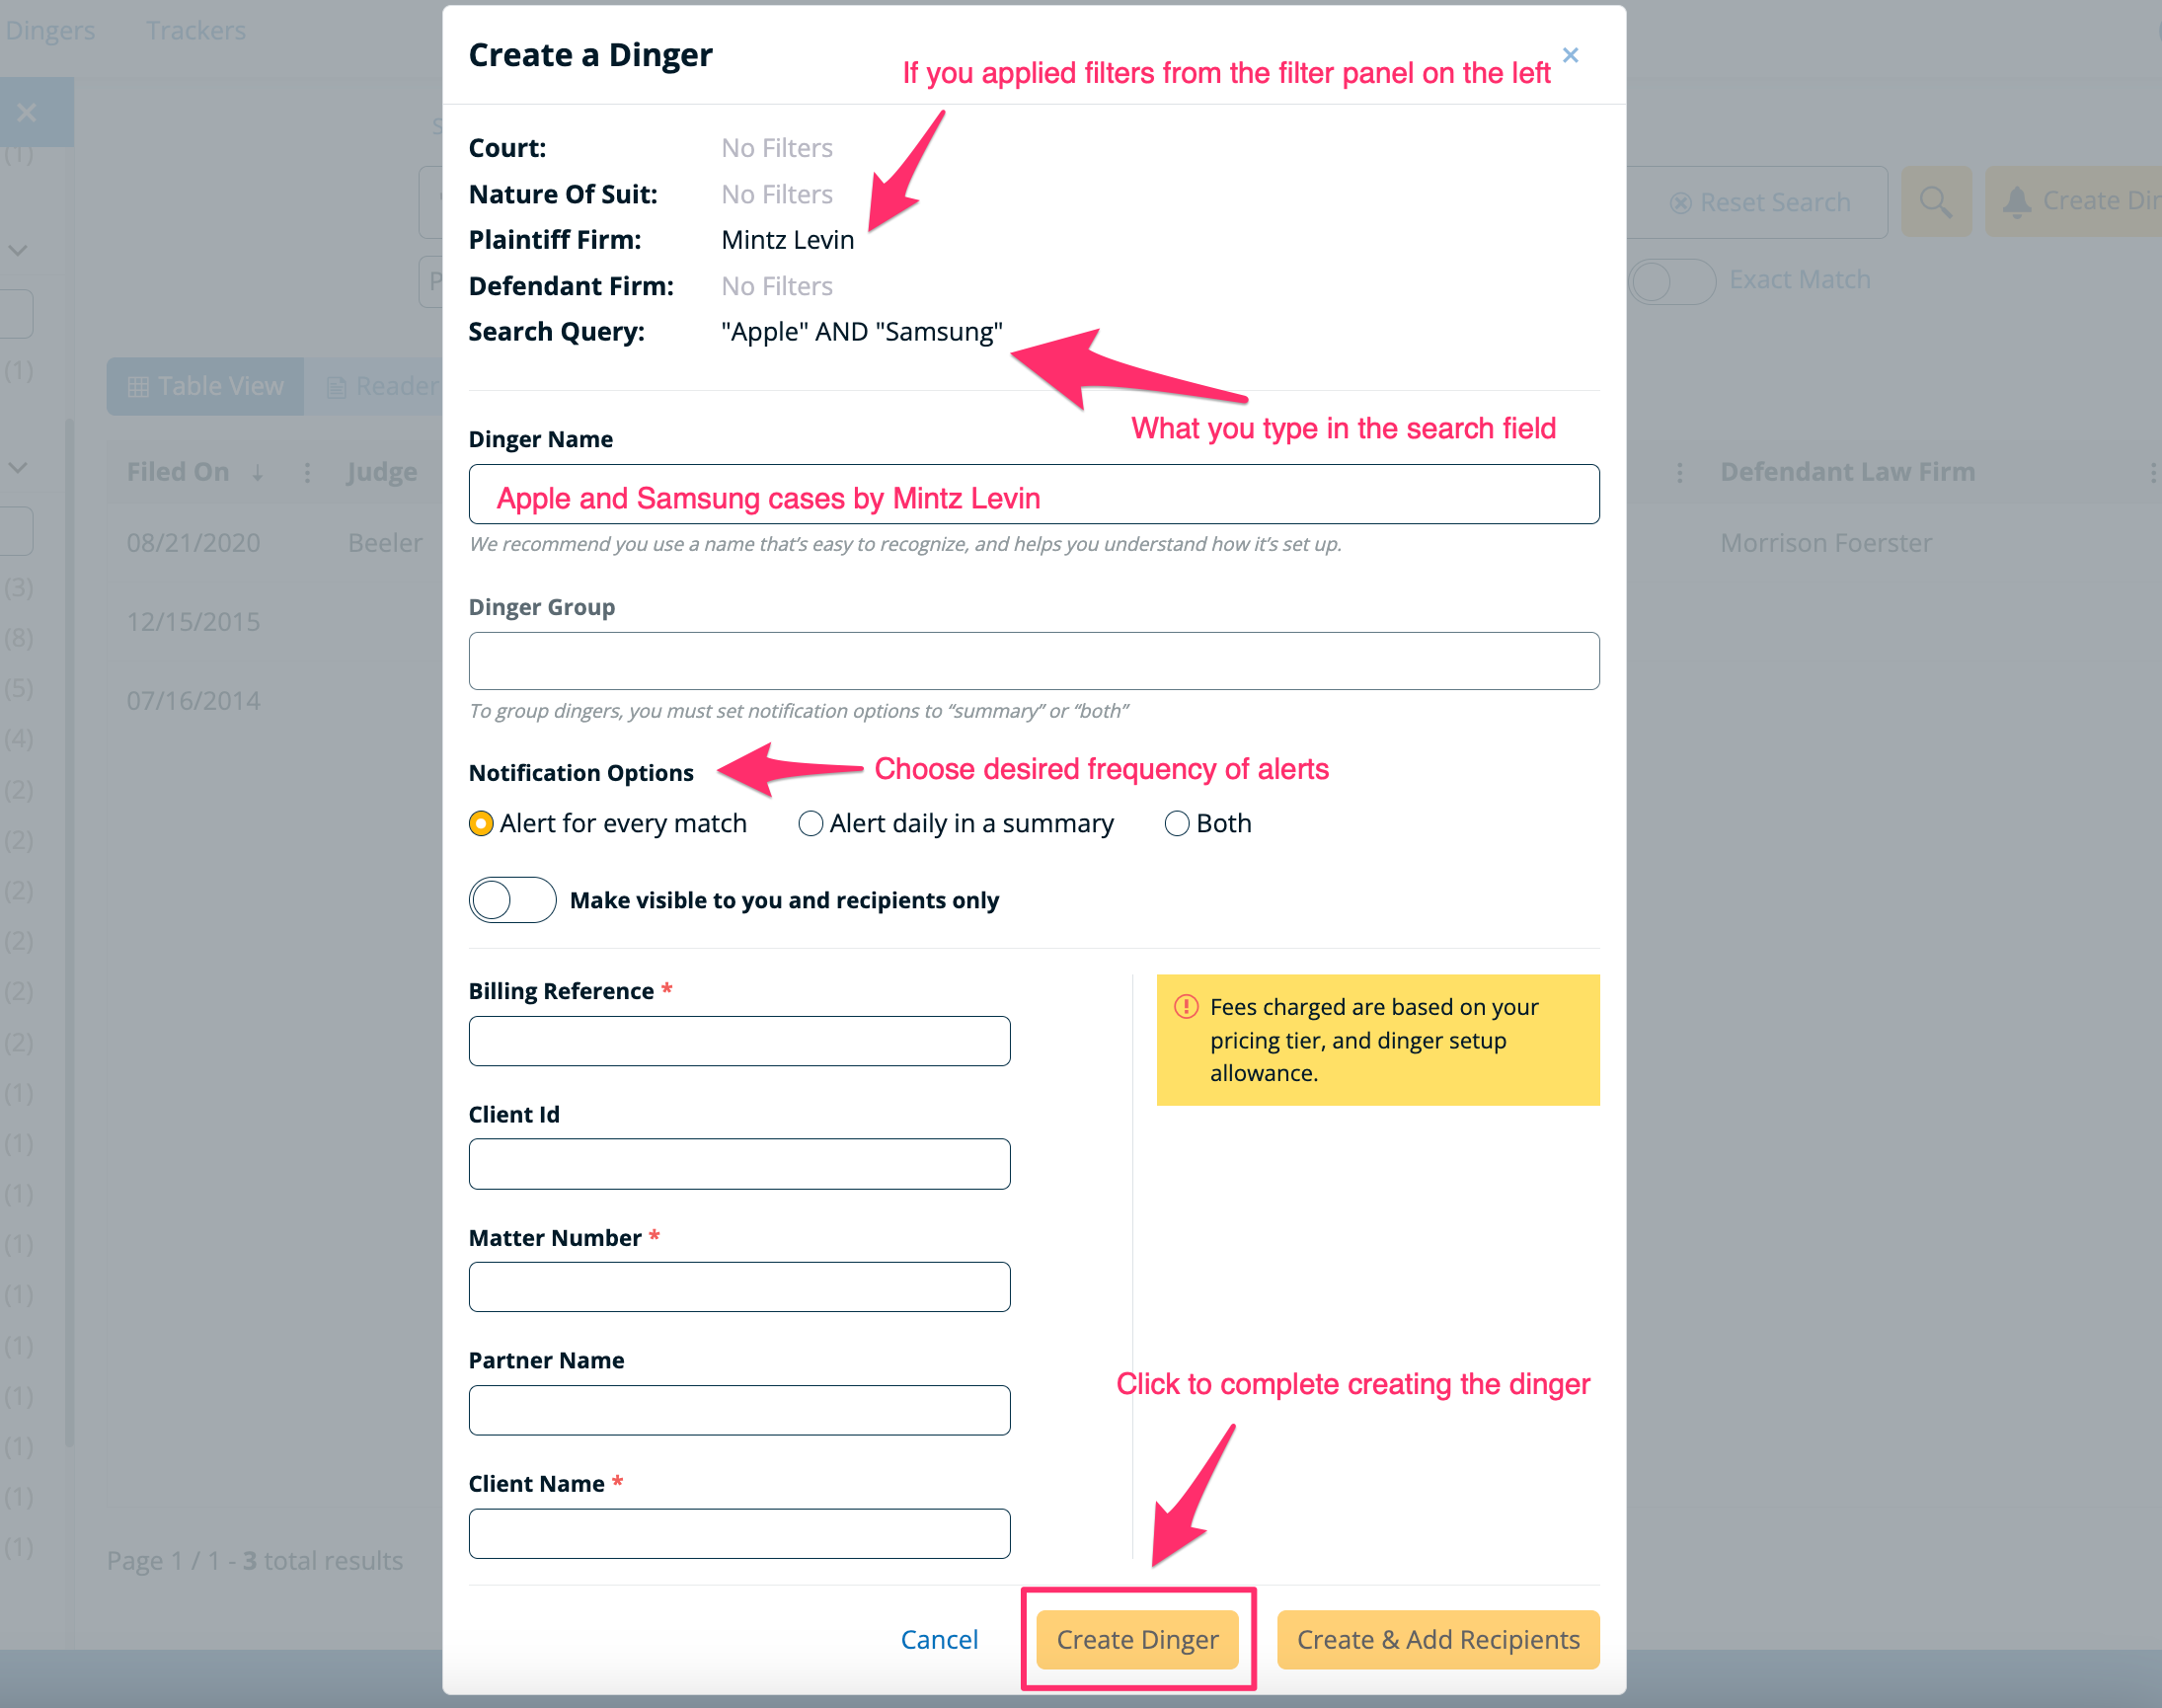
Step 2: Setup the Dinger
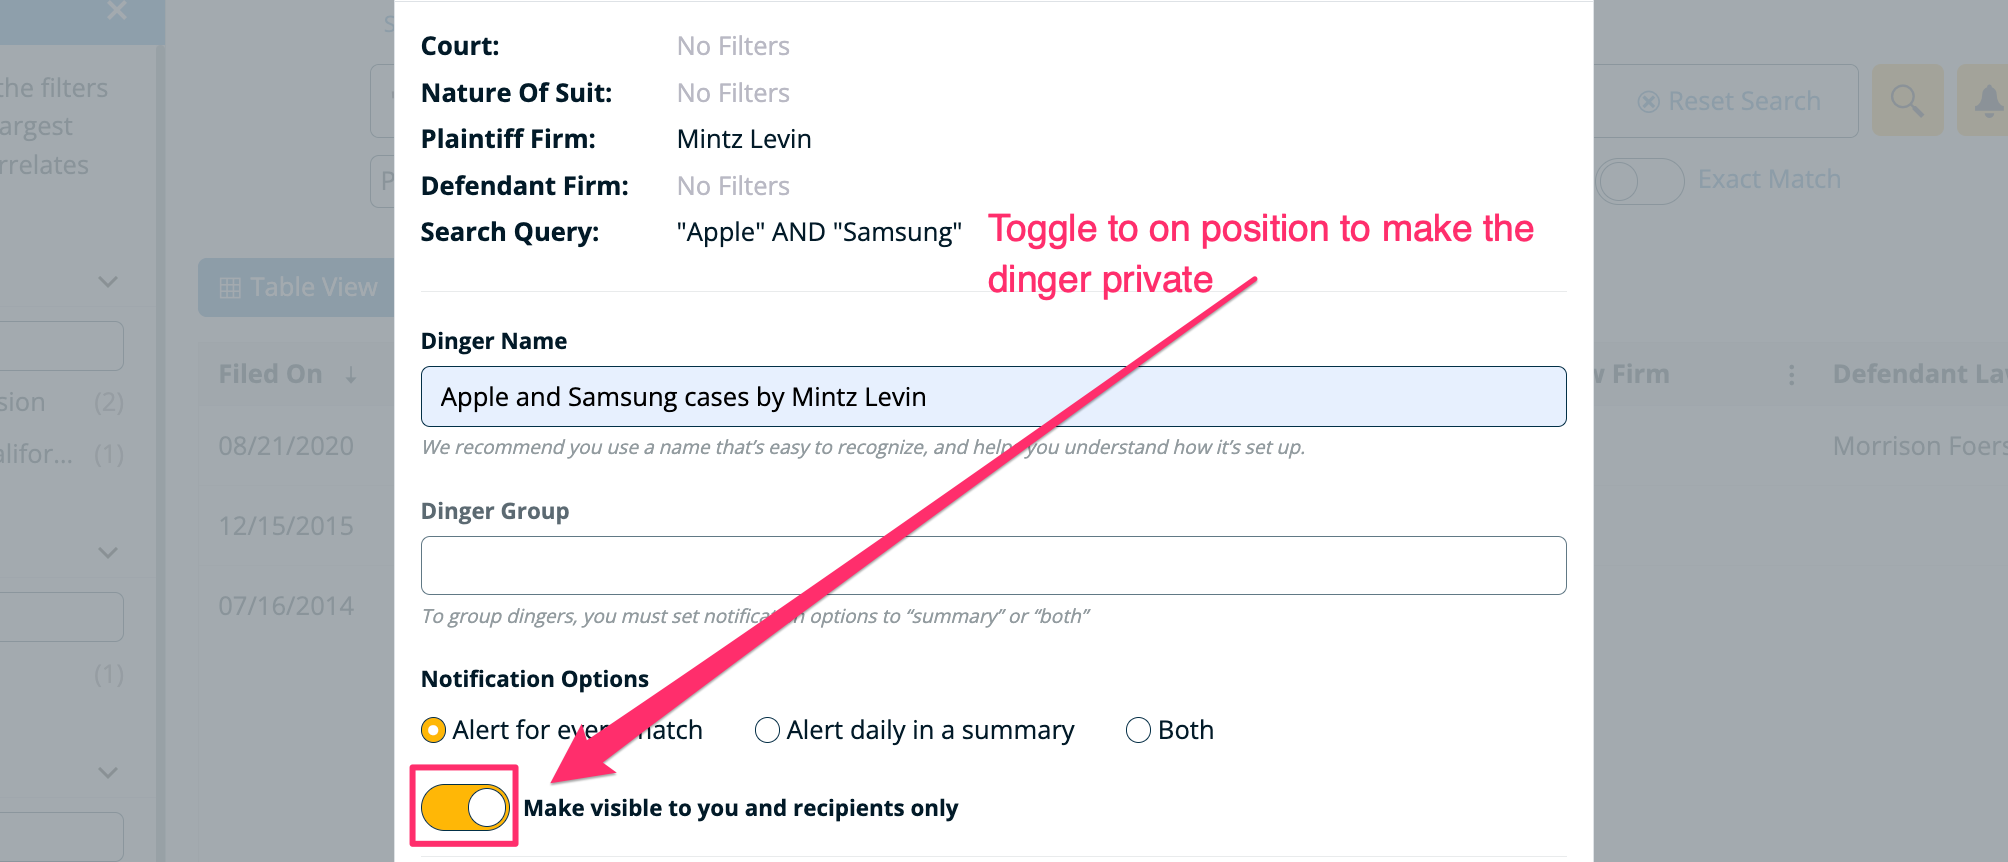
To setup the Dinger, you’ll have to name it, set your notification preferences, and (optionally) invite other users to receive the alerts as well.
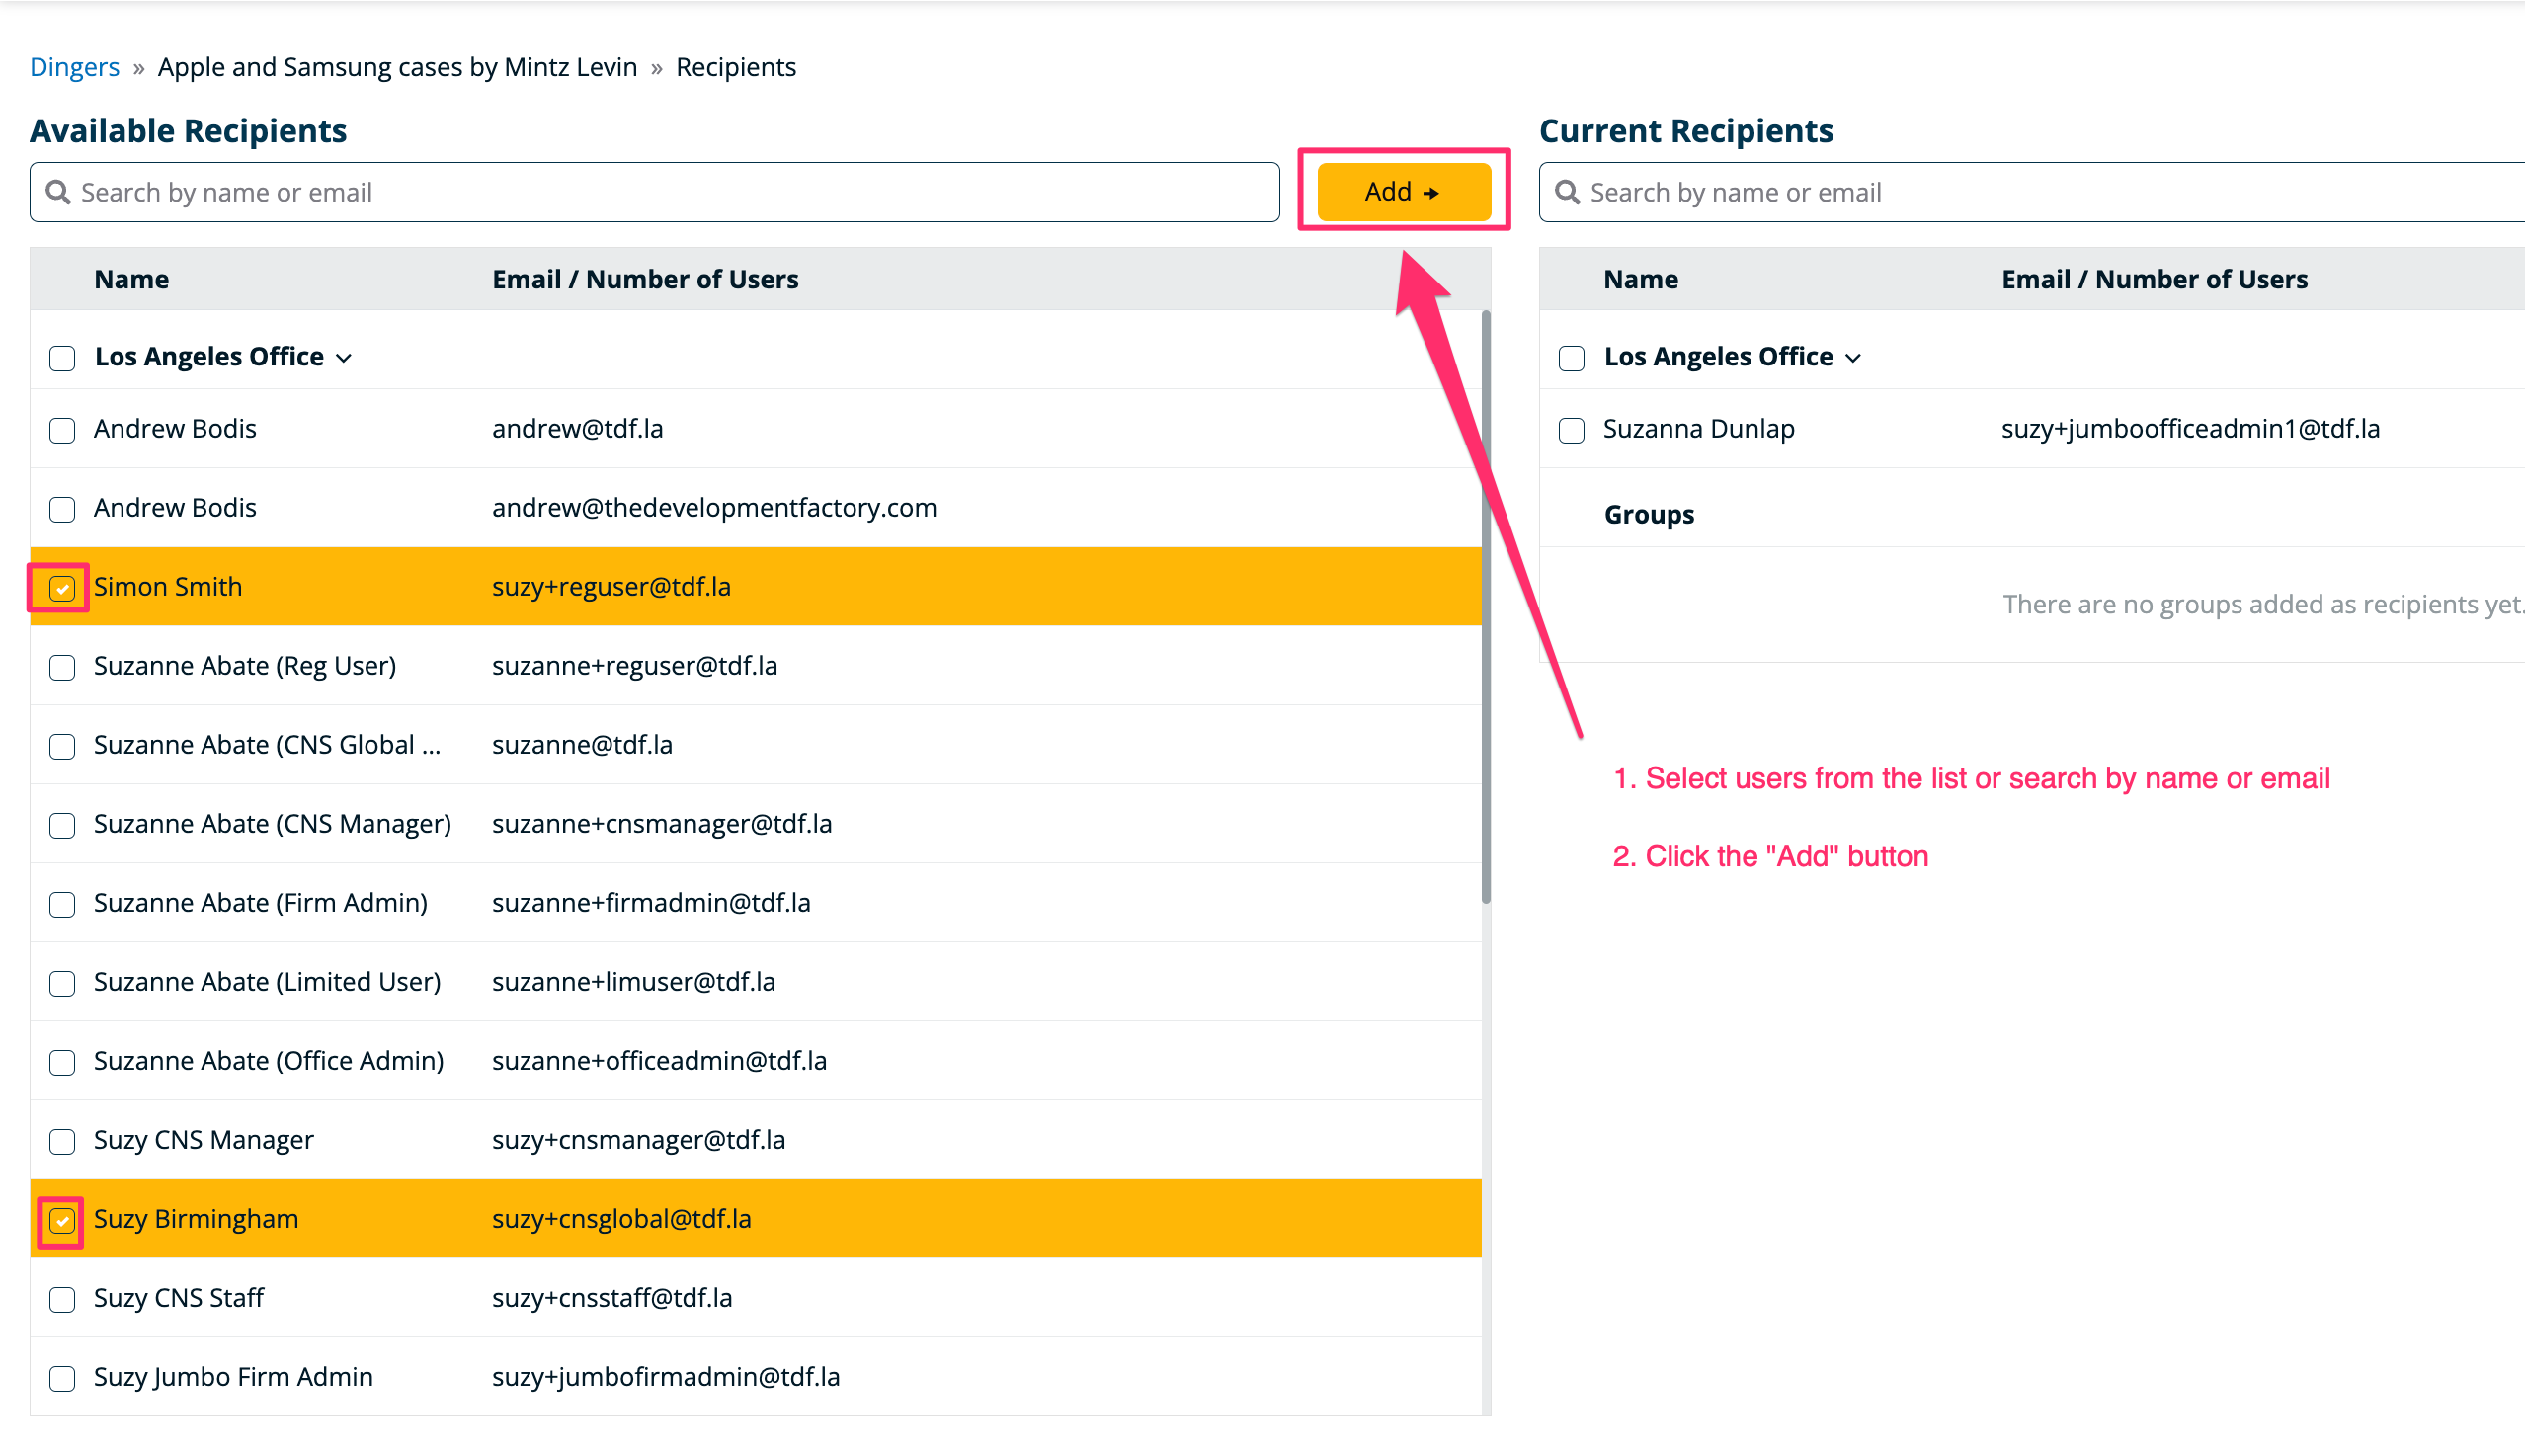
Step 2a: Add Recipients to a Dinger During Creation

To add users to a dinger, simple locate and select them from the list or perform a search by name or email and click the "Add" button.
Why Can't I Create a Dinger?
How to Manage Dingers
Once your Dinger has been created, it can be viewed and managed on the Dingers page.
If you are the creator of a Dinger, you can pause or delete the Dinger whenever you want from this page.
If you are not the creator of a Dinger, but you have Office Admin or Firm Admin permissions, you can also pause or delete Dingers created by other users.
Additional actions that can be taken from the Dingers list:
-
Self-subscribe to or unsubscribe from Dinger emails
-
Self-subscribe to or unsubscribe from Dinger SMS alerts
-
View total hits for a Dinger (a “hit” is recorded every time a new match is found) and drill down to see which cases matched as well as change history to the Dinger setup
-
Modify the Dinger setup
How to Modify Existing Dingers
You can only modify Dingers that you’ve created, unless you have Office Admin or Firm Admin permissions.
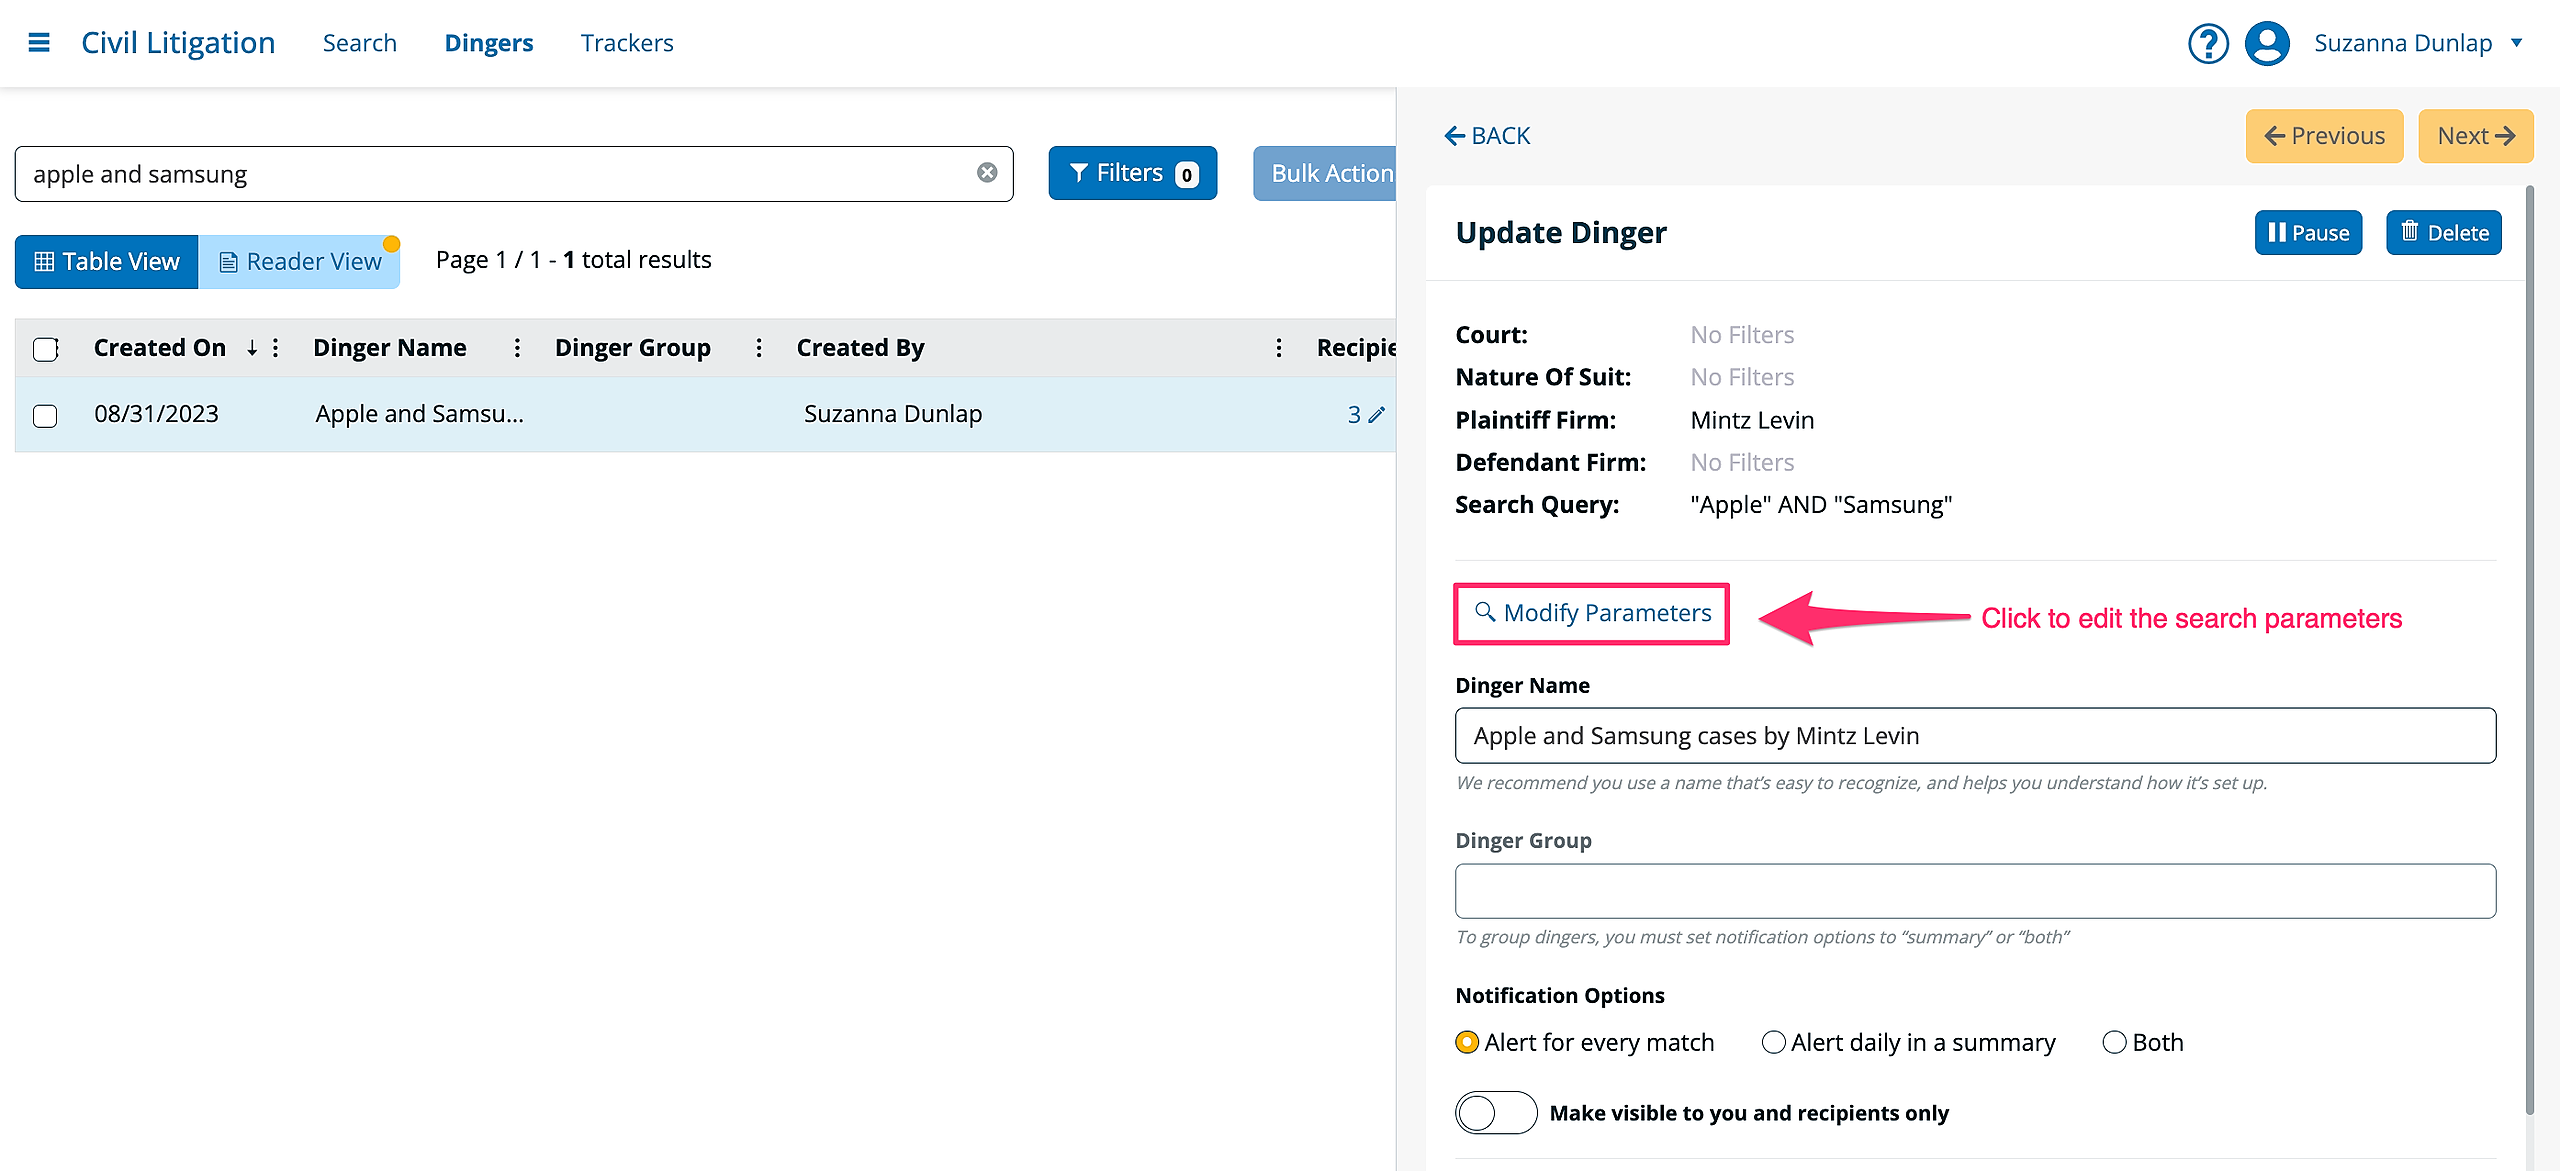
To modify an existing Dinger, click the row to open the Edit Dinger panel.
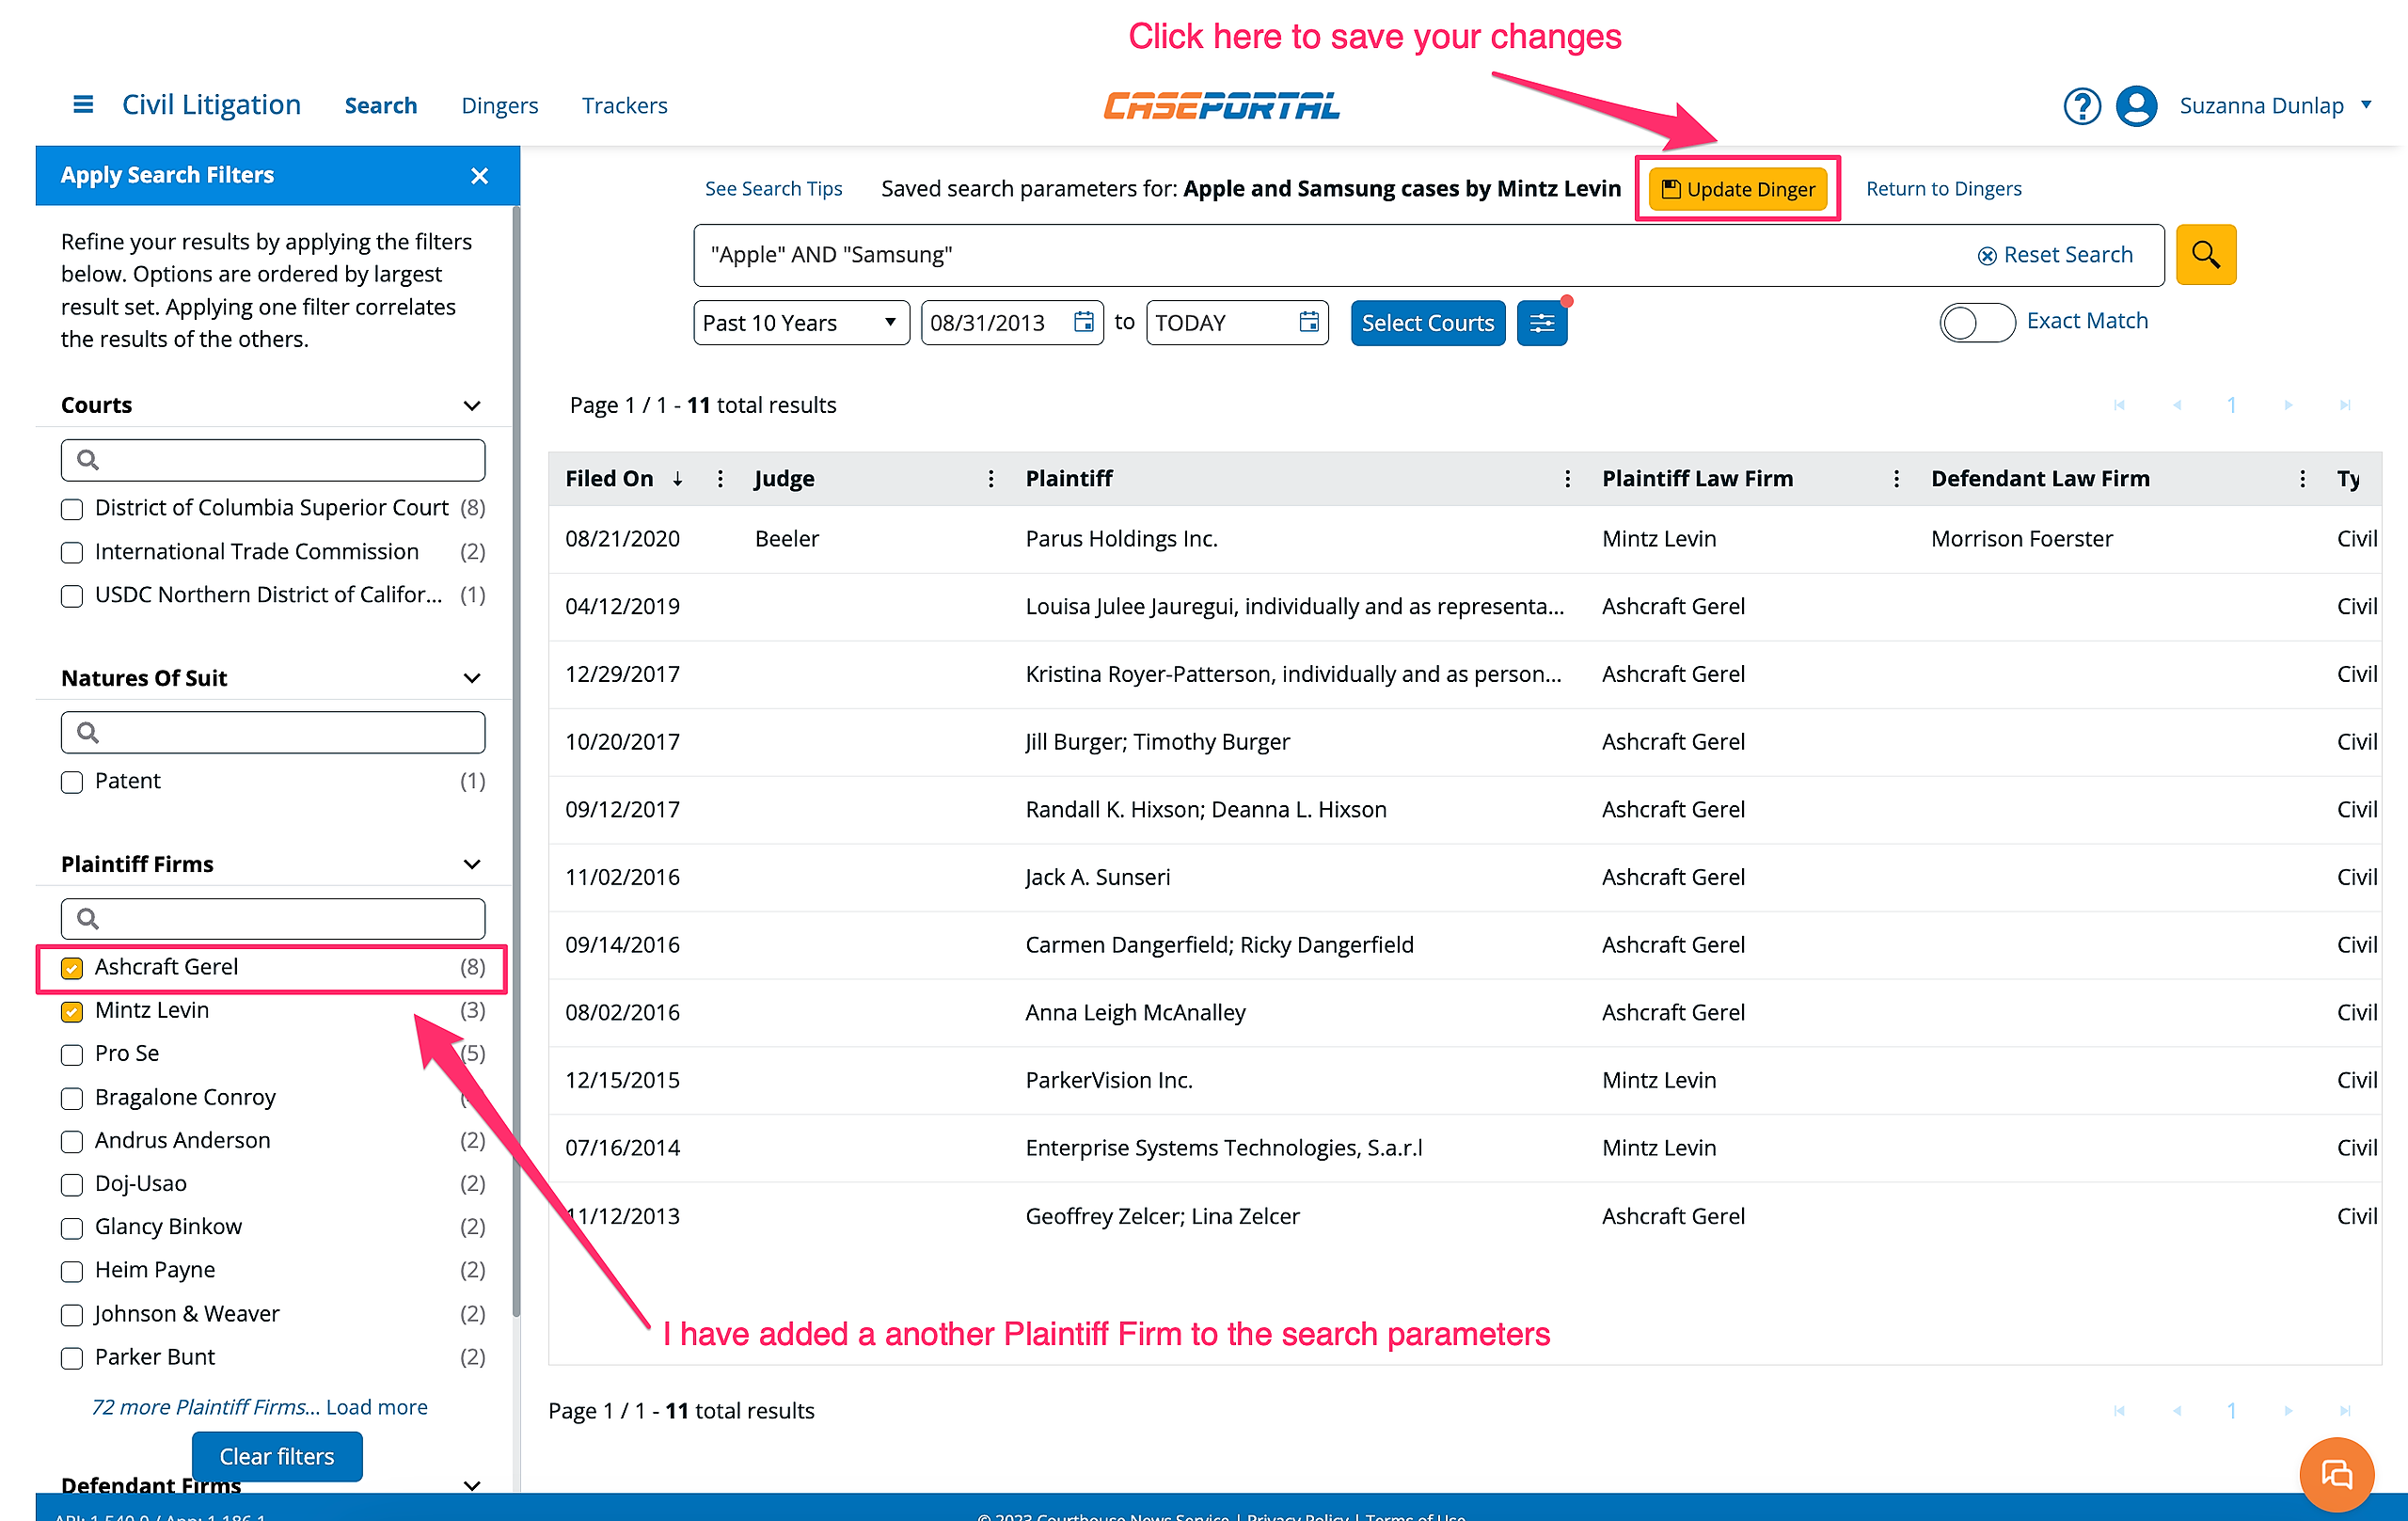
If you want to change the parameters of the saved search, click “Modify Parameters” from the edit panel. This will return you to the search results page, so you can make changes like applying additional filters or removing filters or updating the search query.
When you want to save your changes, click the “Update Dinger” button.
How to Remove Yourself From a Dinger
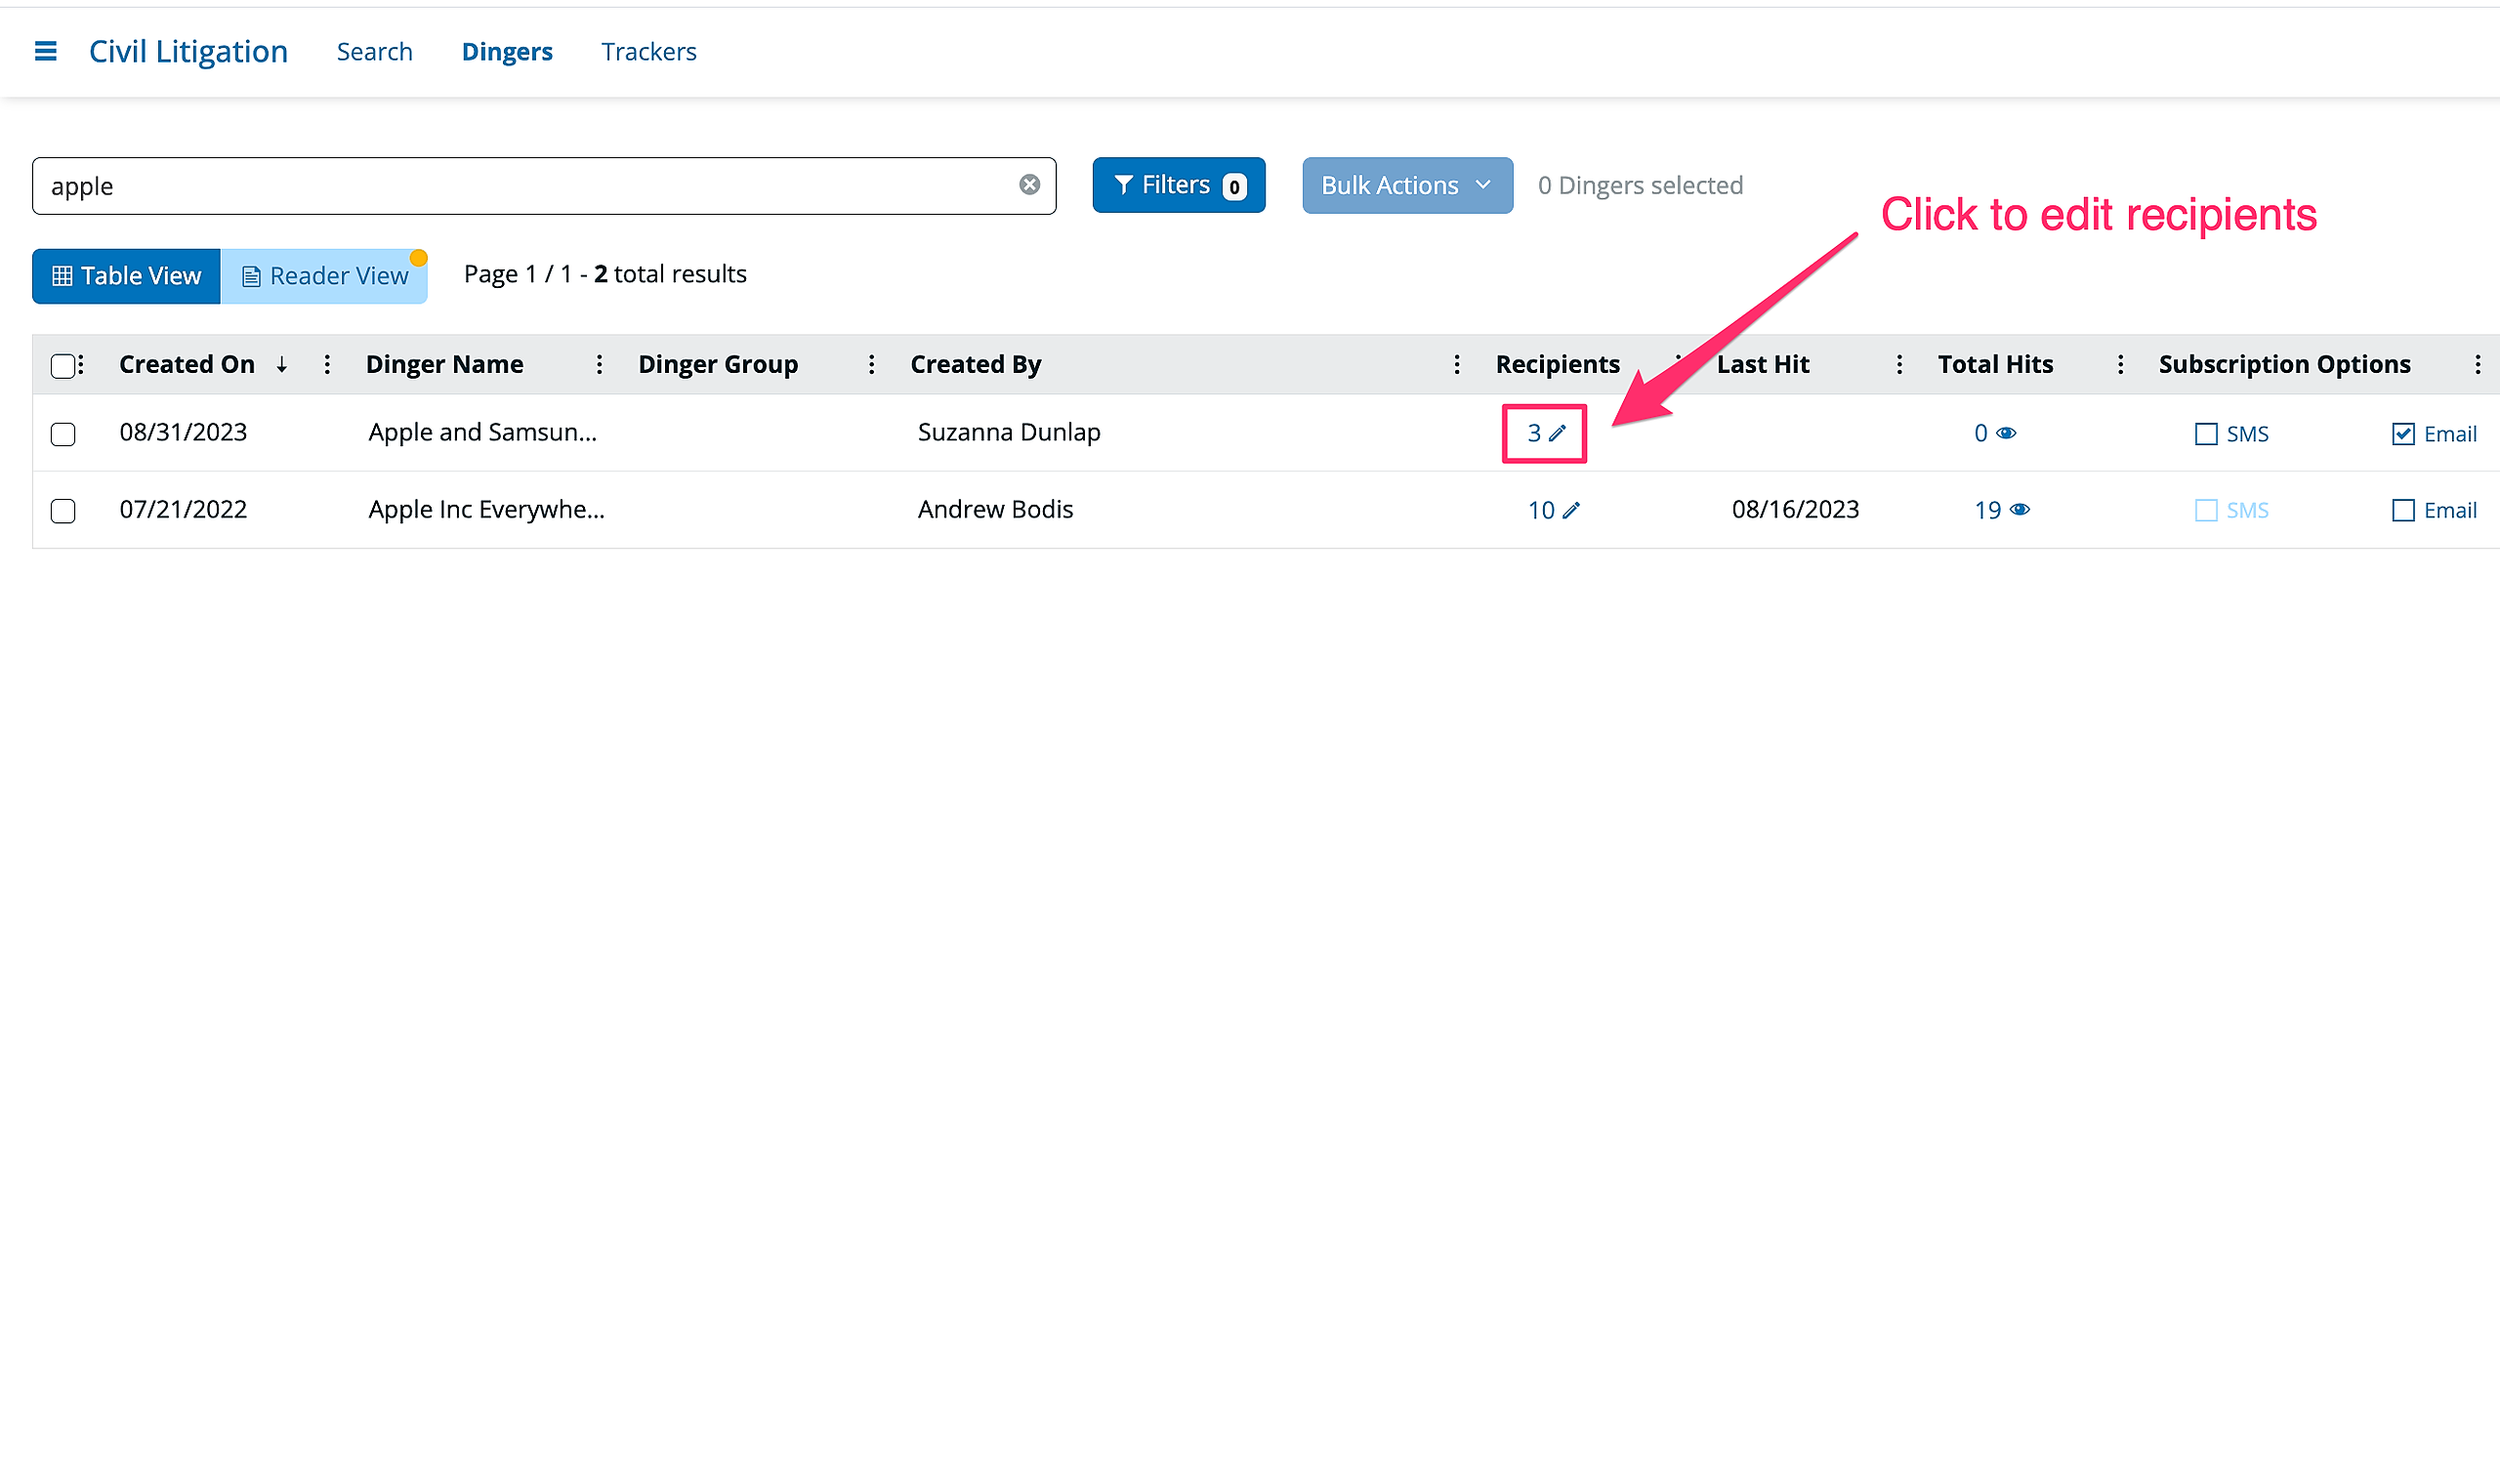
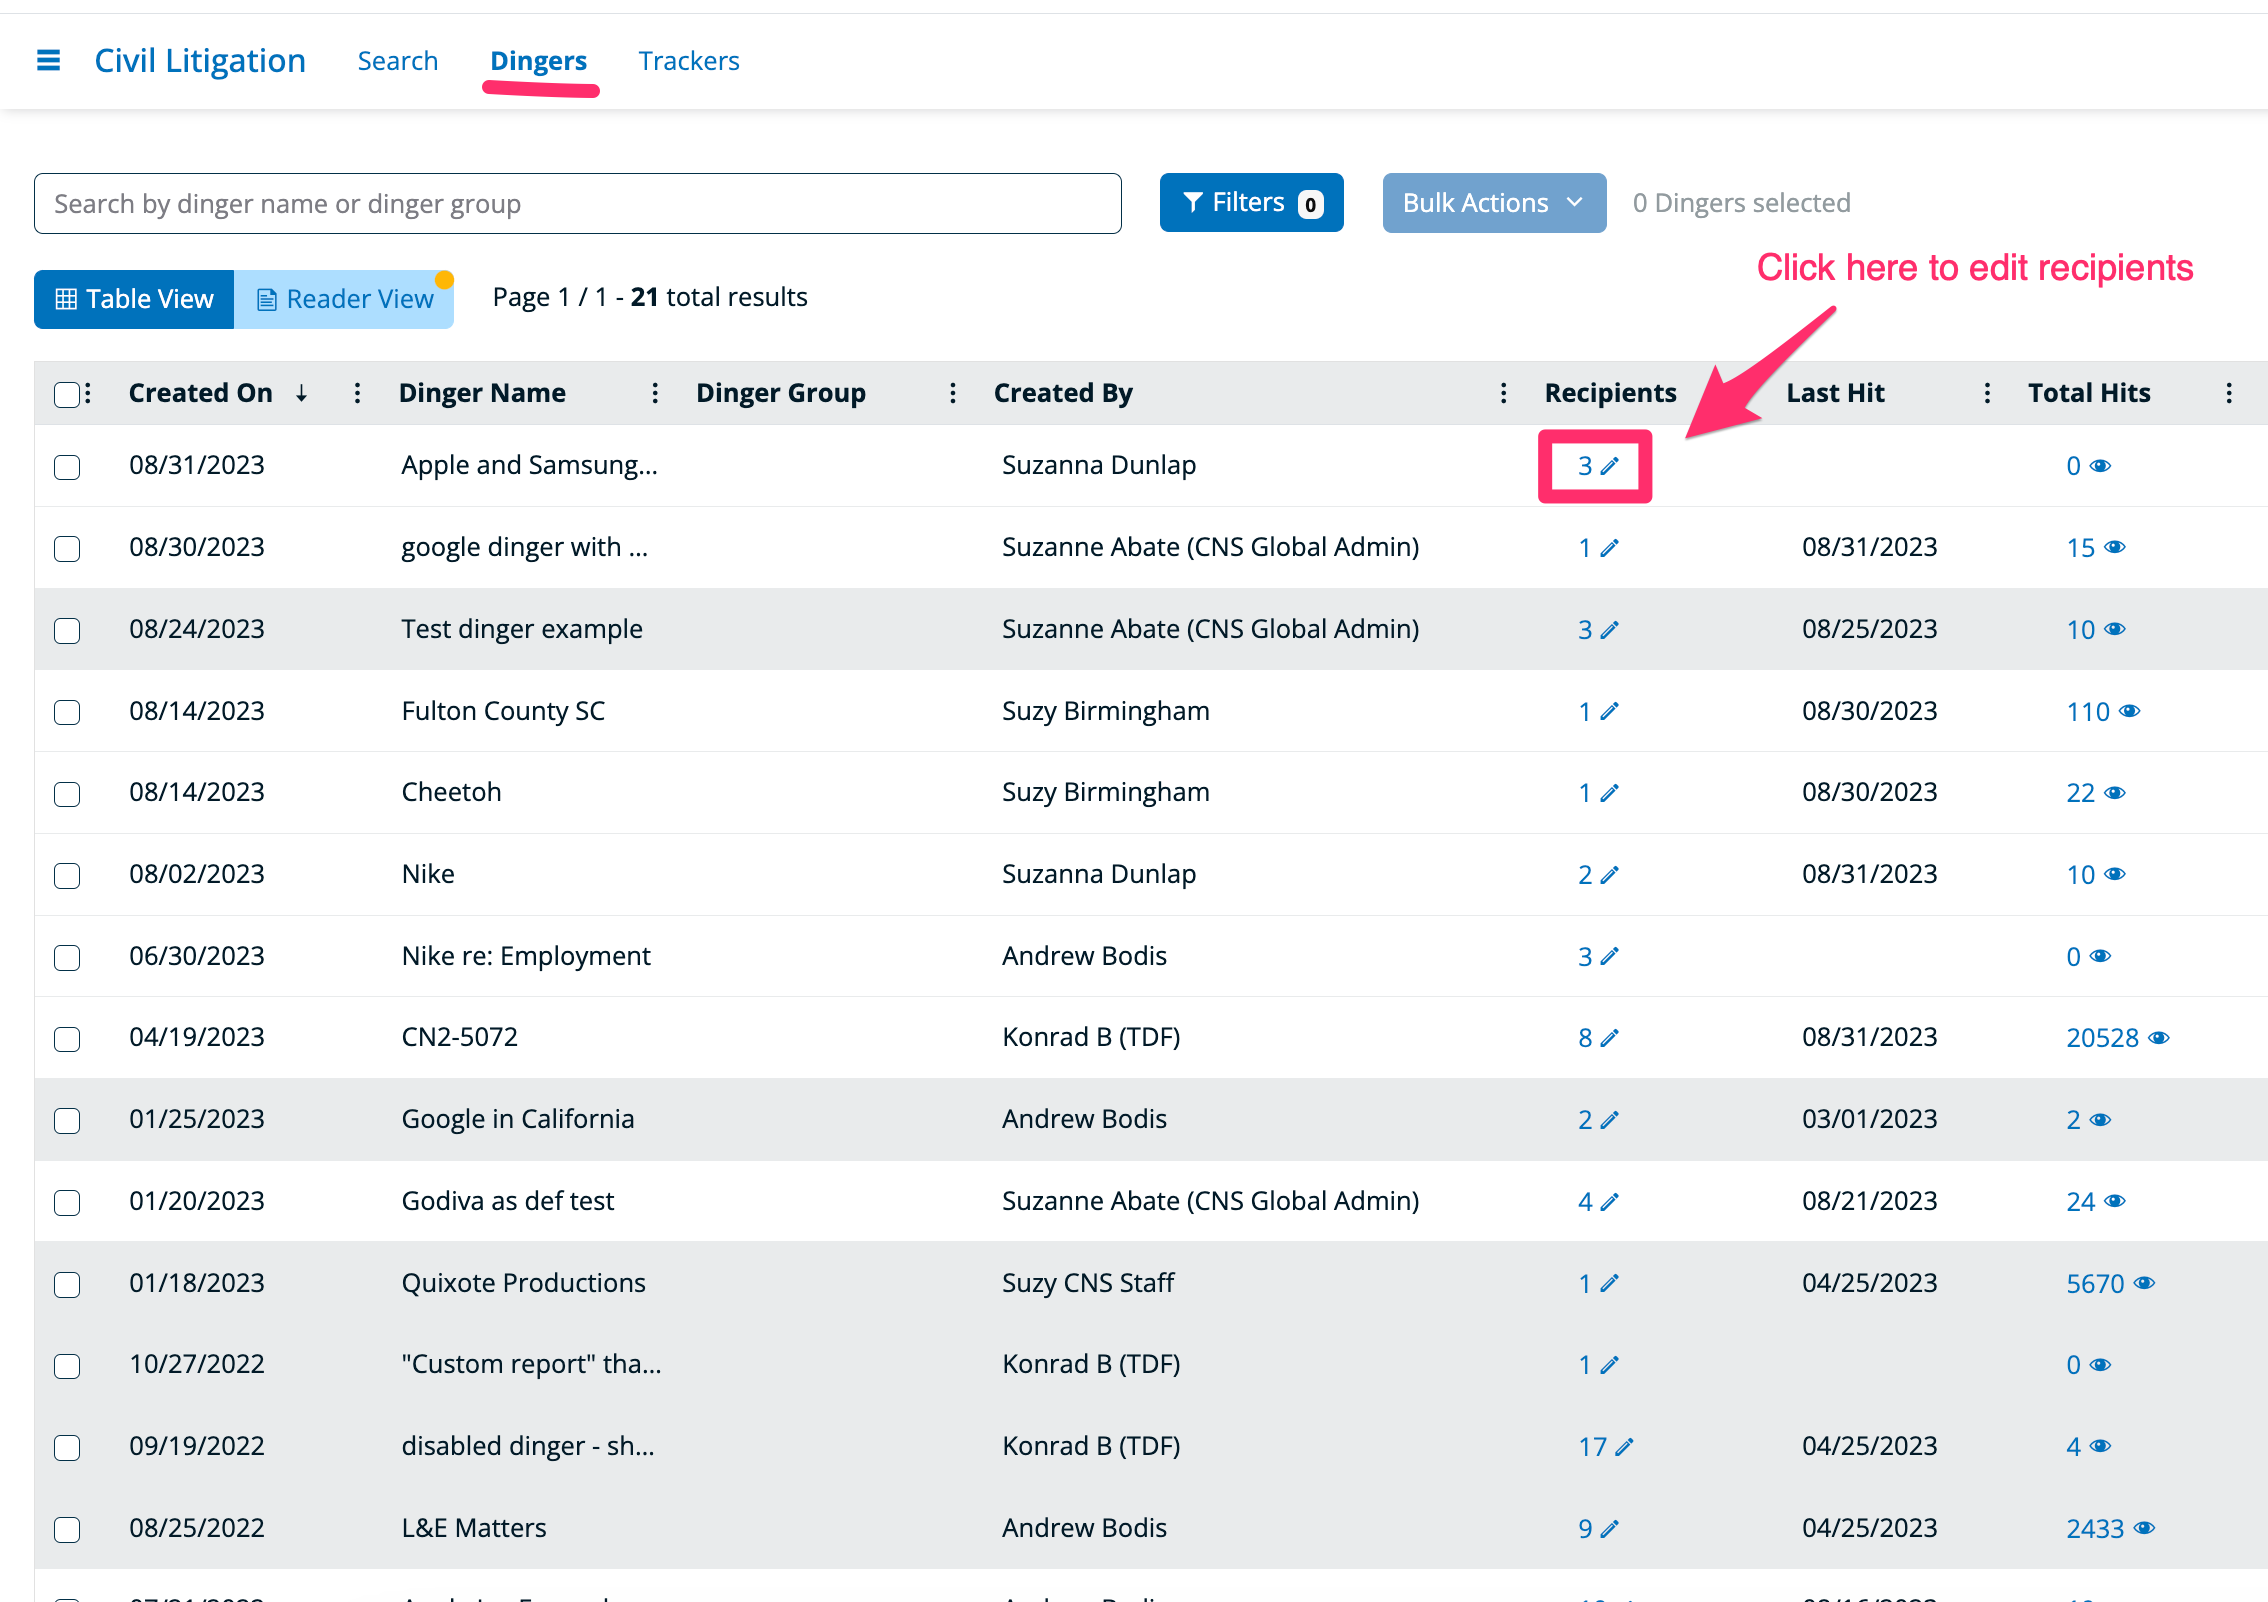
Step 1: Navigate to the Dinger List
To get to your dingers from the main menu, select the appropriate library and then dingers.
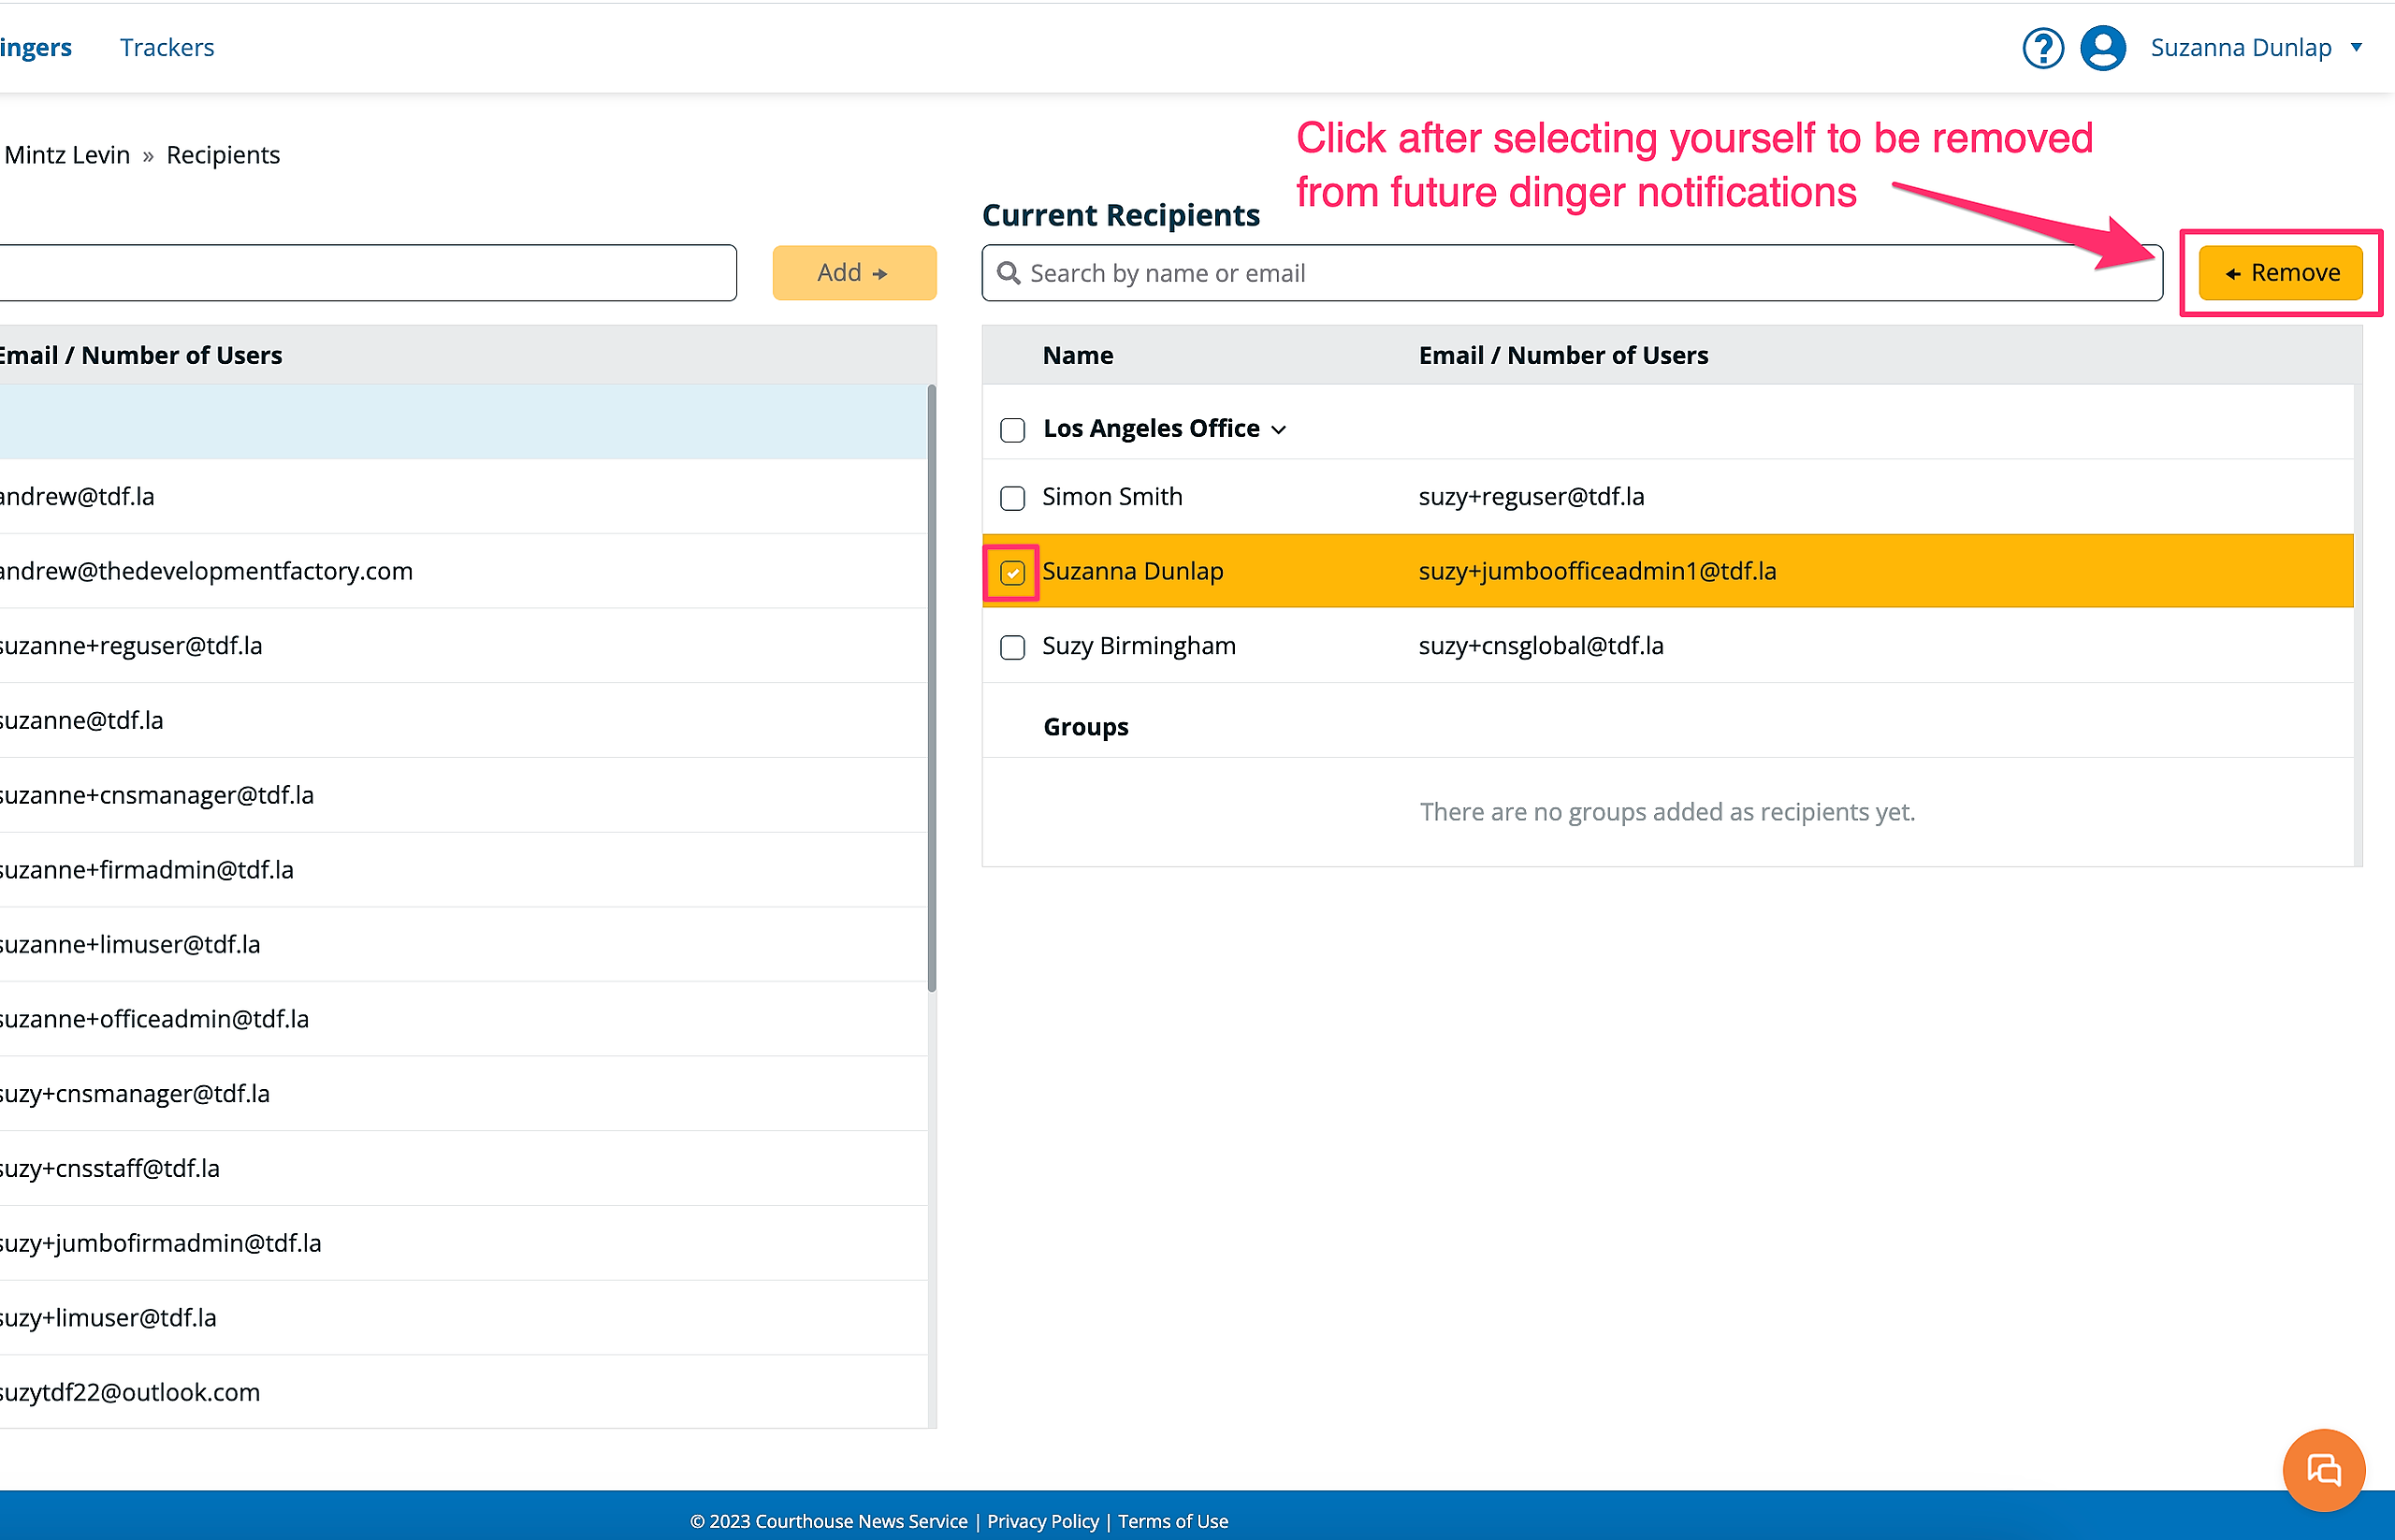
Step 2: Edit Recipient List
Click on the recipients icon of the Dinger you wish to remove yourself from.
Select yourself from the Current Recipients list and click the "Remove" button.


