
What are Custom Reports
Custom Reports are reports of daily civil litigation cases, bankruptcy cases, or judicial opinions from courts you have grouped together. Unlike CNS Reports, Custom Reports are of your own devising and can be edited within CasePortal.
How to Create a Custom Report
Please note: Only users with firm administrator privileges can create custom reports.
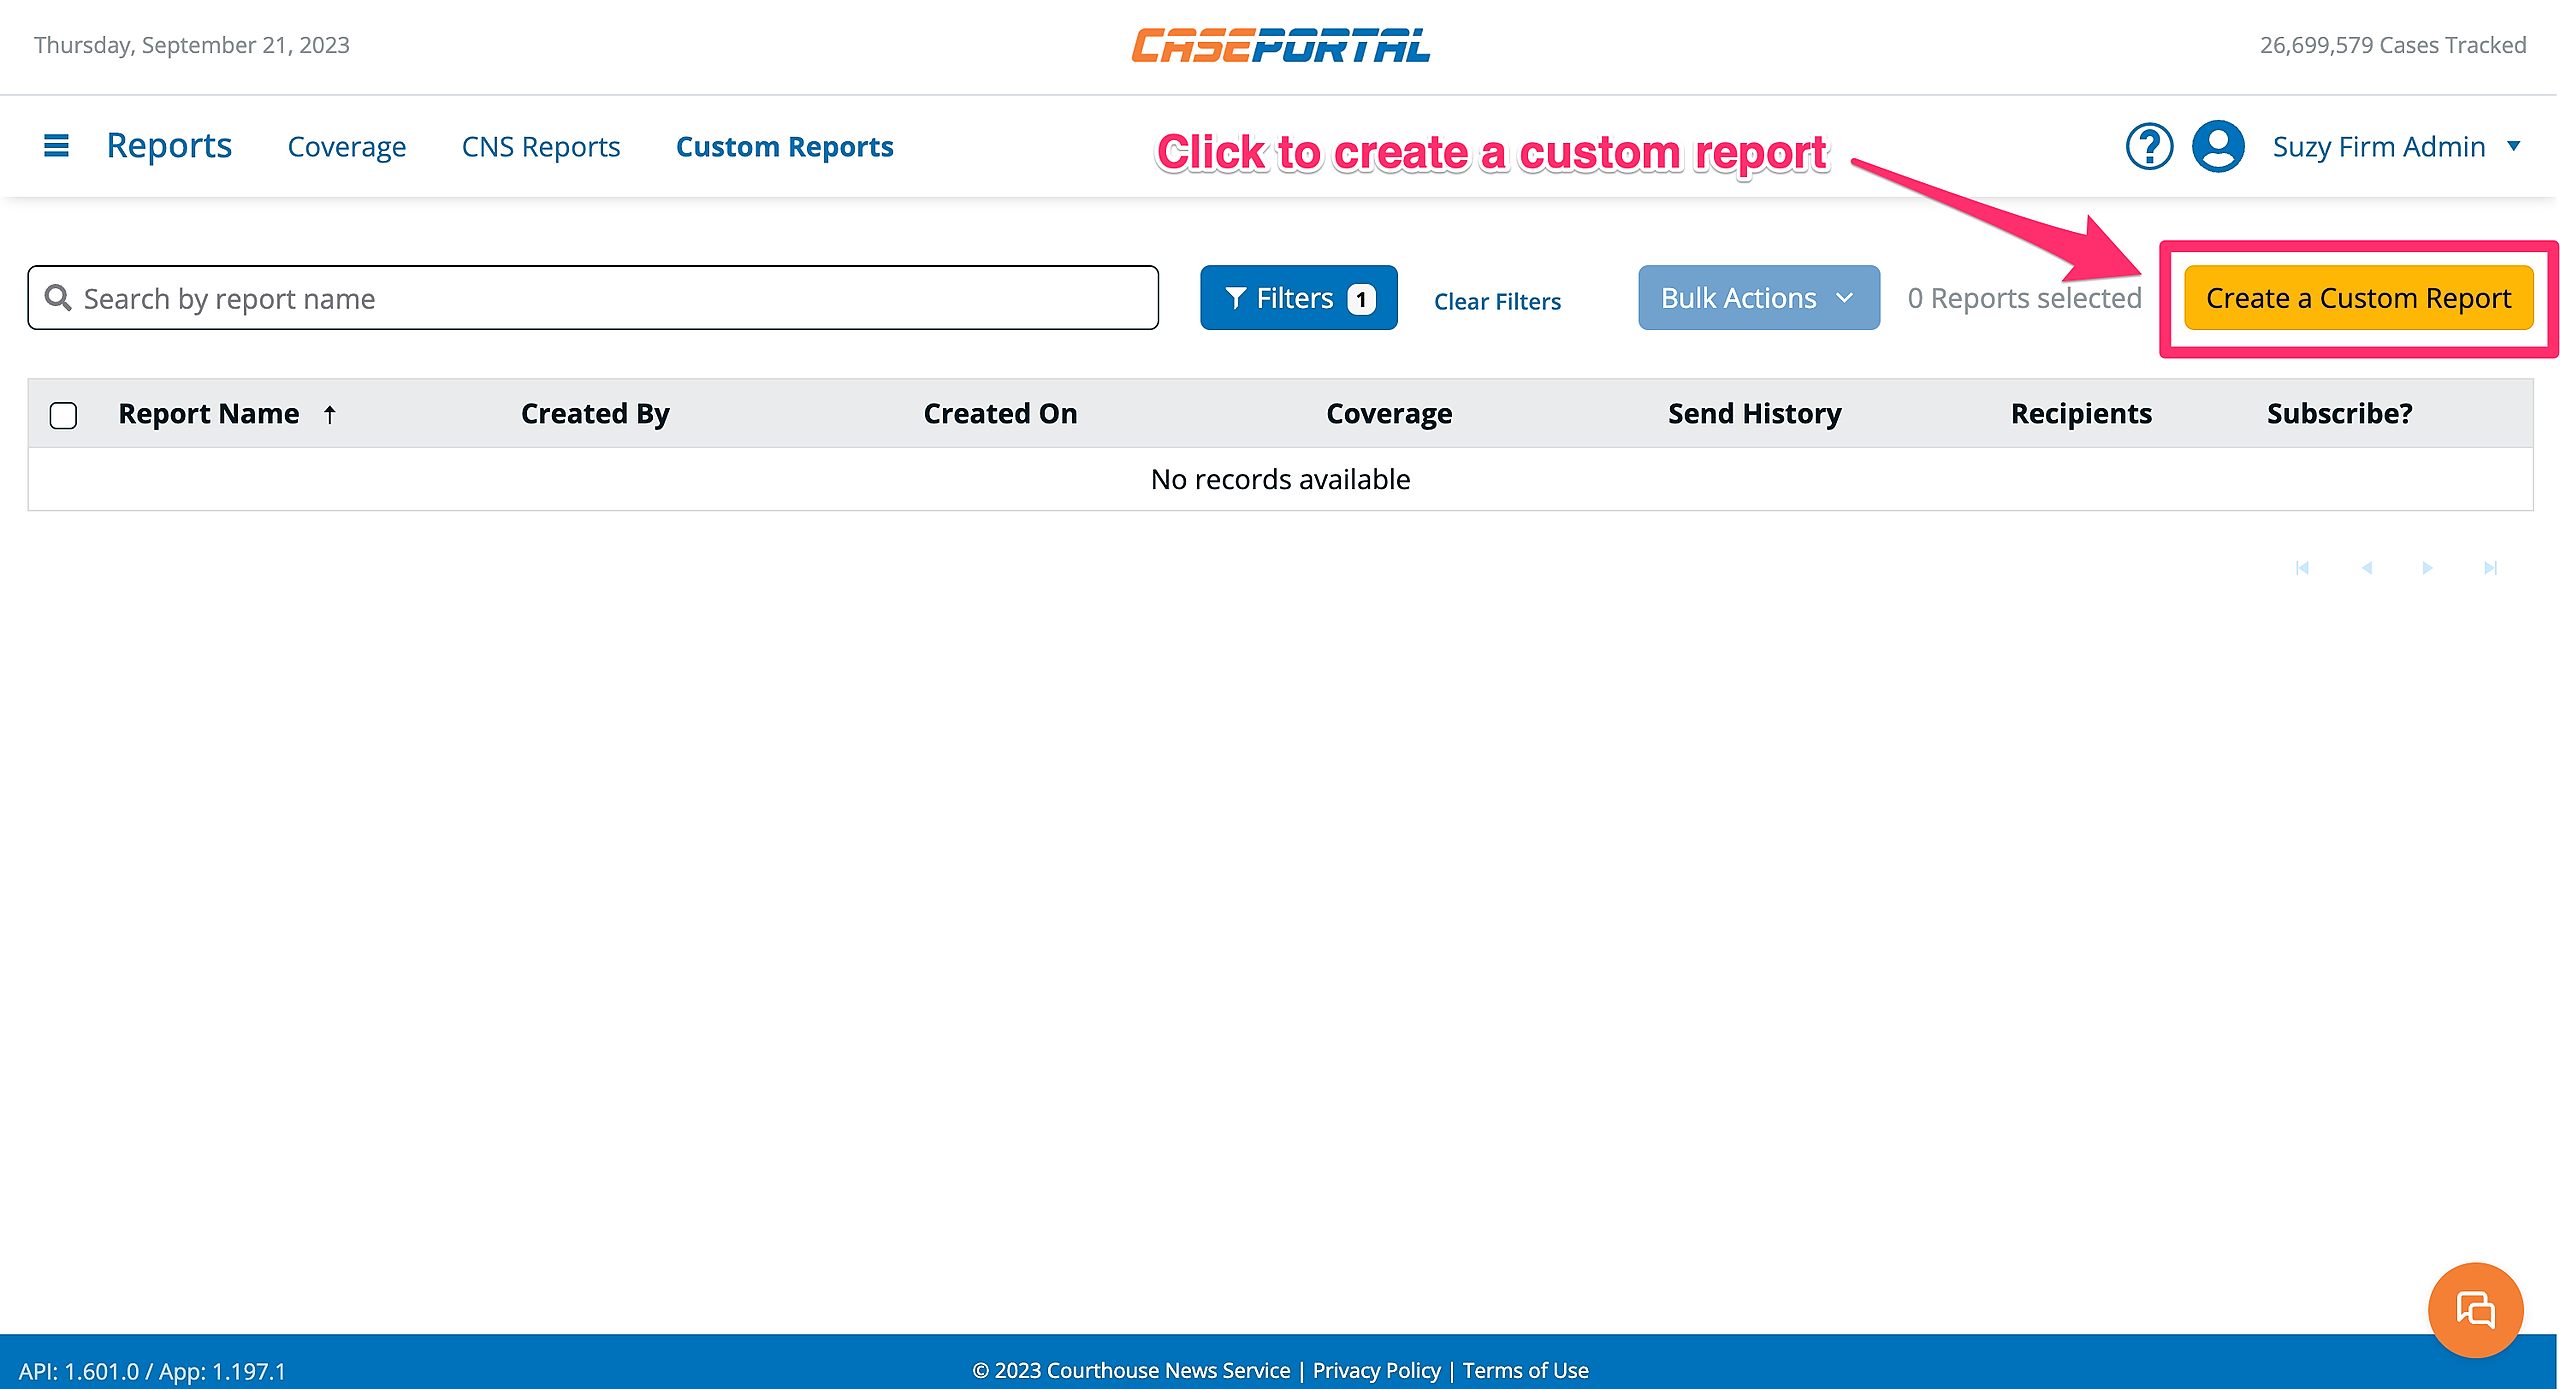
Step 1: Navigate to the Reports section of CasePortal

Step 2: Click the "Create a Custom Report" button
Step 3: Select a library for the Report: Civil Litigation, Opinions, or Bankruptcies and Click "Next"
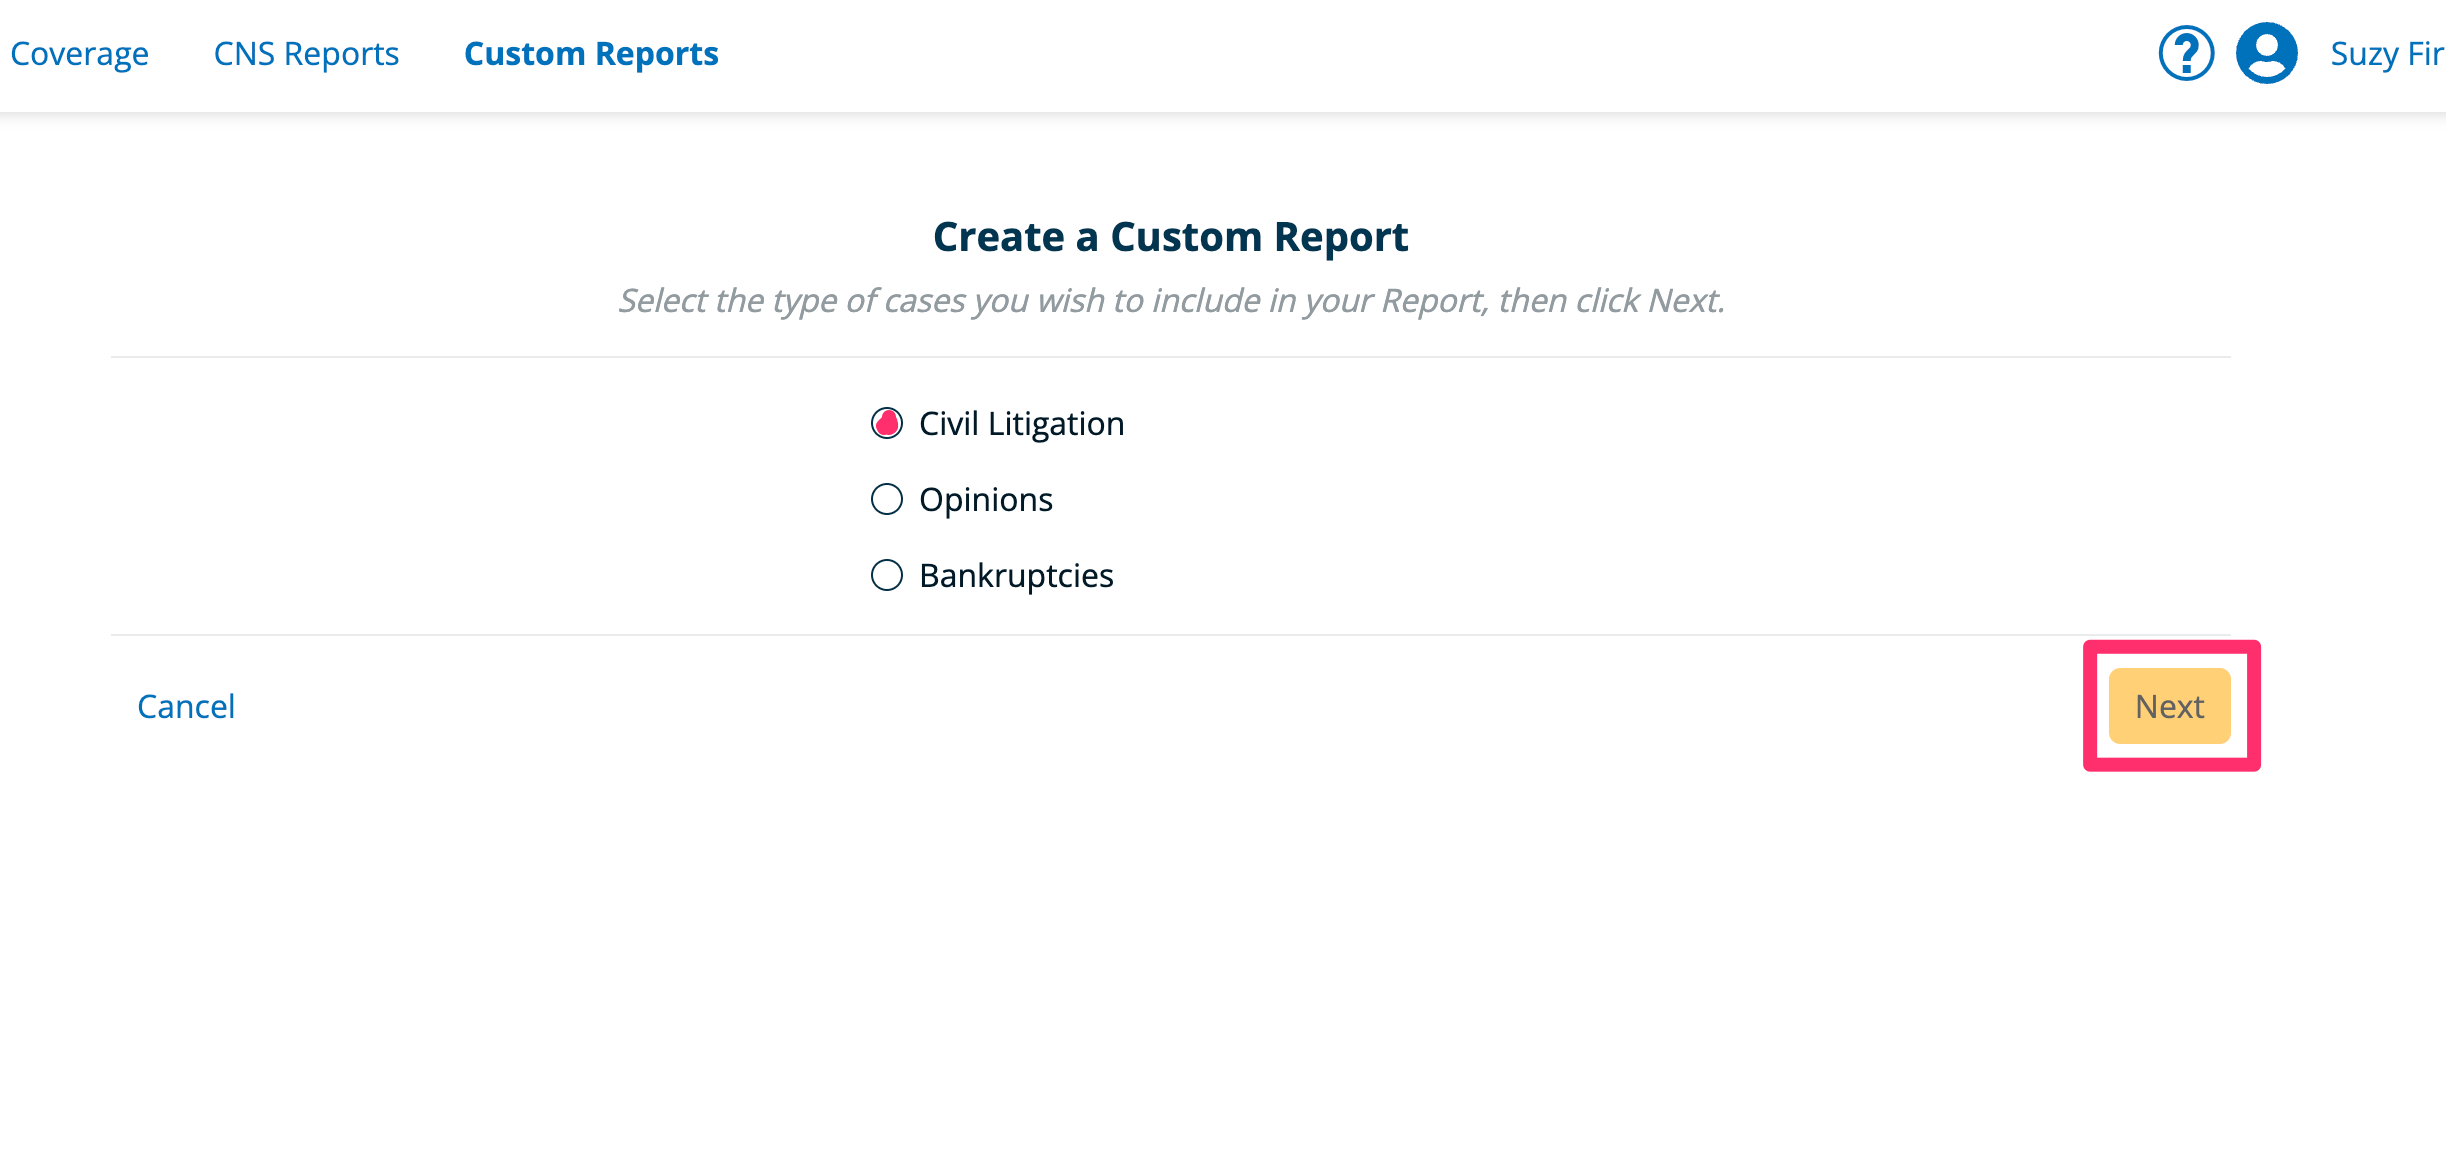
In the above example, I have selected the Civil Litigation library, for other libraries the steps will be the same.
Step 4: Select the courts you want to include and click the "Next" button
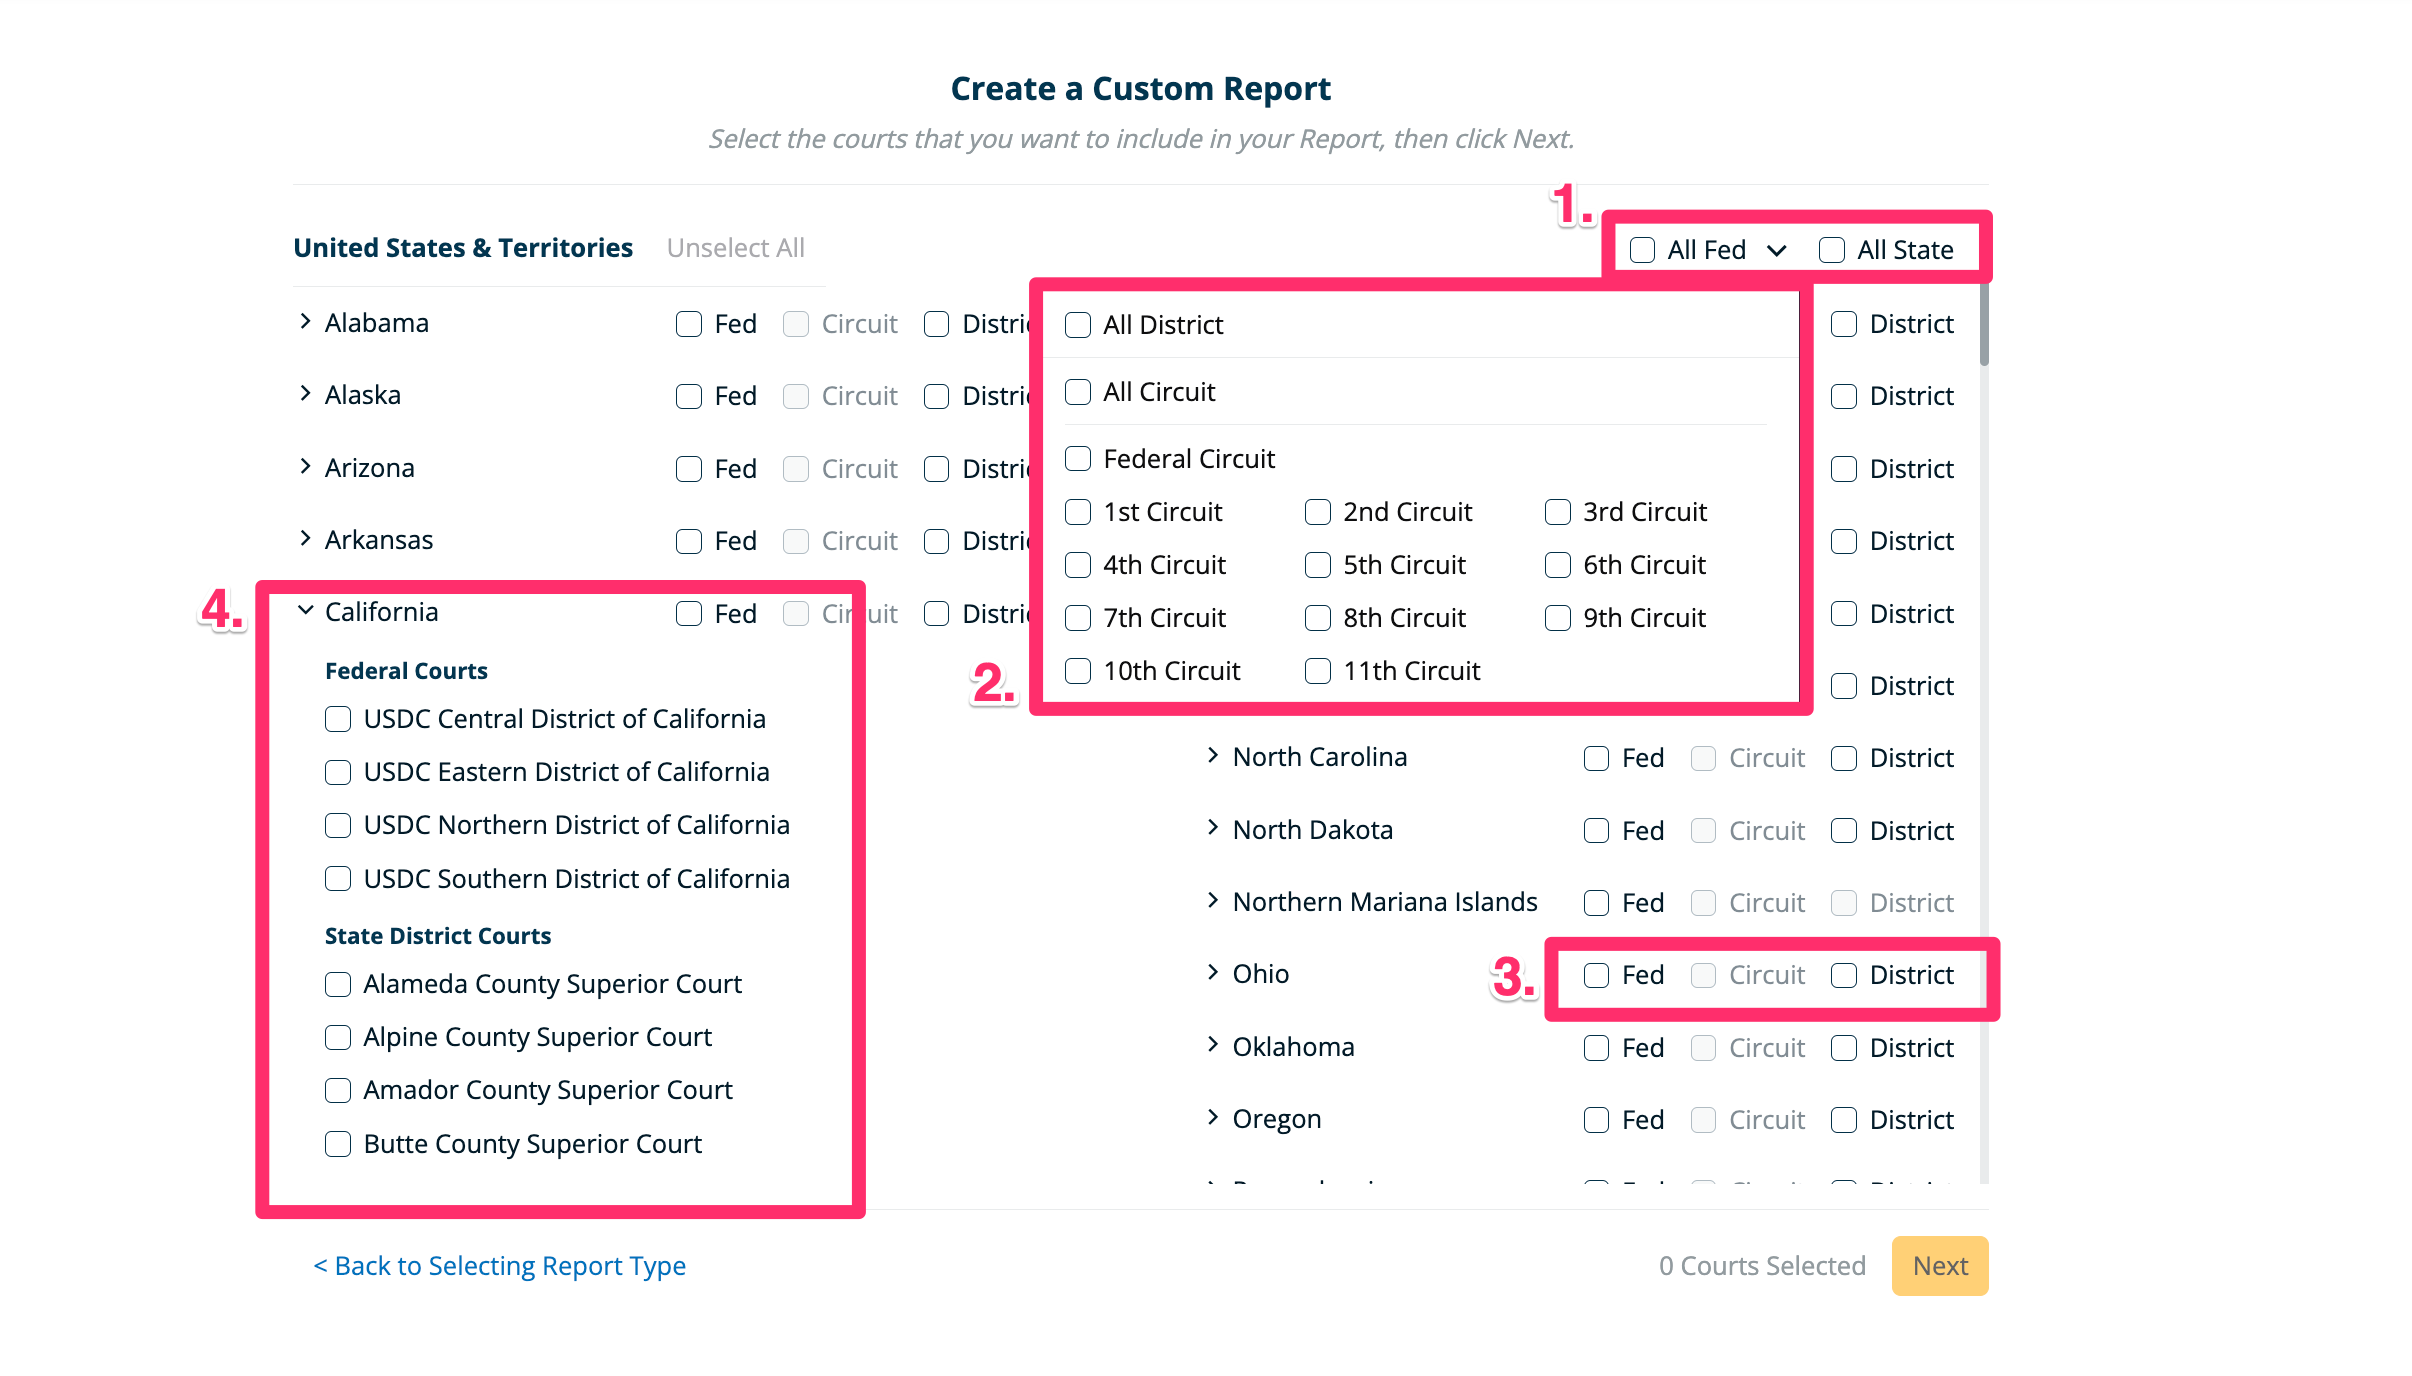
You have several different options when it comes to choosing courts for your reports:
- To select All Federal or All State courts, use the checkboxes in the upper right hand corner of the screen
- To limit the Federal courts, click the carrot and choose from All District, All Circuit, All Federal Circuit, or individual Circuit Courts
- To select All Federal or All District courts in individual states, use the checkboxes beside each state
- To select individual courts within a state, click the carrot to the left of the state name and choose courts from the expanded list
Click the "Next" button when you have finished selecting courts for your report.
Step 5: Name the Custom Report and either save and close or add recipients

To add recipients after creating the report, click the "Save & Continue to Recipients" button. Select users from the available recipients list and click the "Add" button.
How to Manage Recipients of a Custom Report
If you are a regular or limited user, you can only self-subscribe and unsubscribe from custom reports.
If you are an office administrator or firm administrator, you can add/remove yourself and other recipients to/from reports.
For more information on user roles and permission, please refer to this article.
Step 1: Find the Report you wish to manage
Step 2: Click on the number in the recipients column

Step 3: Locate the Users or Groups you wish to add as recipients
This can be done by manually scrolling through the list of "Available Recipients" on the left, or by entering a user's name or email in the search field.
Step 5: Add Users or Groups to the Report
Once you have selected the user/s you would like to add, click the "Add" button.
Upon click, the selected user/s will populate in the "Current Recipients" list on the right.
To remove users, follow the same steps above, using the "Current Recipients" list and the "Remove" button.
How to Use the Send History Feature
With the send history feature you can examine past reports in the following ways:
-
See number of cases included in each report
- See the case details of individual cases within a report
-
See the recipients of that report
Step 1: Open the send history of a given Custom Report

See the cases sent in a past report
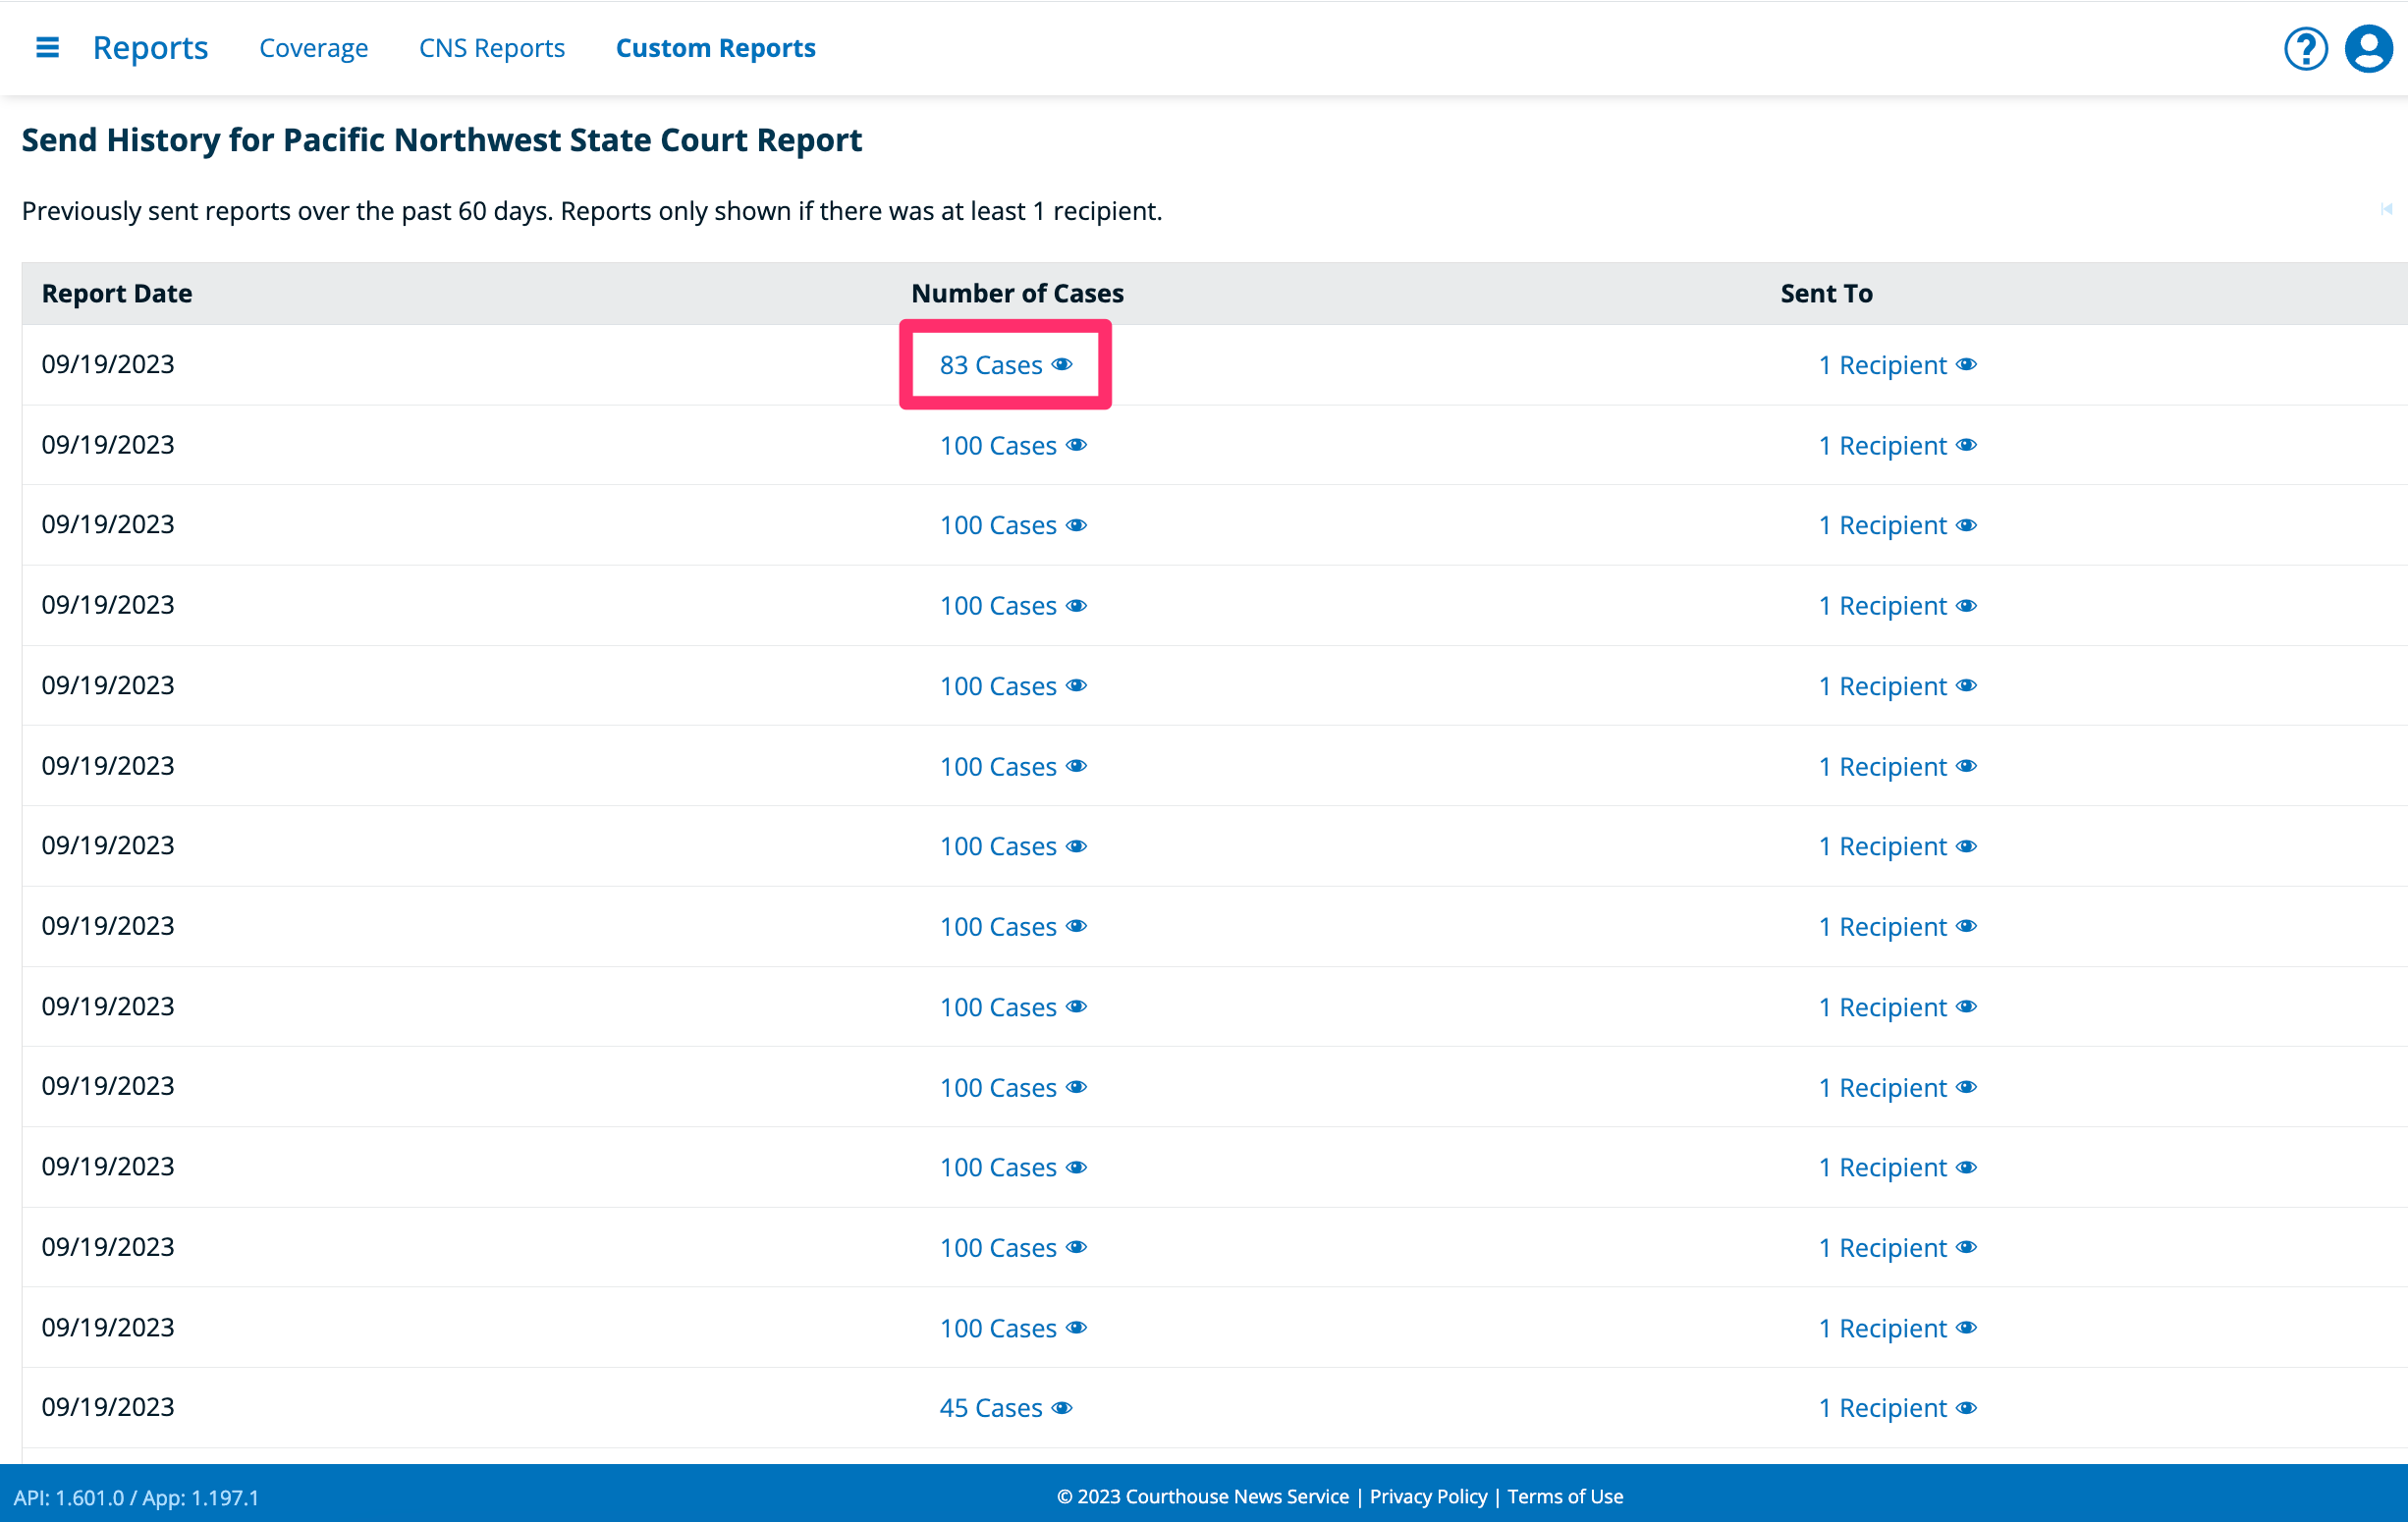
The number of cases column will display how many cases were included in a previous report. (The limit per email send at this time is 100 cases, so if a report includes >100 cases, there will be 2+ emails for that daily report.)
If you click the eye icon, a list of all the cases in that report will populate in the browser. You can scroll down the list and even open the case details of a given case.
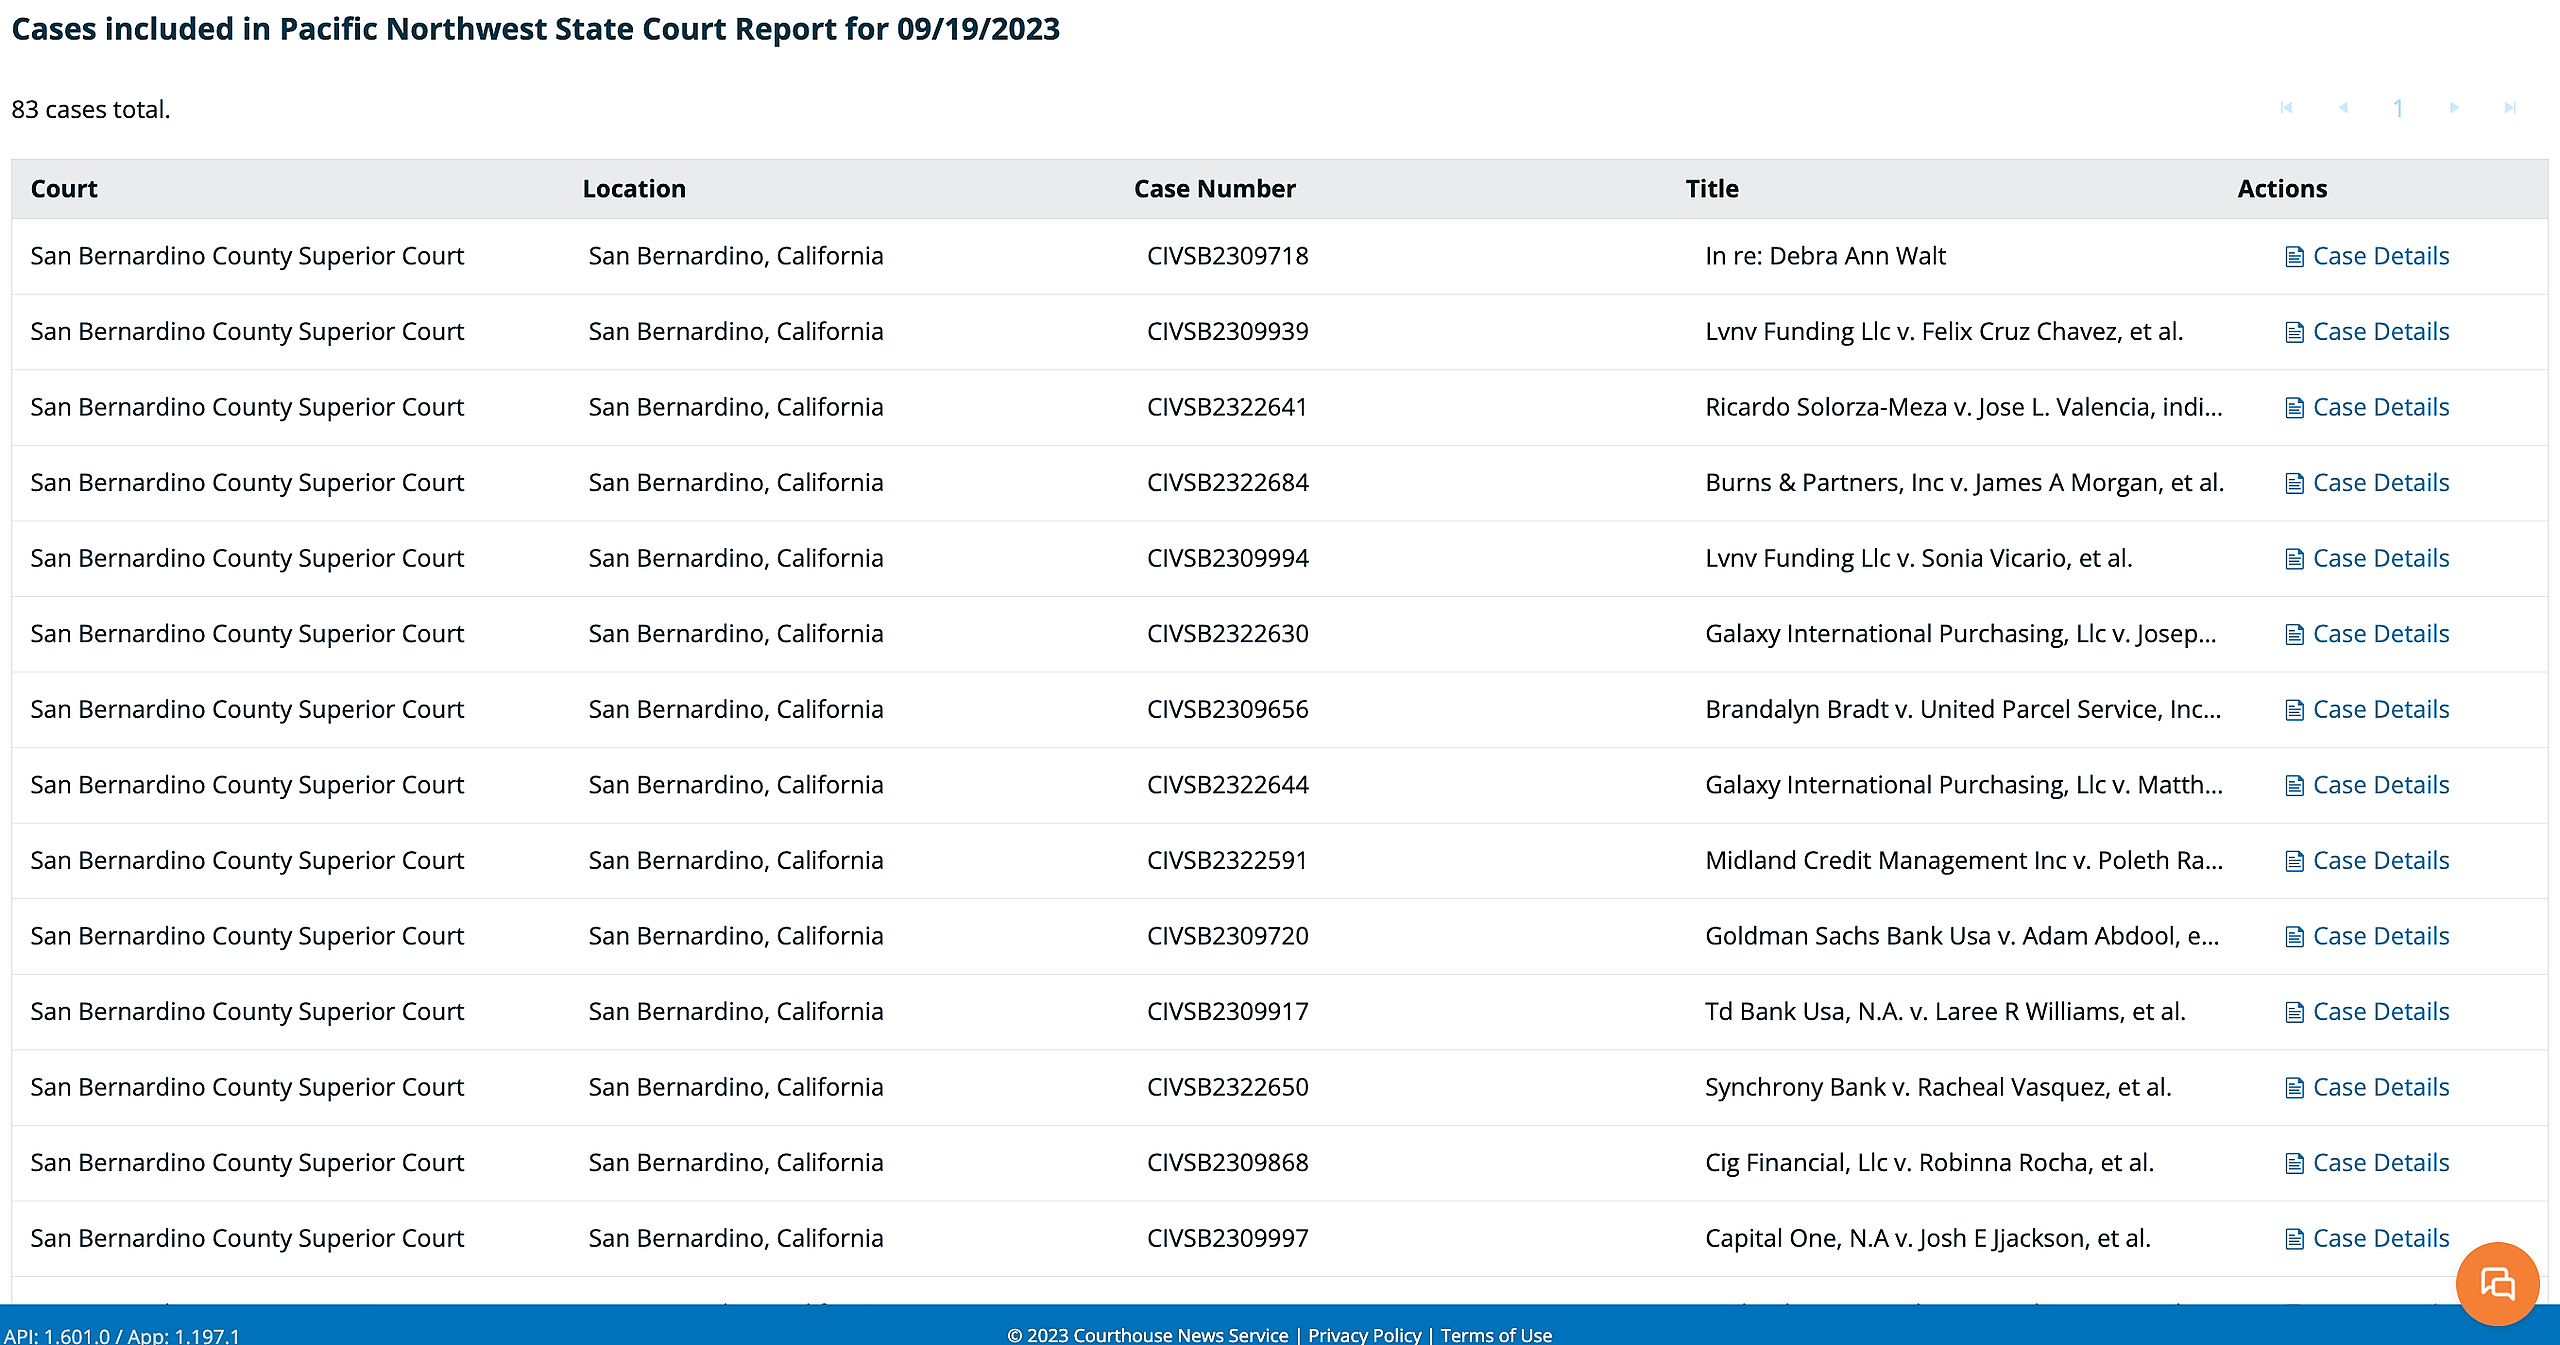
Example of a list of cases in a past report.

In the above, the case details panel is open while reviewing the cases in a past report.
See the recipients of a past report
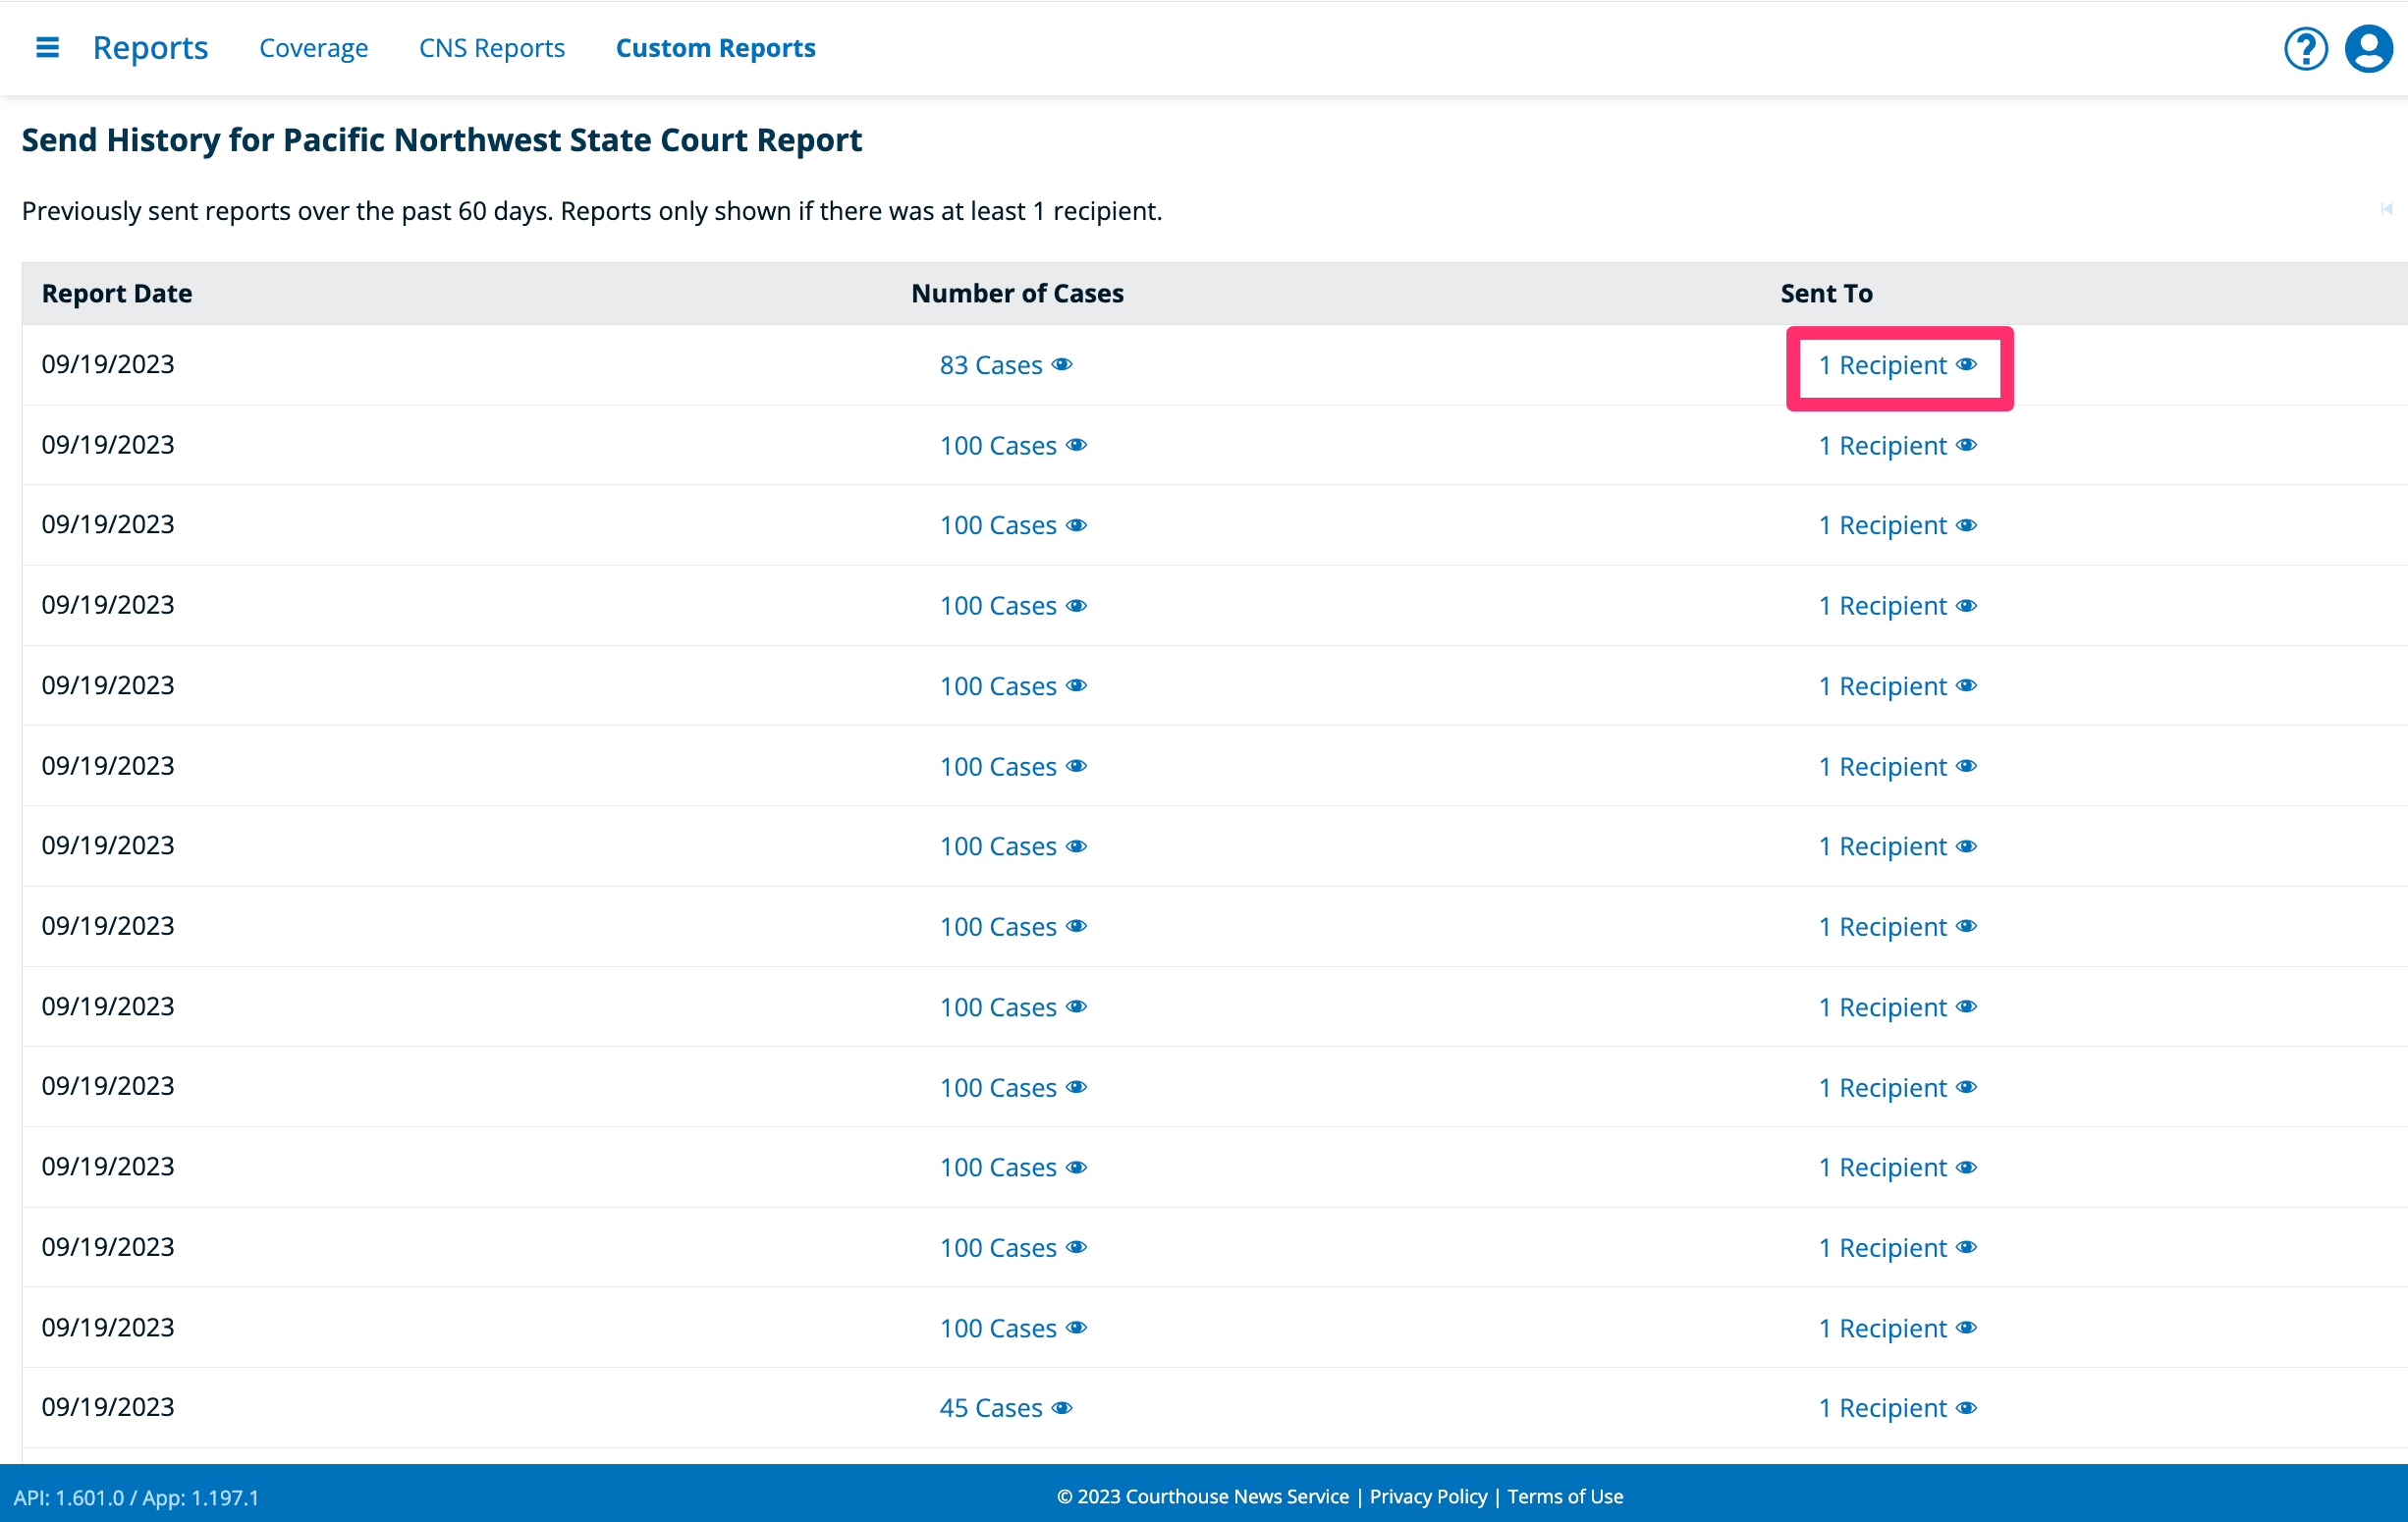
Click the eye icon, to see a list of recipients of a given custom report.