
What are User Groups?
User Groups are distribution lists you can build inside of CasePortal to simplify the process of adding users to various notifications.
For example, you might create a group to organize users in your firm who belong to a specific practice, industry, or client. Then, whenever you setup alerts specific to that practice, industry, or client, you can be sure that all relevant individuals will receive that alert.
Additionally, as new users join your firm, you can quickly add them to existing groups and they will be automatically added to all alerts already being sent to that group.
The benefit of User Groups is that they allow for easy and efficient management of recipients for all CasePortal notification types (Dingers, Trackers, and Reports).
Instead of adding (or removing) users to alerts one at a time, you can first create a group, assign users to that group, then add (or remove) that entire group to a specific alert with just a few clicks.
Only users with Office Admin or Firm Admin permissions can create user groups.
How to Create a User Group
Before you get started, it's important to know that creating groups based on offices is not recommended.
This is because you can already add/remove entire offices to/from notifications using the drag and drop method described below. For more information about setting up your offices and users, please read Introduction to Firm and Office Management.
Step 1: Navigate to the Groups section of CasePortal
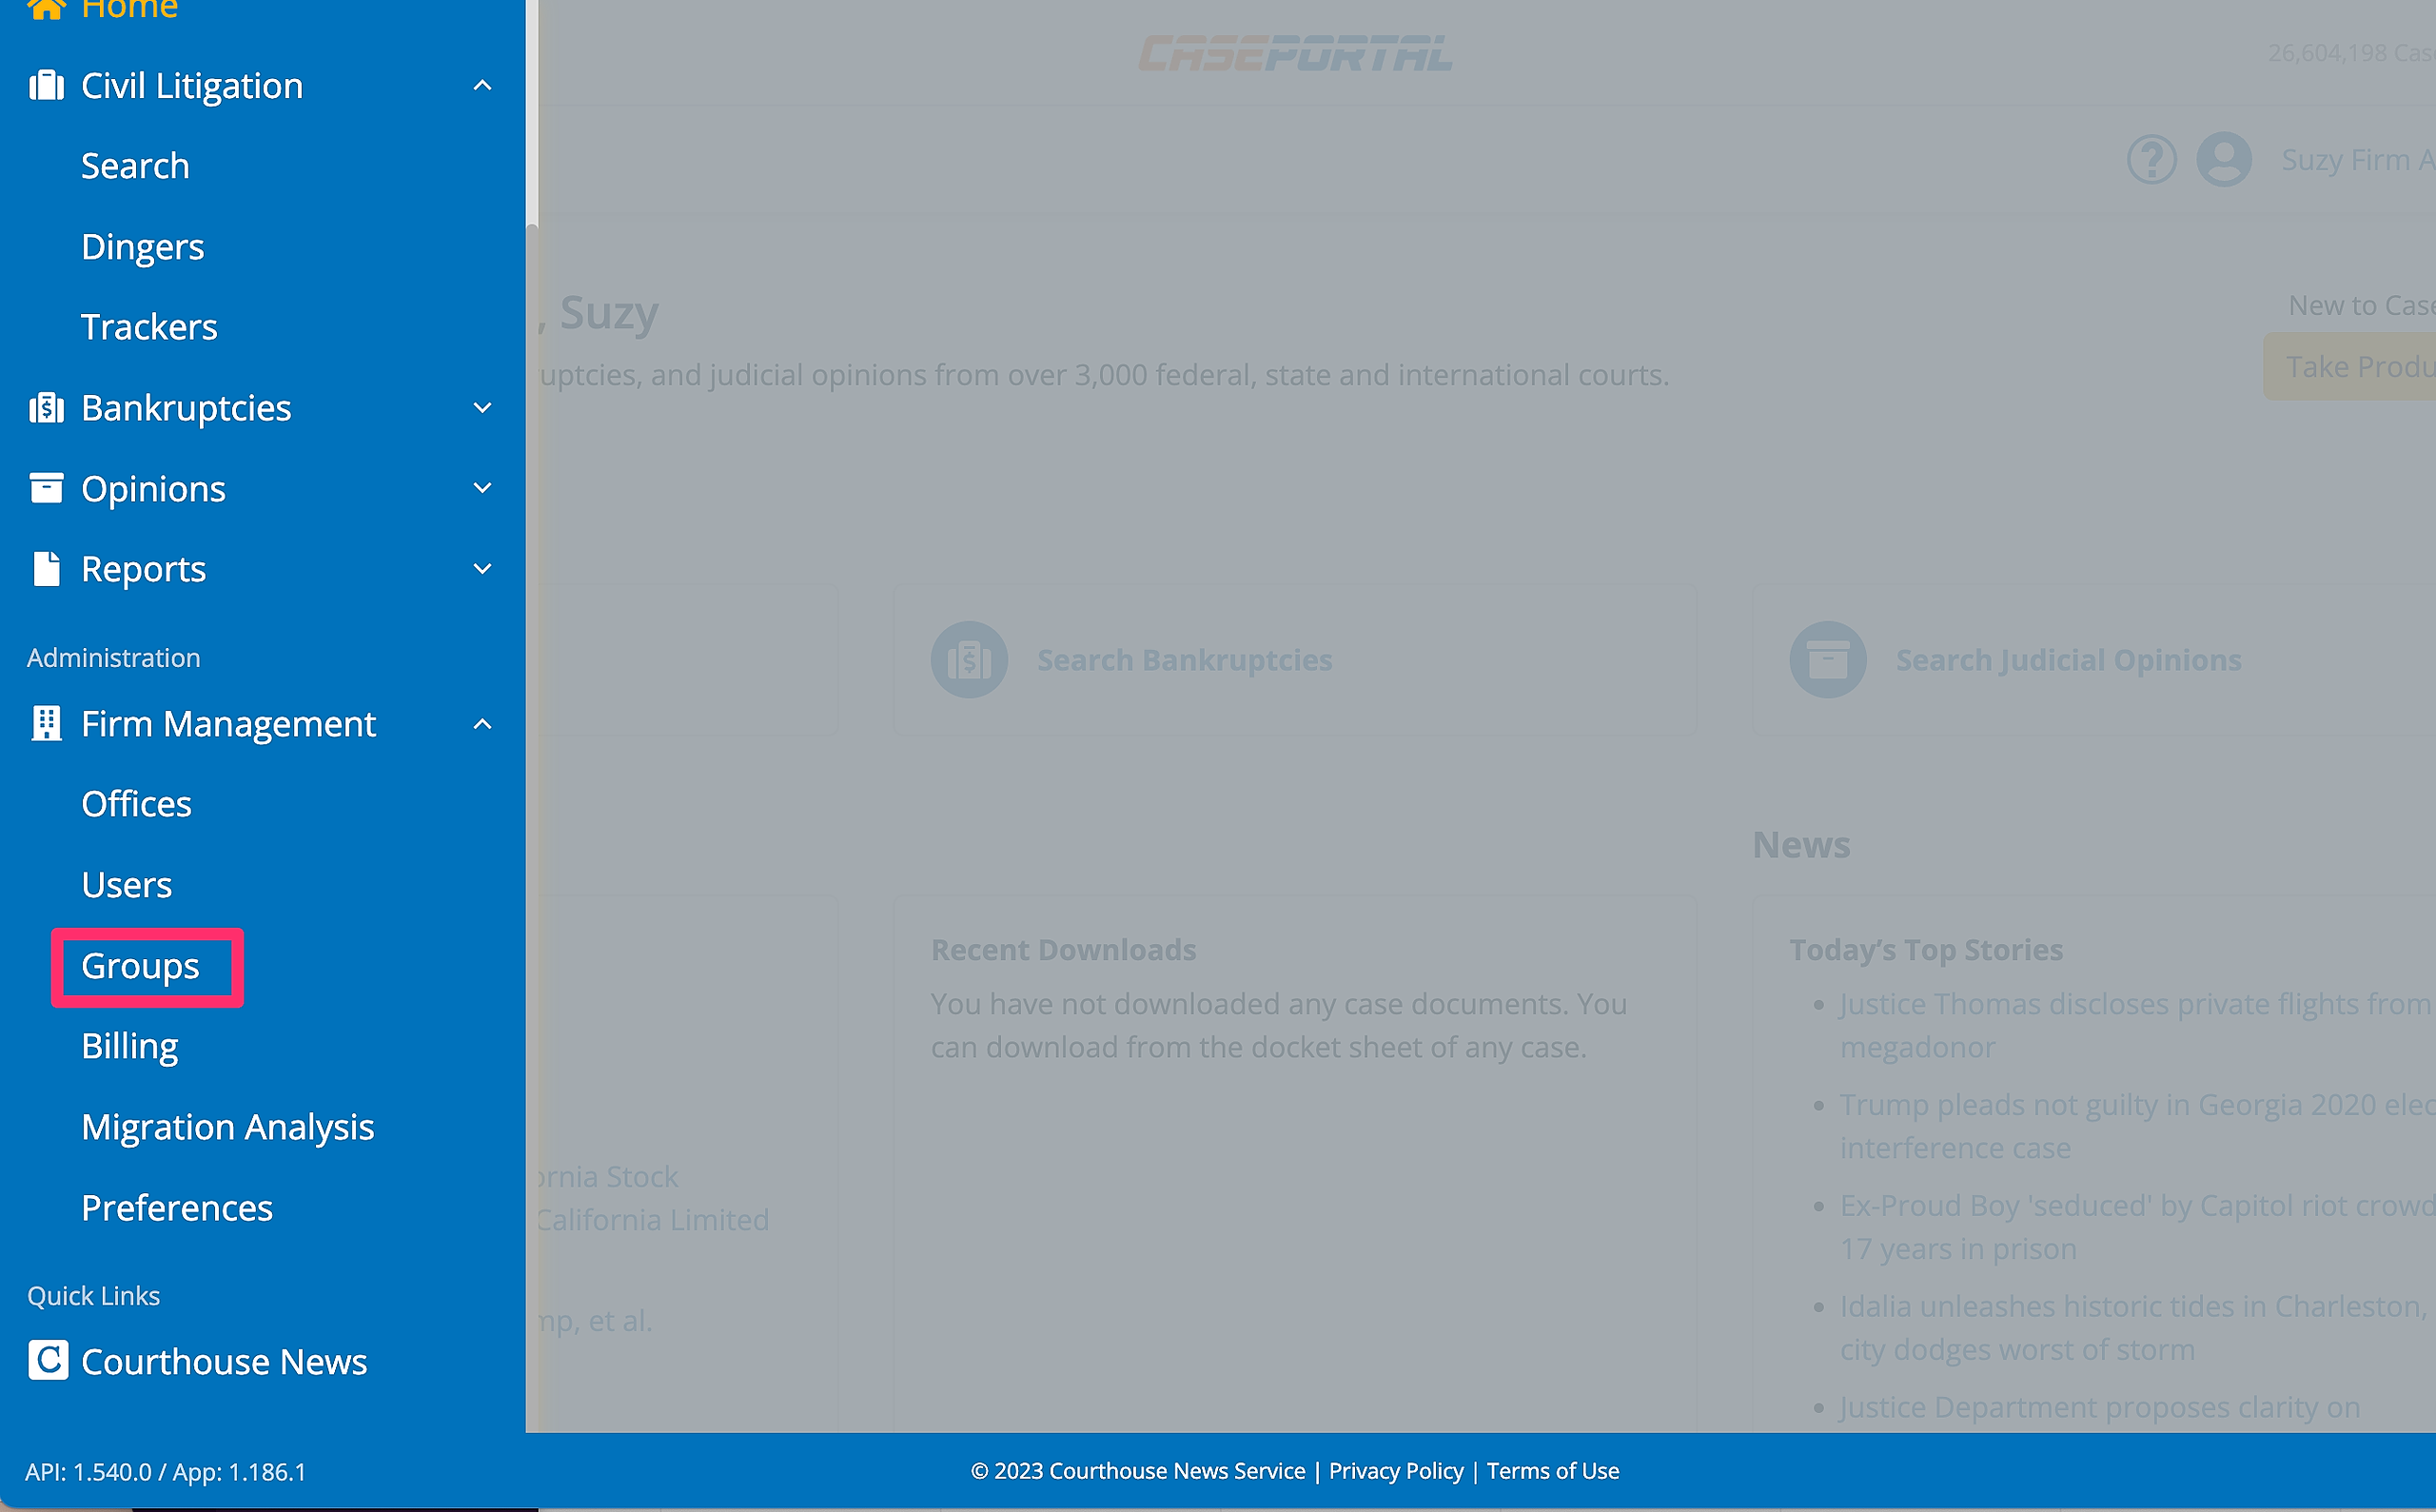
The above shows how to access Groups if you are logged in as a Firm Admin. Office Admins access Groups from the menu heading: Office Management.
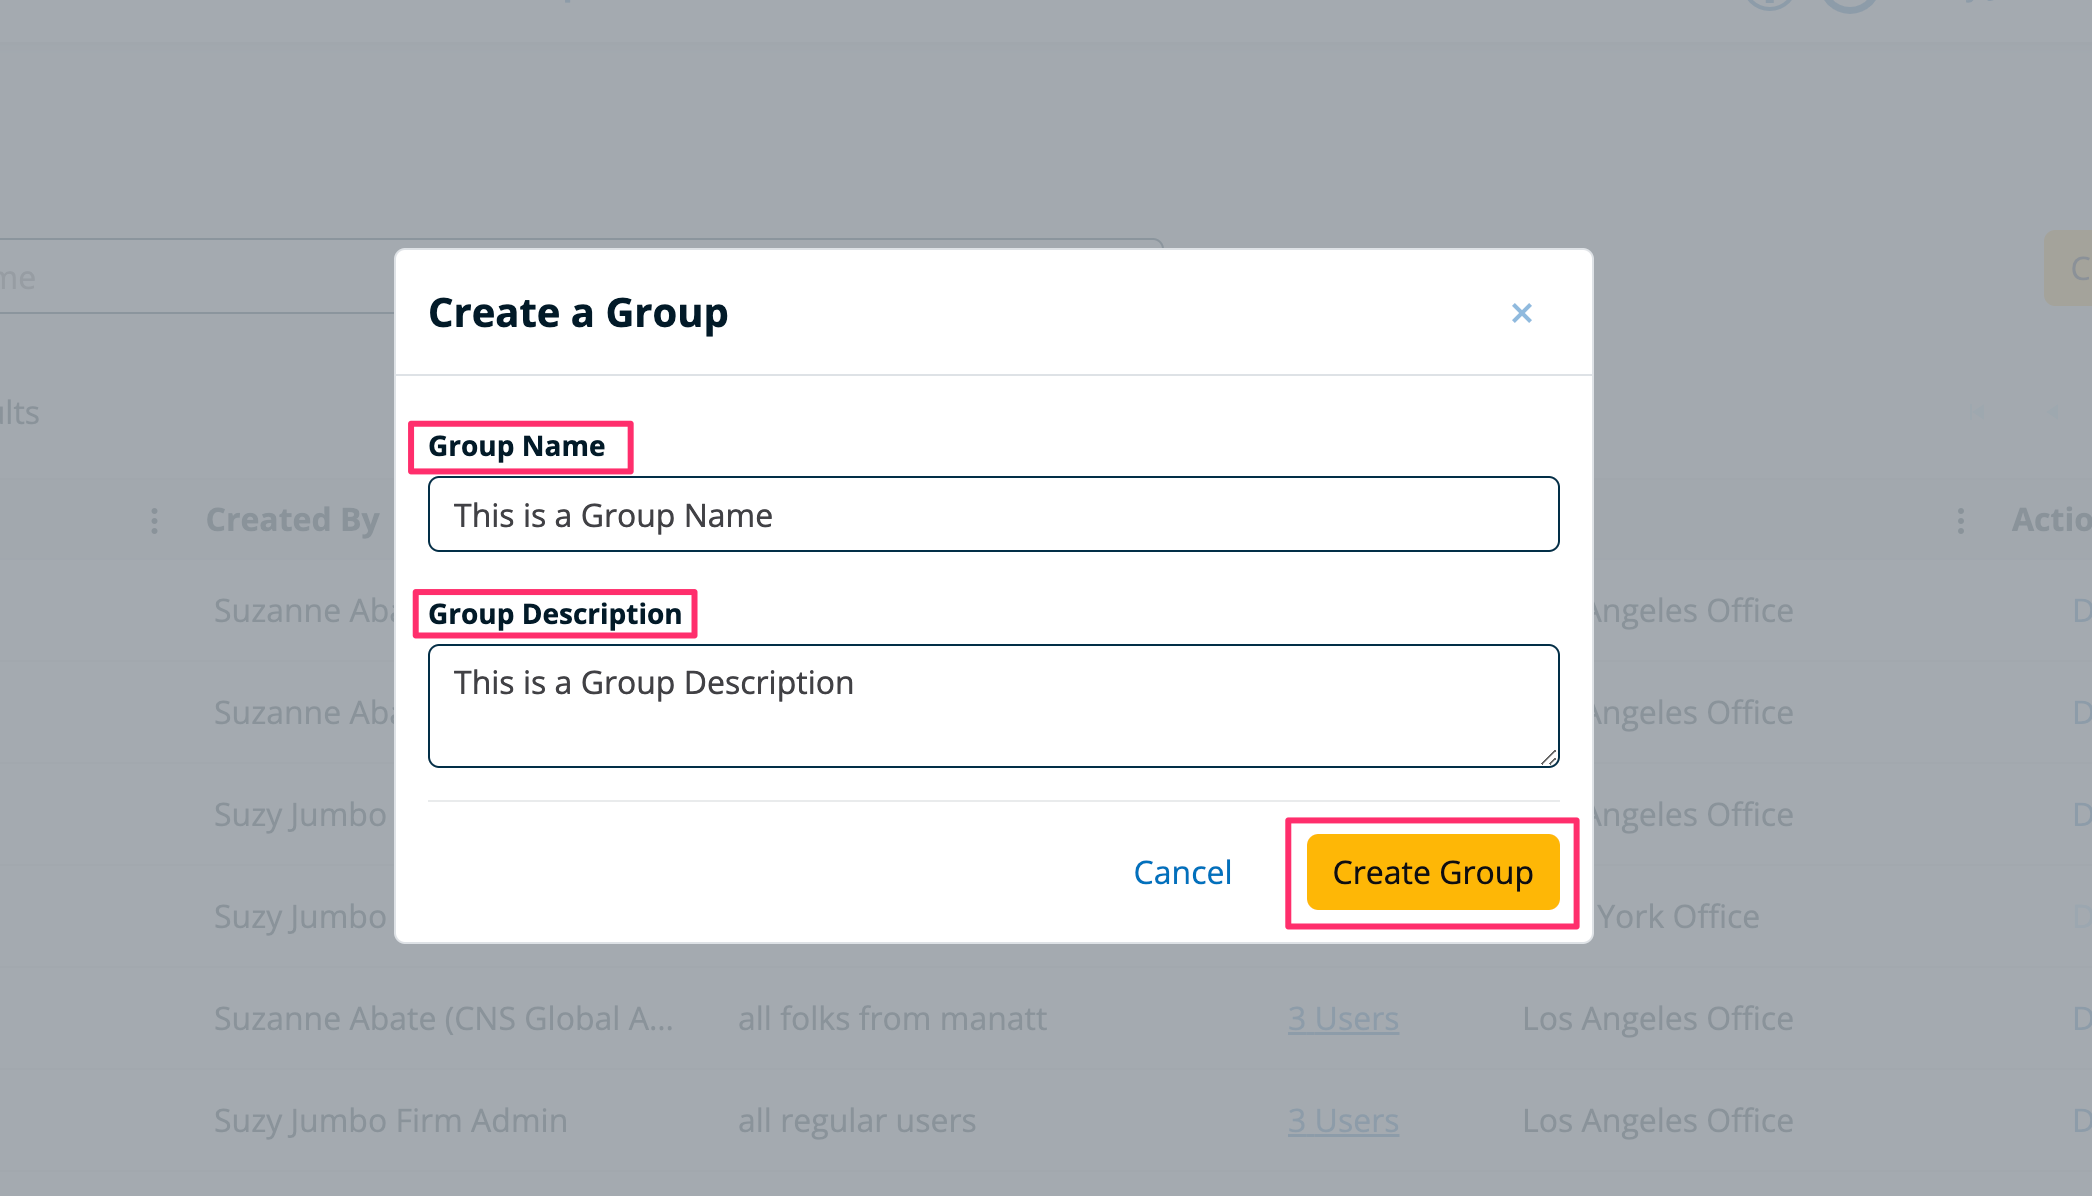
Step 2: Click the "Create a Group" button

Step 3: Name the Group, Add a Description, and Click "Create Group"
Step 4: Add Members to the Group
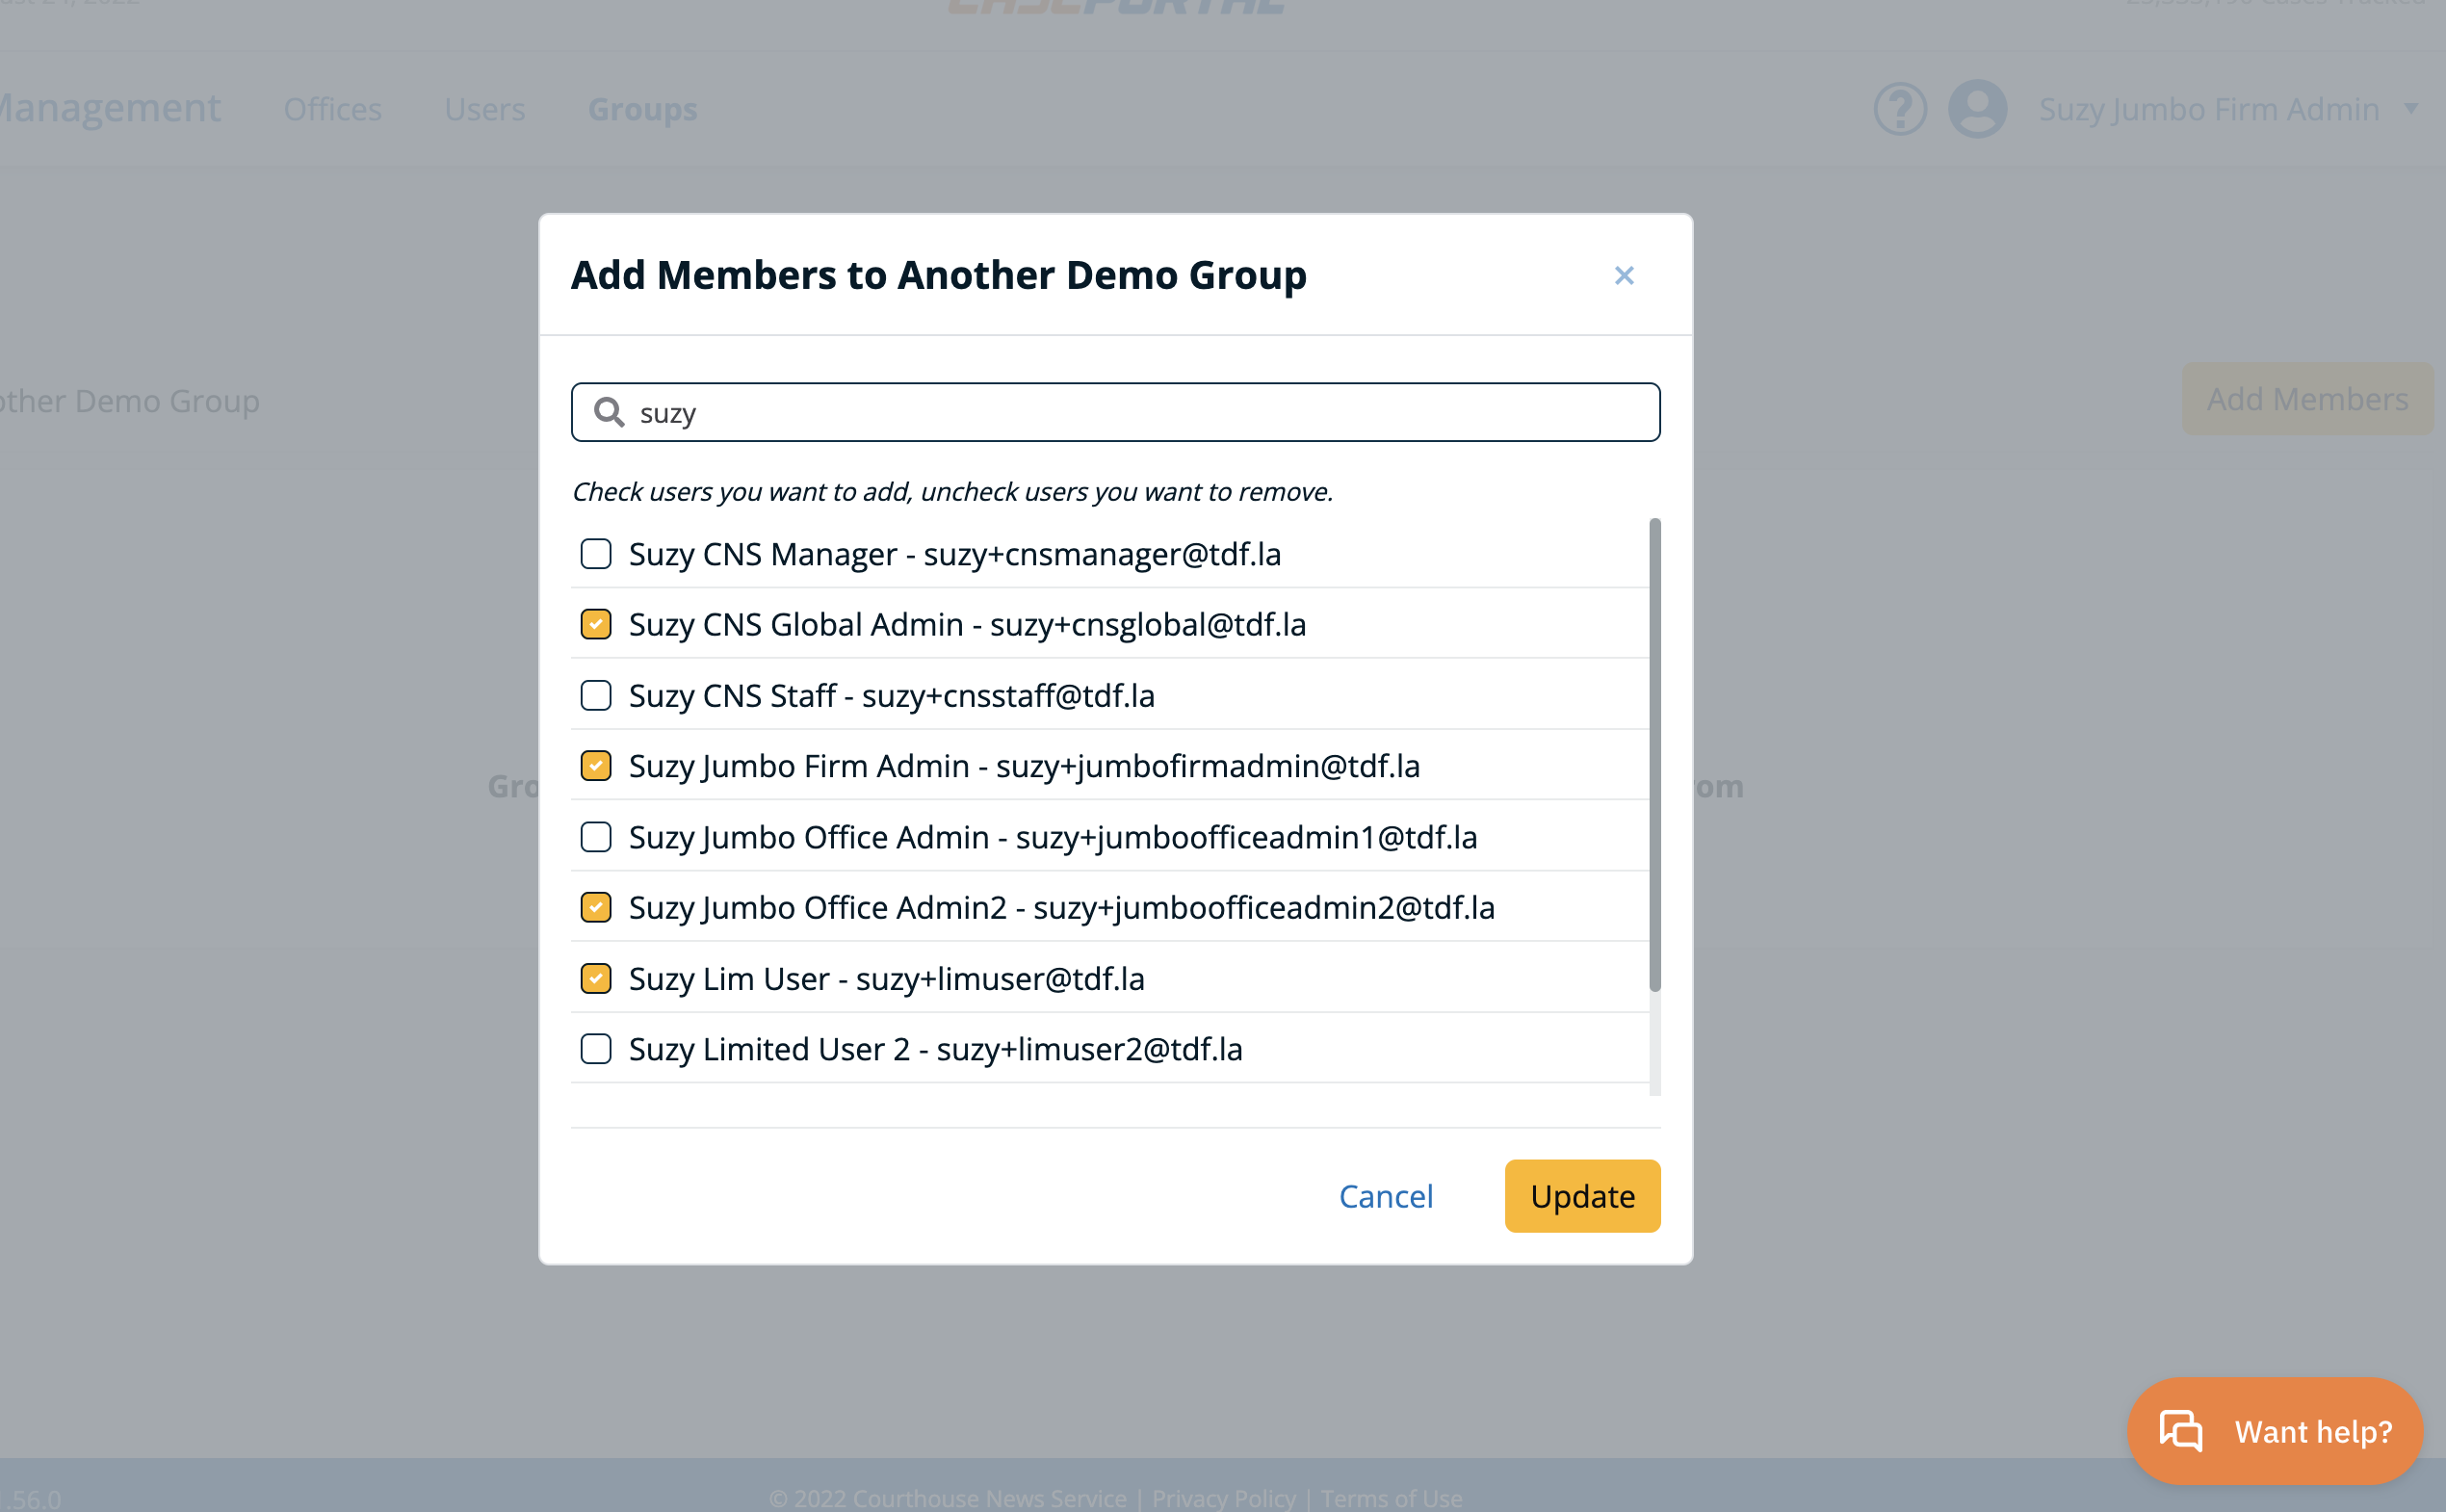
By default your new group will have no members in it. To add users, click the "Add Members" button.
A modal will display where you can search or scroll through the list of registered users in your firm or office and select everyone you wish to add to the group.
Once you have all members selected, click the "Update" button. The modal will close and you will see your newly created group with all added members.
This step may take some upfront time and planning, but once it's done, it will save you time whenever you want to batch add (or remove users) to alerts.
You can also talk to your IT team about using CasePortal's API to sync your existing distribution lists/groups with CasePortal.
How to Edit a User Group
You can edit a User Group you've created by following these steps:
Step 1: Navigate to Groups in the Administration section (as shown above)
Step 2: To edit Group name or description, click any row and the edit panel will open on the right
Step 3: To add/remove members, first click the link in the users column of the User Group you would like to edit

Step 4: You can remove individual members by clicking "Remove" or you can batch add/remove members by clicking the "Update Members" button.
Removing a member from a user group will stop that user from receiving group notifications.
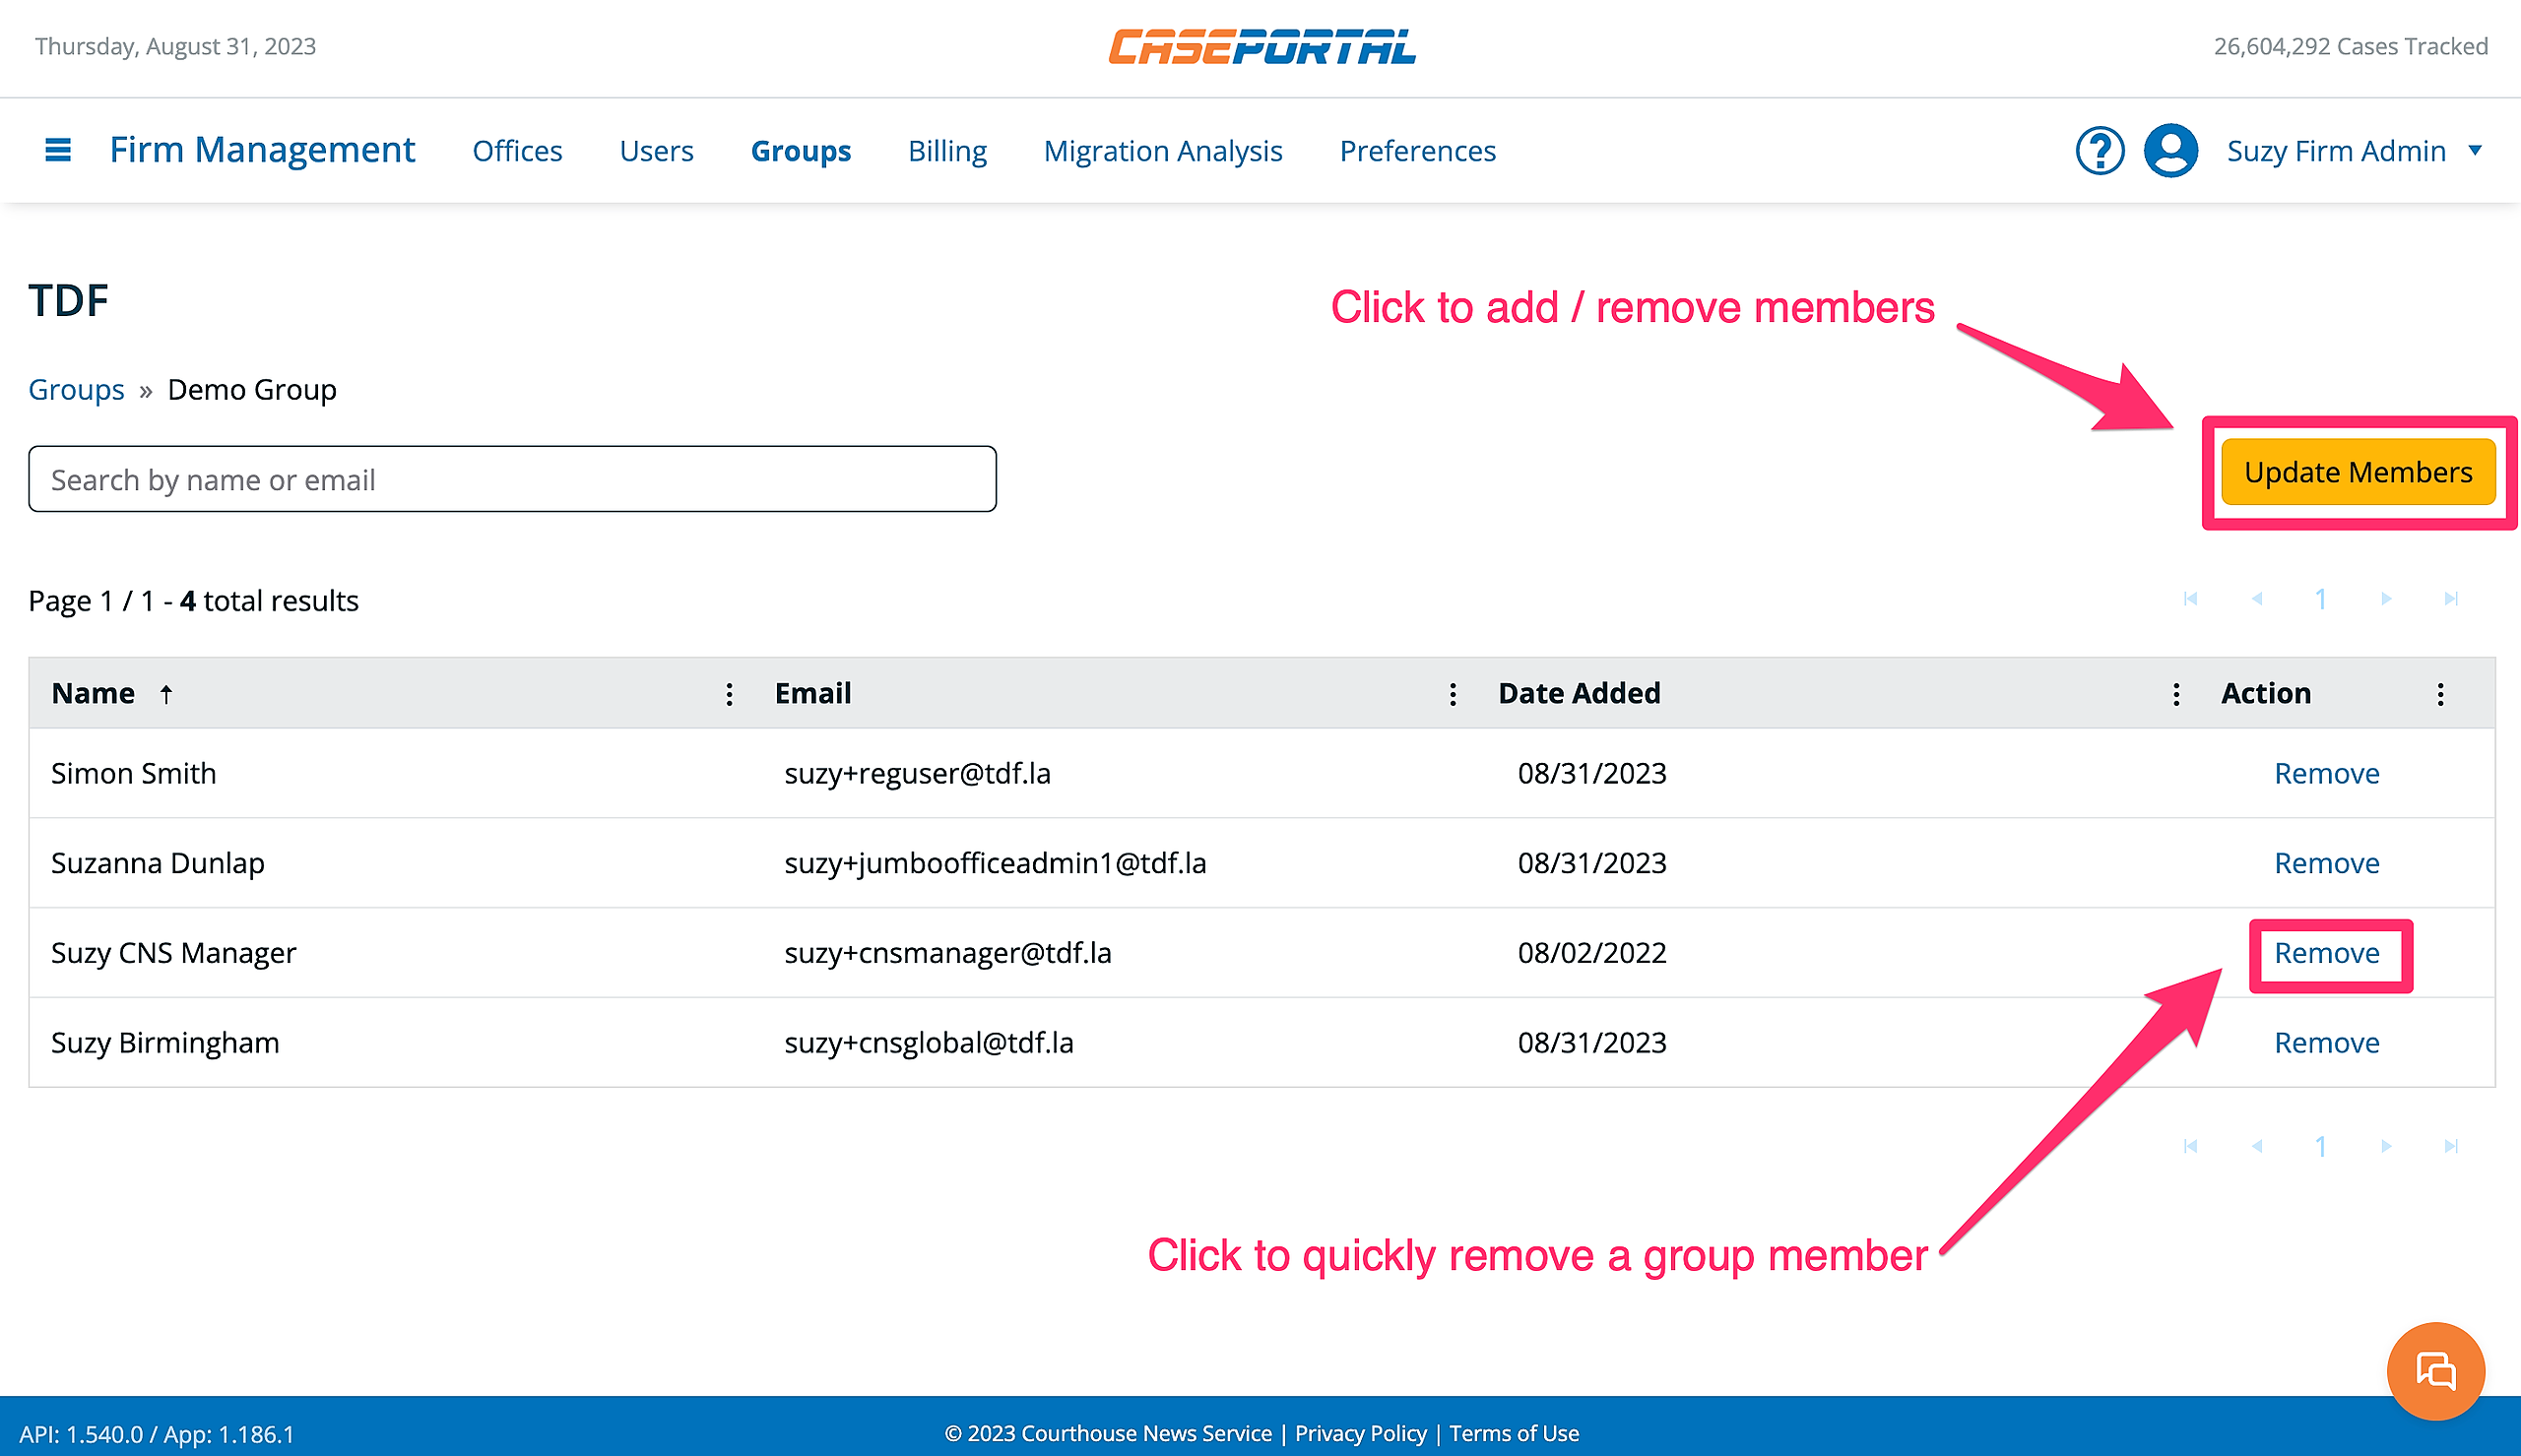
Adding and removing members from a user group
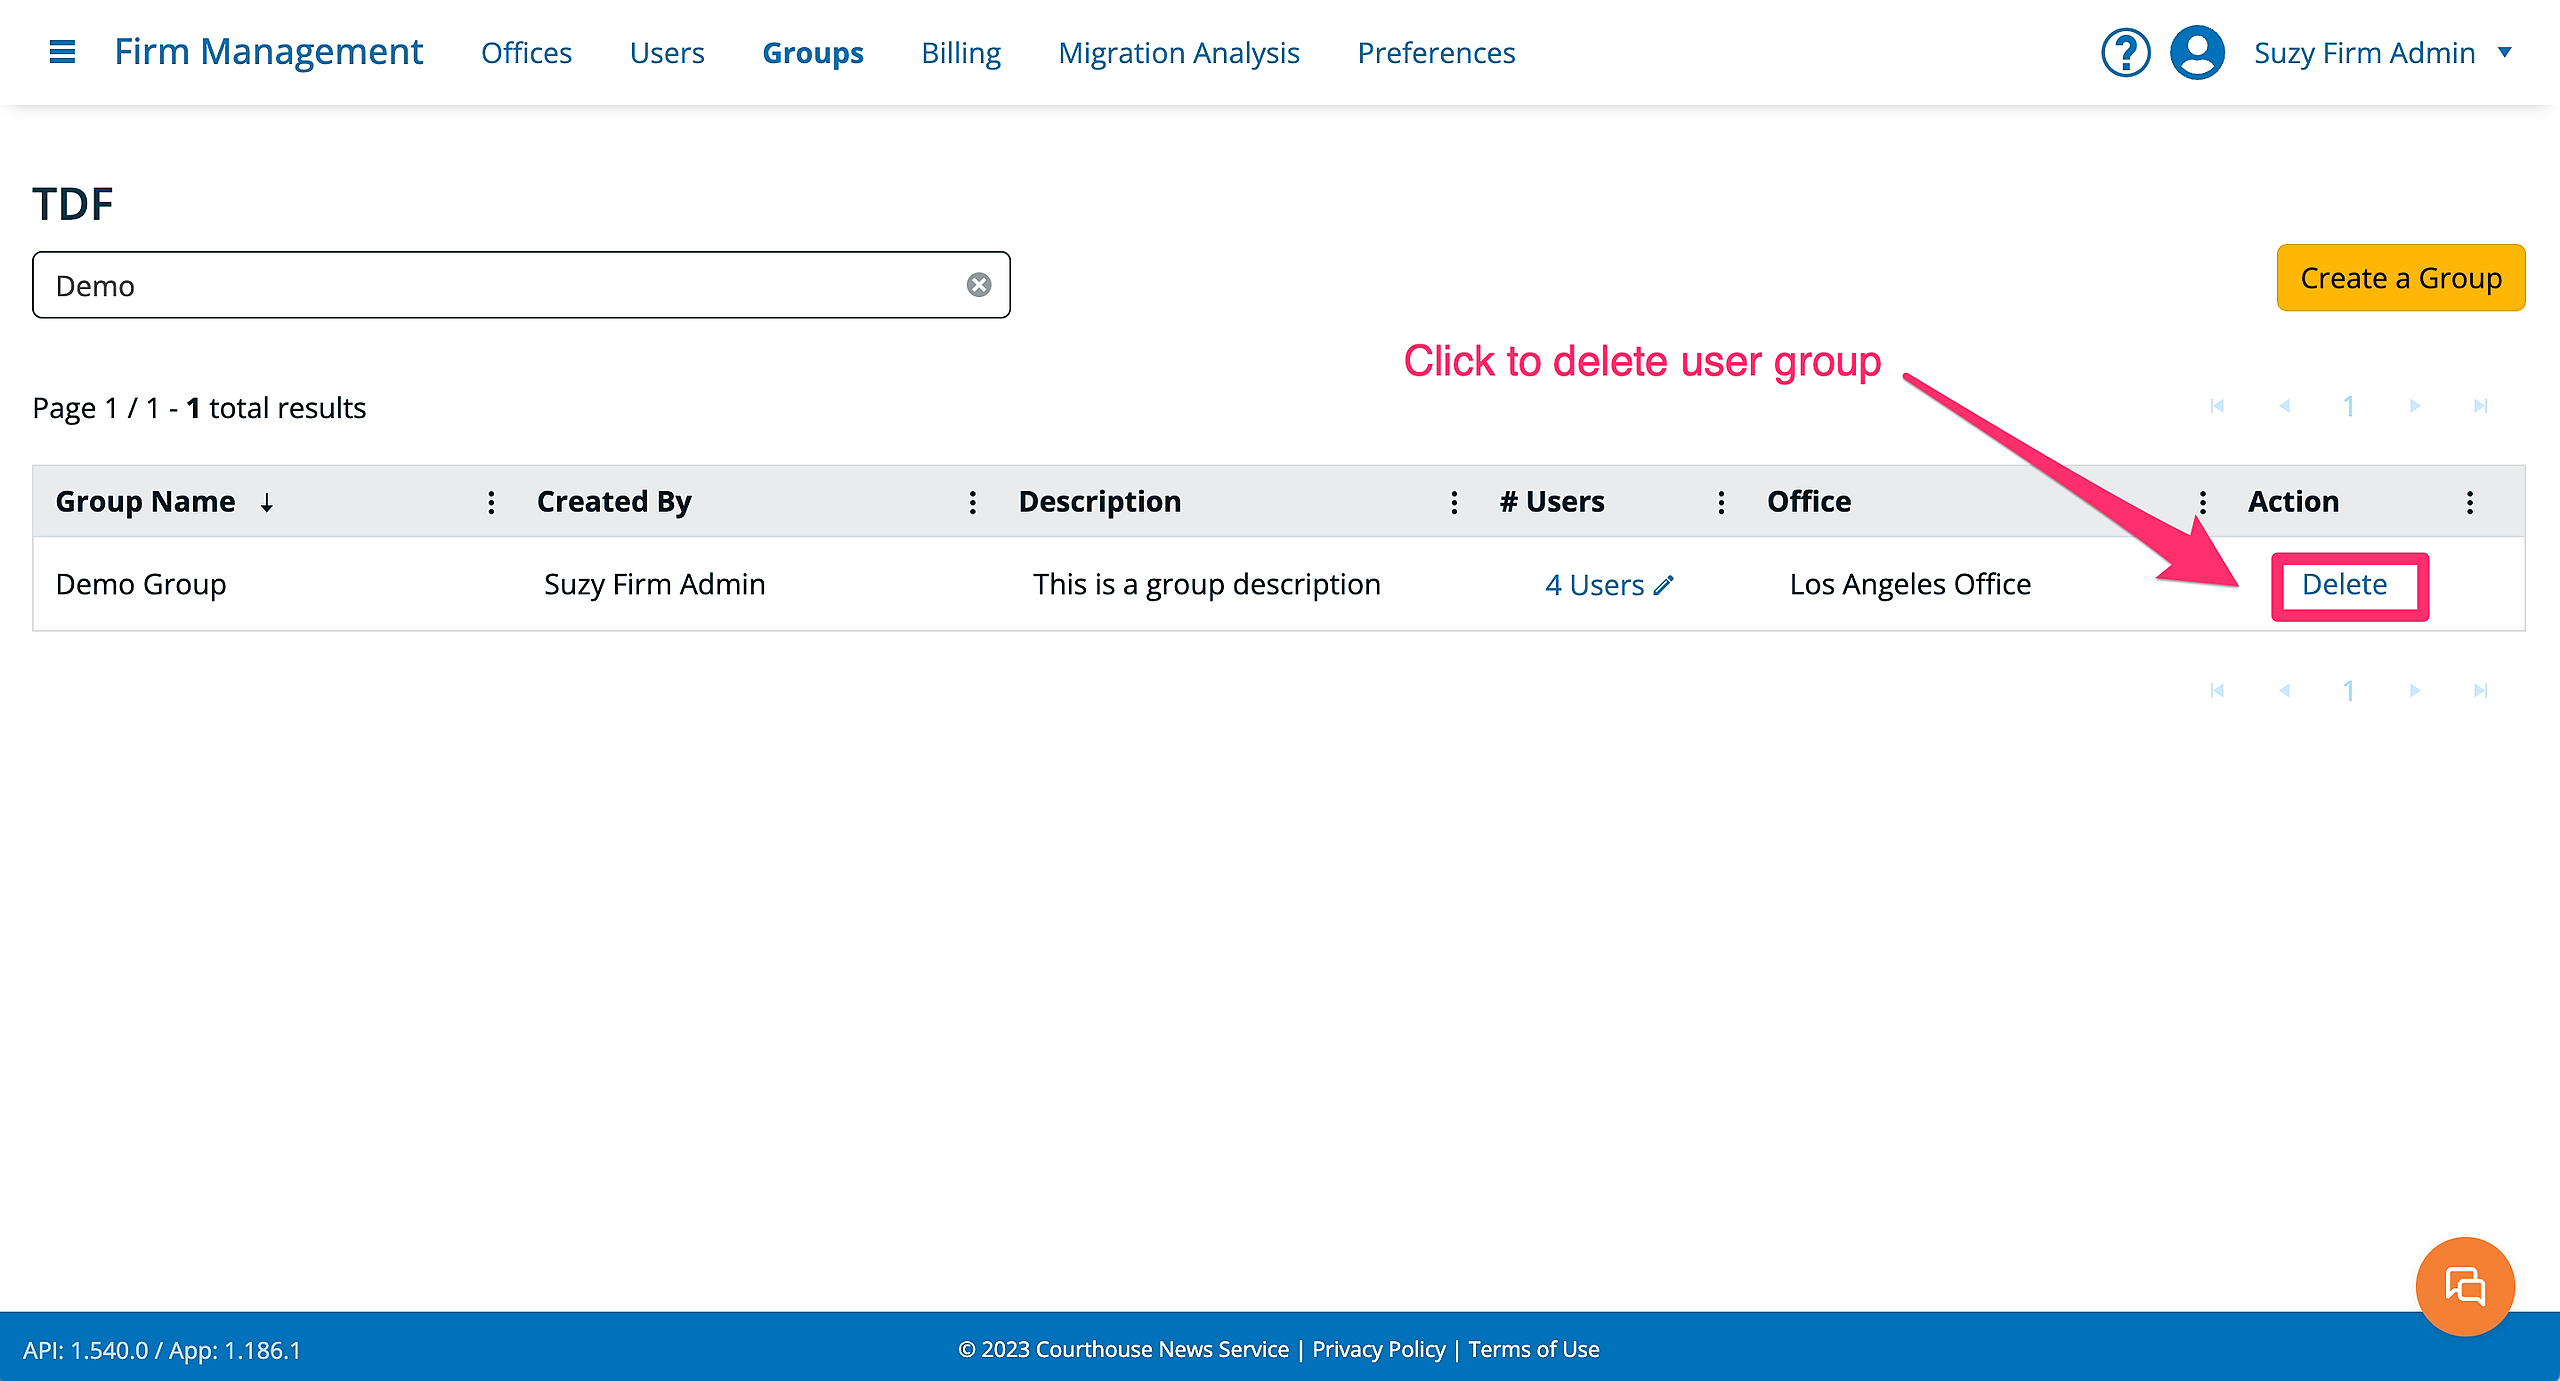
How to Delete a User Group
When you delete a User Group, that group will automatically be removed from all notifications and any individuals associated with that group will no longer receive those notifications.
To delete a User Group, click "Delete" in the action column.
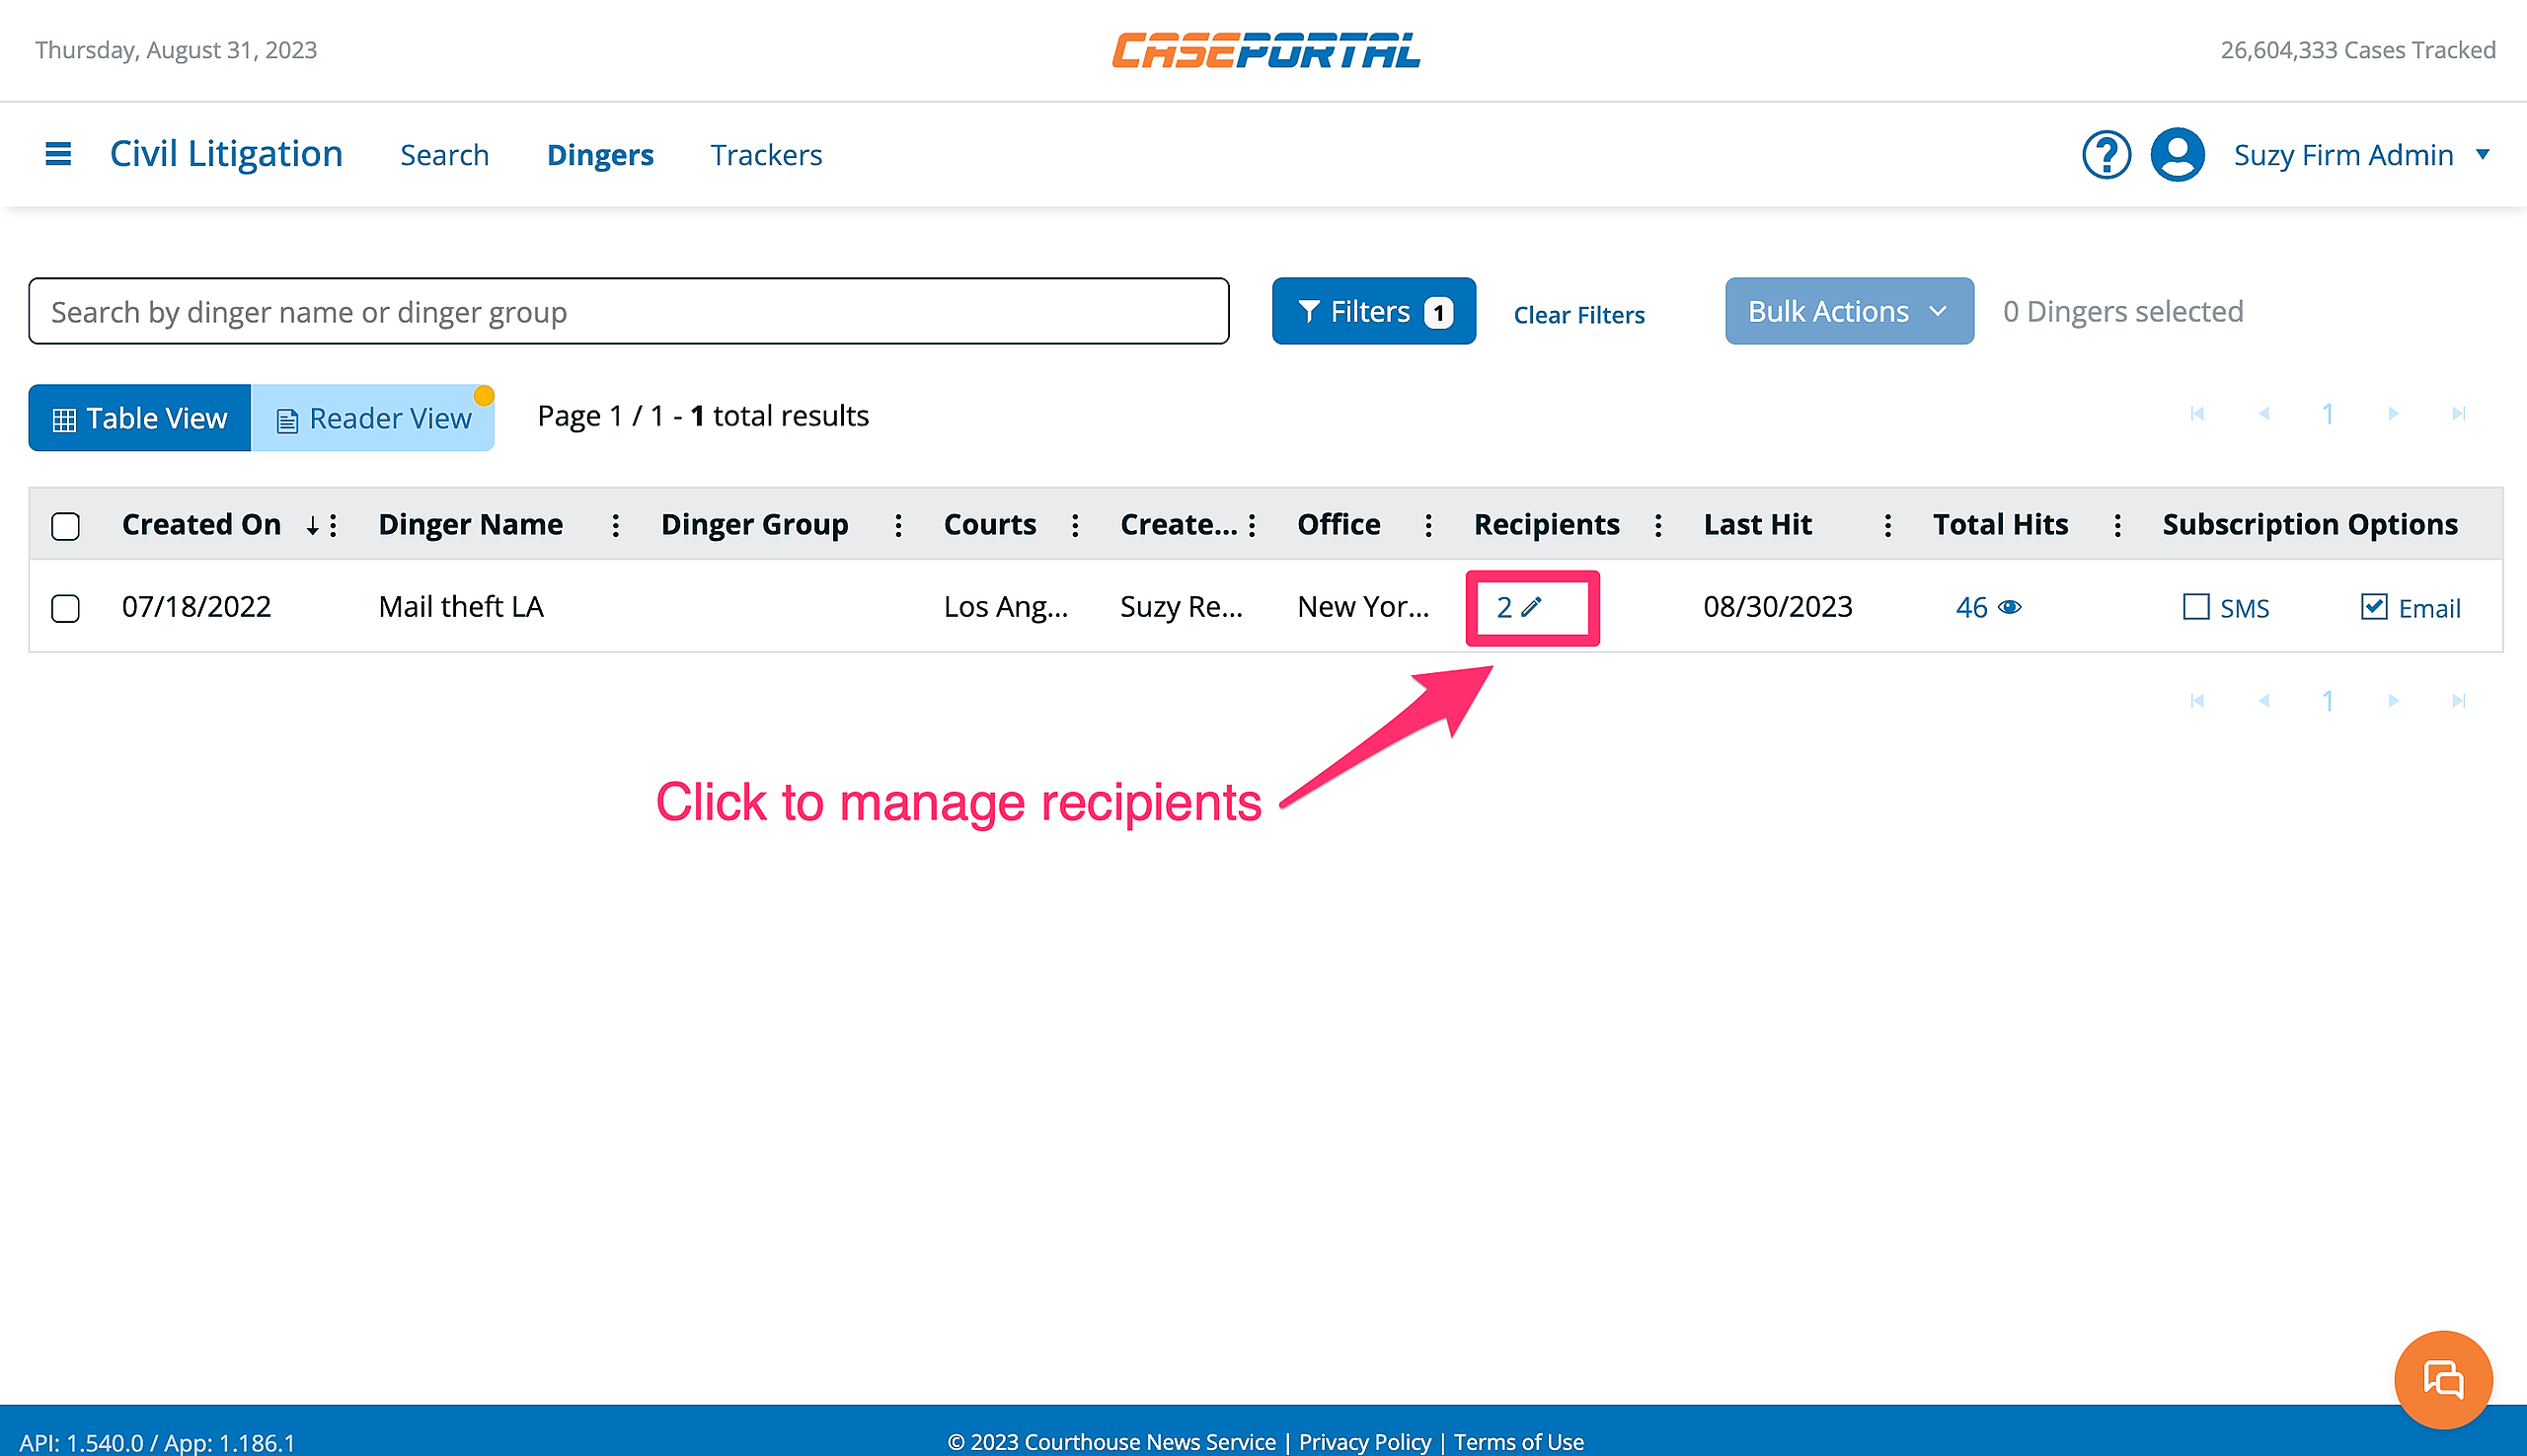
How to Add (or Remove) User Groups from Dingers, Trackers, and Reports
Step 1: First navigate to the Dingers or Trackers list (note that Dingers and Trackers are specific to each case library), or navigate to the Reports page
Step 2: Click the link in the recipients column
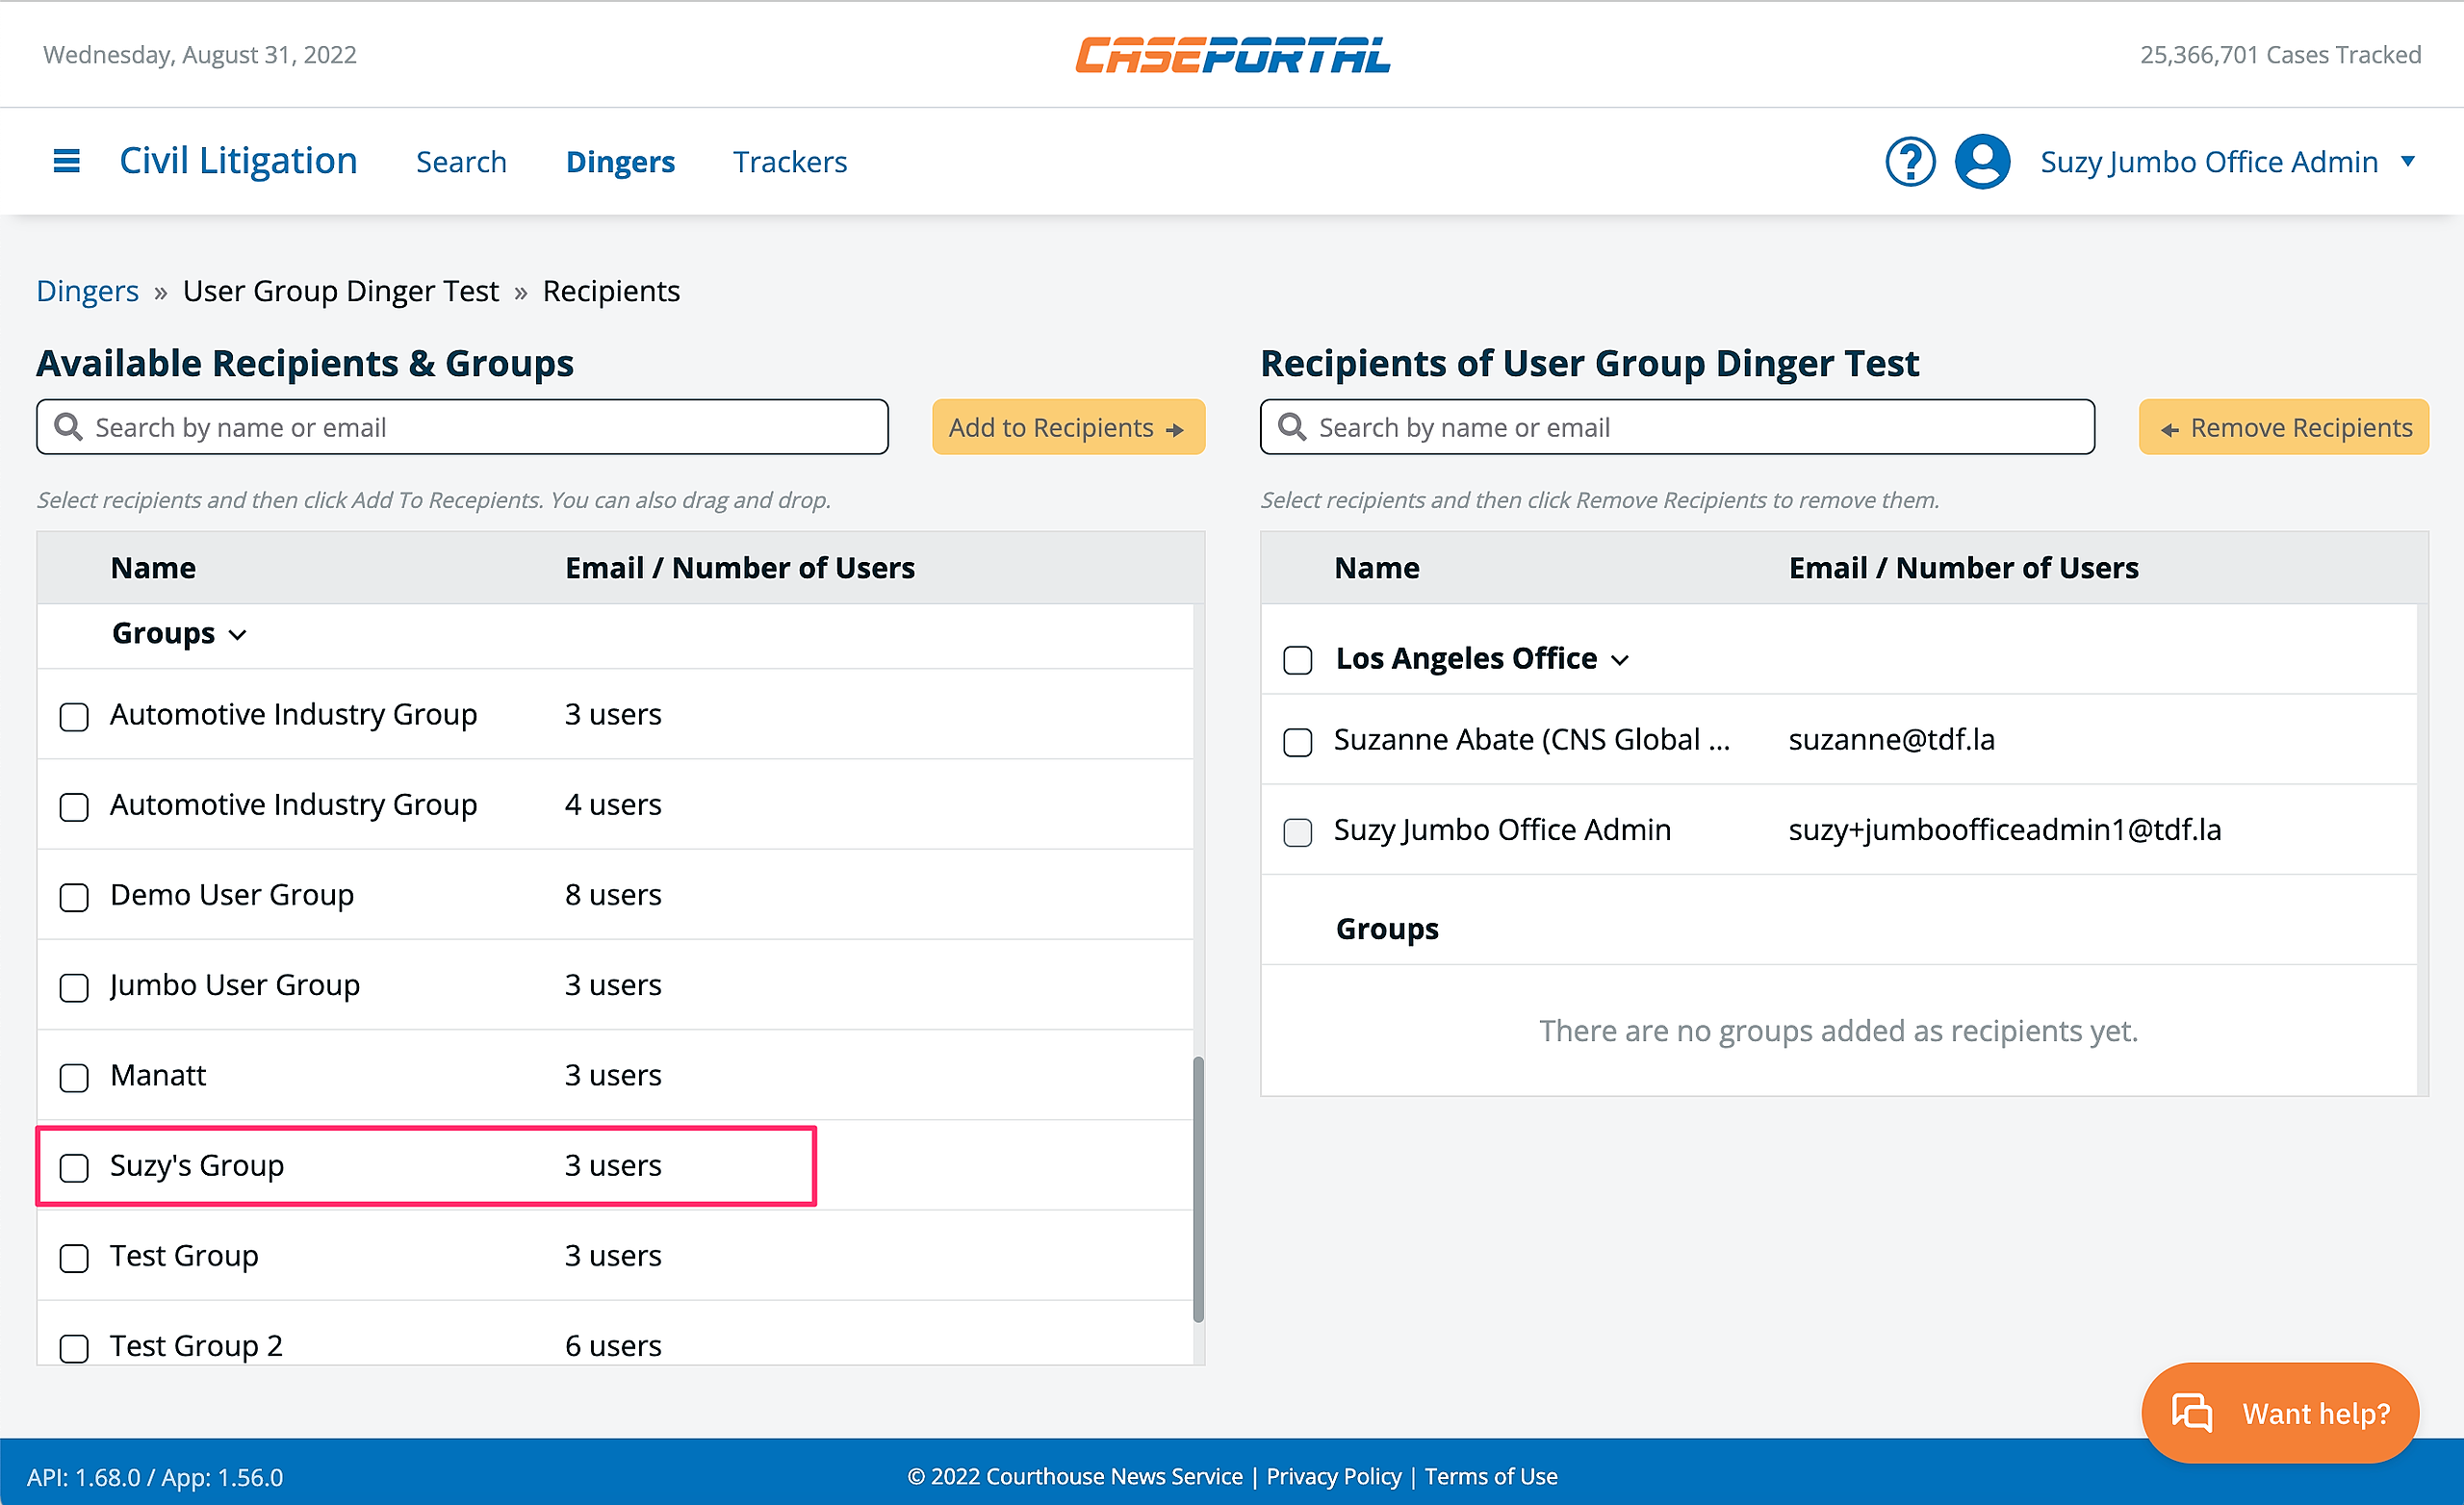
Step 3: To add a group to an alert, search the group name or scroll down to the groups section in the available recipients list. Add your group to the alert by selecting it and clicking "Add to Recipients," or you can drag the item into the recipient list on the right. Note that you can also add/remove entire offices using this same method.

To add a group to an alert, first select it from the column on the left
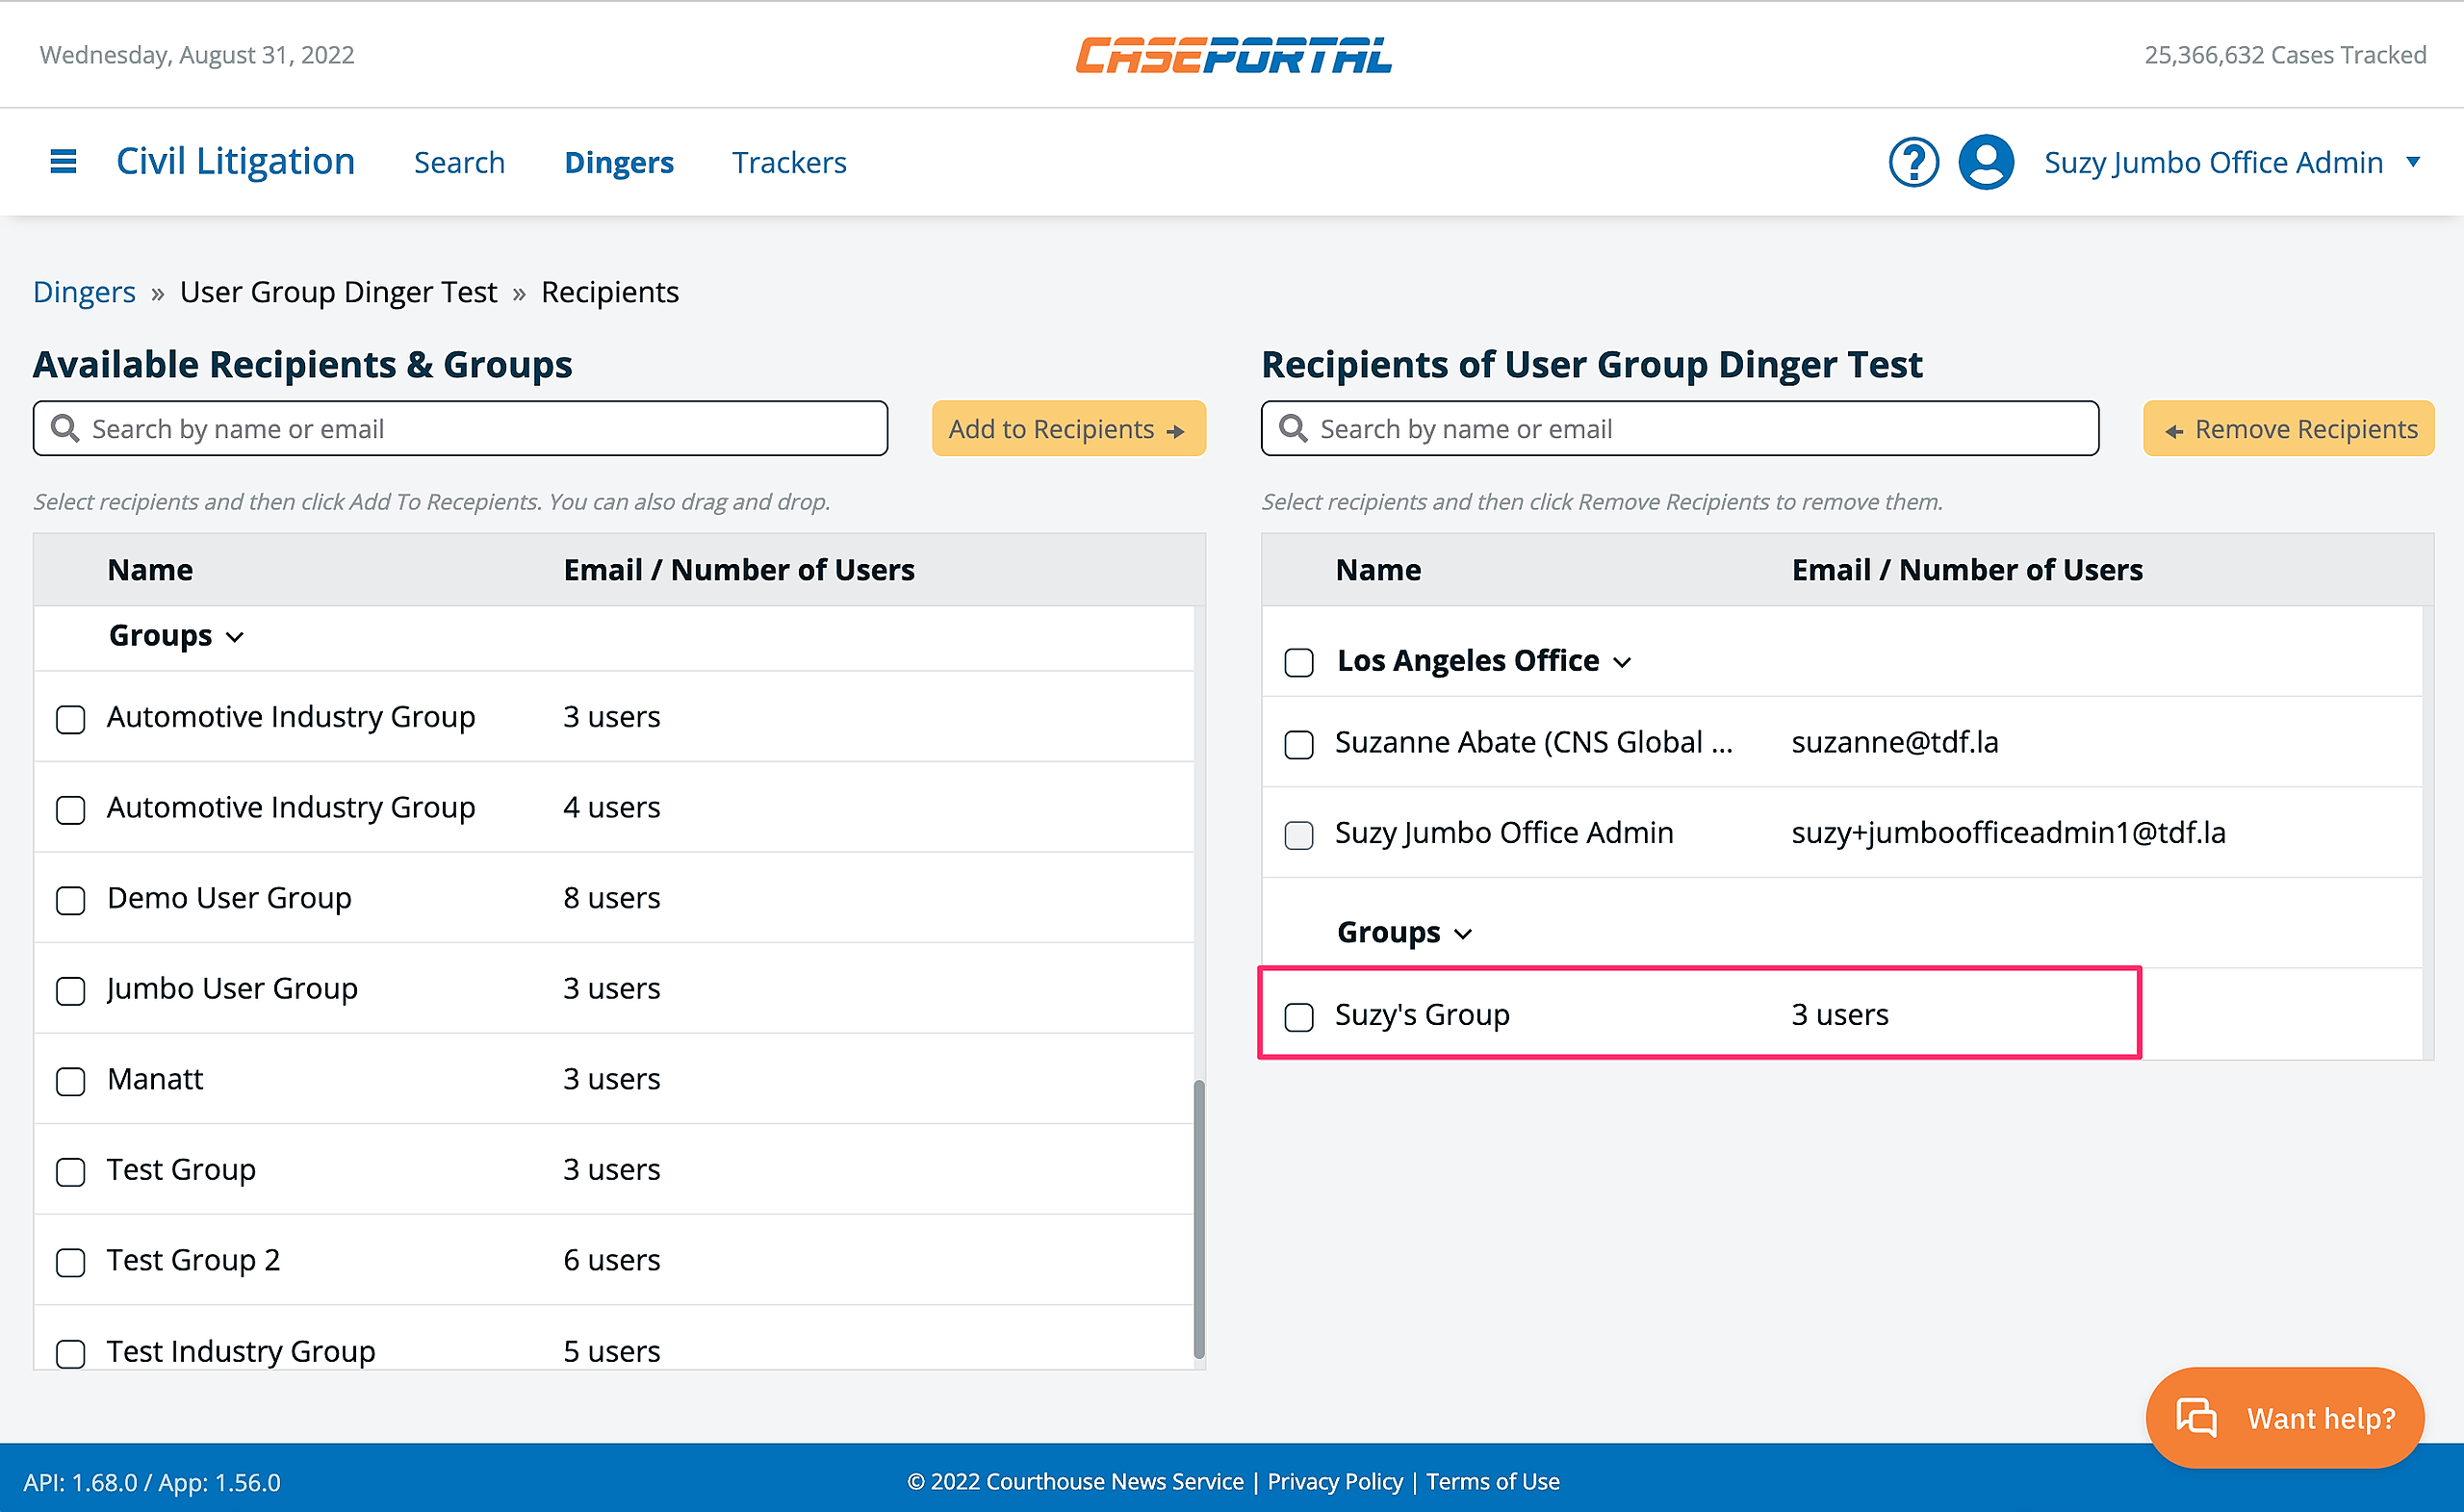
Once a group has been added to an alert, it will display in the column on the right
Step 4: To remove a group, pull it from the column on the right by dragging it into the available recipients list on the left or by selecting it and clicking "Remove Recipients."
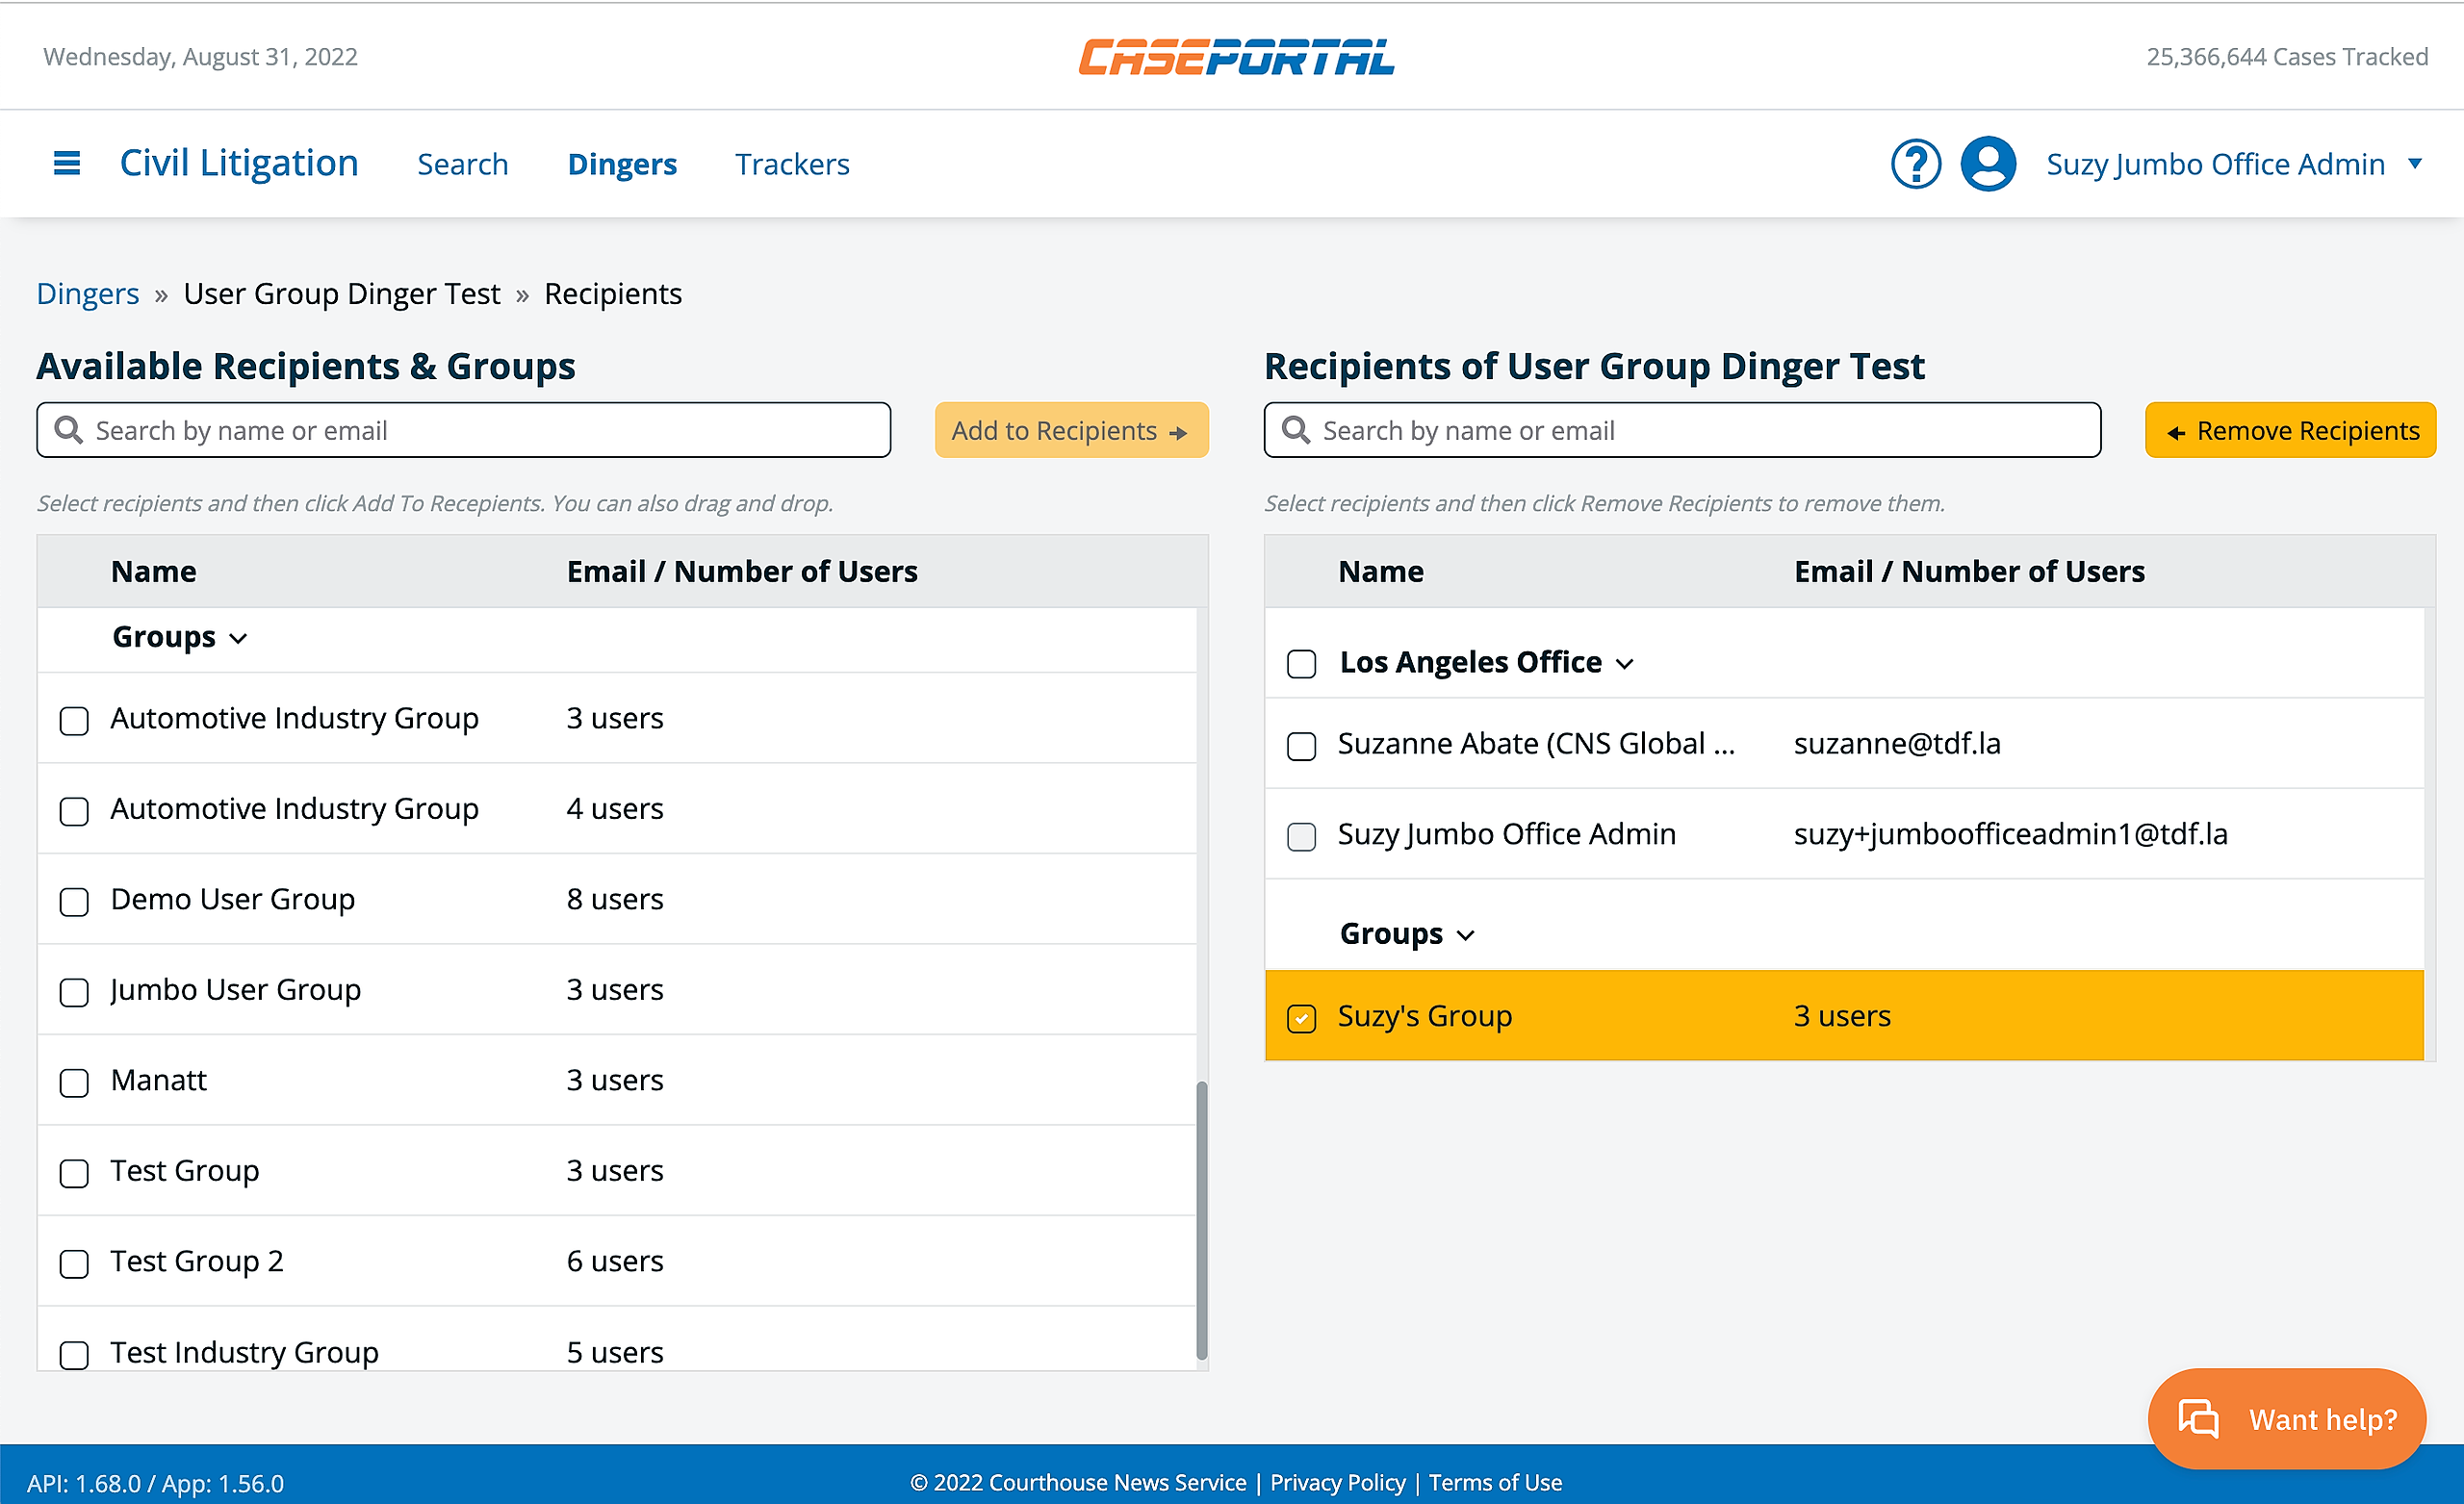
Users, Offices, and Groups that have been added to an alert will always display in the recipients column on the right
Users, Offices, and Groups that have not yet been added to (or that have been removed from) an alert will always display in the available recipients column on the left